

You’re five minutes into a major client call and someone’s mic is dead. The camera points at the floor. You’re apologizing more than collaborating. We’ve all had meetings like that—and, unfortunately, it hurts more than just wasting time. Having great video meetings helps you connect with your teammates and move forward with your projects. However, to have a great video meeting, you need the right tools to make it happen, and that includes video conferencing hardware.
Video conferencing hardware includes the physical tools—cameras, microphones, speakers, and displays—that make virtual meetings possible. But not all setups are created equal. The right equipment makes a virtual meeting professional and seamless, especially when hybrid teams or high-stakes conversations are involved. In this guide, we’ll cover how to choose the right video conferencing hardware for your space, the essential features to look for, and smarter ways to build a setup that helps your team focus on what matters most: connecting and collaborating.
- Video conferencing hardware includes cameras, mics, speakers, and displays optimized for remote communication.
- High-quality gear improves meeting clarity, engagement, and overall team efficiency.
- Room size and layout play a big role in determining the right setup.
- Look for features like AI framing, noise cancellation, and easy integrations.
- All-in-one solutions can simplify installation and scale collaboration across your organization.
Core Components of Effective Video Conferencing Setups
A high-performing video conferencing setup relies on more than just a webcam and a stable Wi-Fi connection. To make sure your team is able to communicate clearly, you need hardware in five key areas: cameras, microphones, speakers, displays, and processing systems. Here’s a breakdown of each component and why it matters.
Cameras
Thirty-two percent of remote participants struggle to see facial expressions or gestures due to poor angles or low-res video. To make sure that’s not happening, start with cameras that support 4K resolution to capture fine detail and high levels of clarity—especially important when visual cues and facial expressions play a role in your communication. PTZ (pan-tilt-zoom) functionality gives you dynamic room coverage, so the camera can follow speakers or zoom in on whiteboards.
For example, if you used a 4K PTZ camera in the classroom, remote students can clearly see instructors and whiteboard content—even as the teachers move around the room. These cameras range from $300 to $1,500, depending on features and optics.
Microphones
Everyone needs to be able to hear to communicate, and poor audio quality increases listener fatigue by up to 35% as the brain works harder to fill in gaps. Audio clarity starts with the right microphone technology. Beamforming mics or ceiling array systems intelligently isolate voices and filter out background noise, delivering crisp audio—even when the speaker isn’t directly facing the mic.
On sales calls, muffled audio or dropped words can cost you the deal. Beamforming mics make sure you’re always heard, even while pacing or turning. Expect to spend $150 to $1,200 depending on room size and setup.
Speakers
Eighty-one percent of virtual attendees say audio quality is the most critical part of a successful meeting. Forget laptop speakers. For true clarity and reduced echo, opt for conference-grade soundbars or dedicated speakerphones. These give you clean, room-filling audio without distortion or feedback.
During client presentations, distorted audio can undermine your professionalism. A $200–$800 soundbar ensures your voice comes through loud and clear.
Displays
Dual monitors or interactive whiteboards make it easier to manage video calls by separating participant faces from shared content. This minimizes screen-switching and improves information retention.
With one screen for participant reactions and another for slide decks, you can adapt your message in real-time and boost engagement. Expect to spend $500–$2,000 for professional-grade displays.
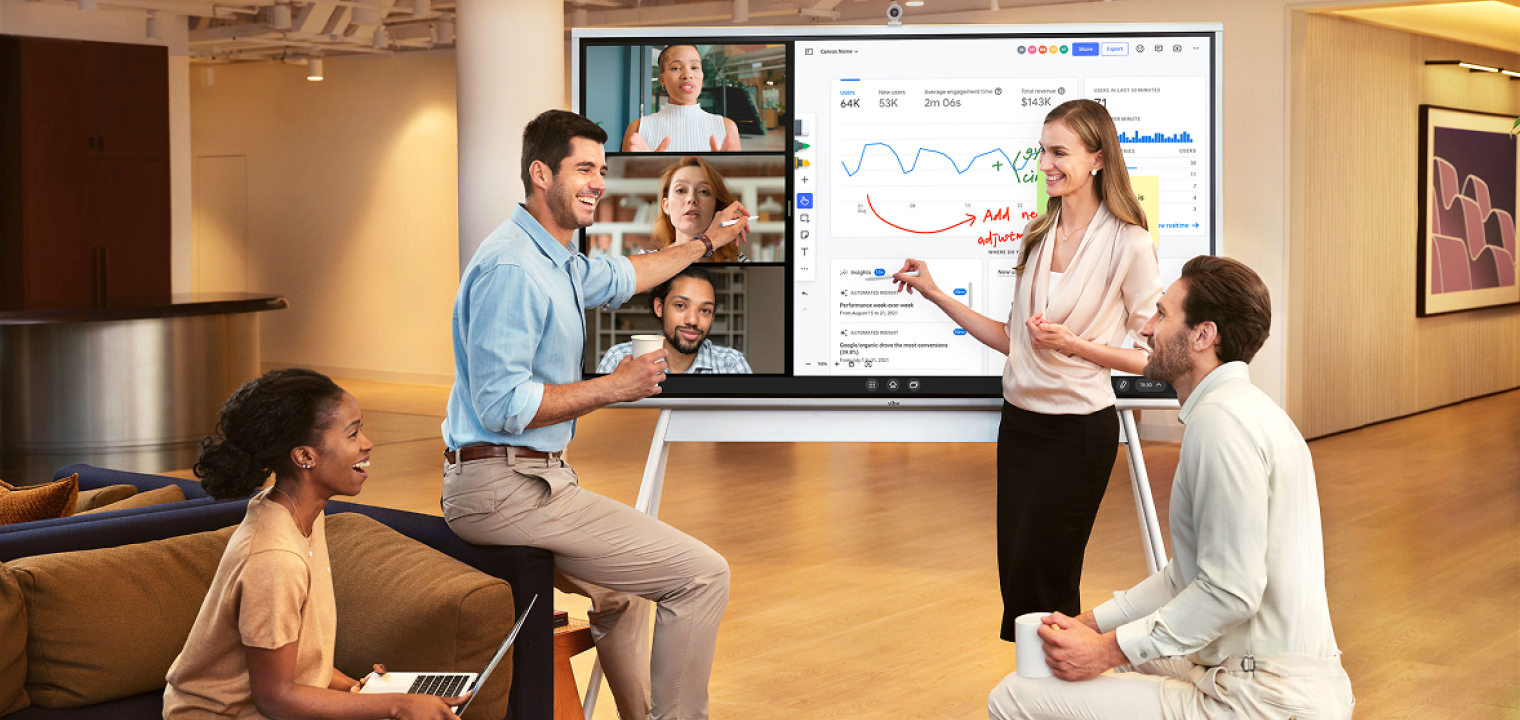
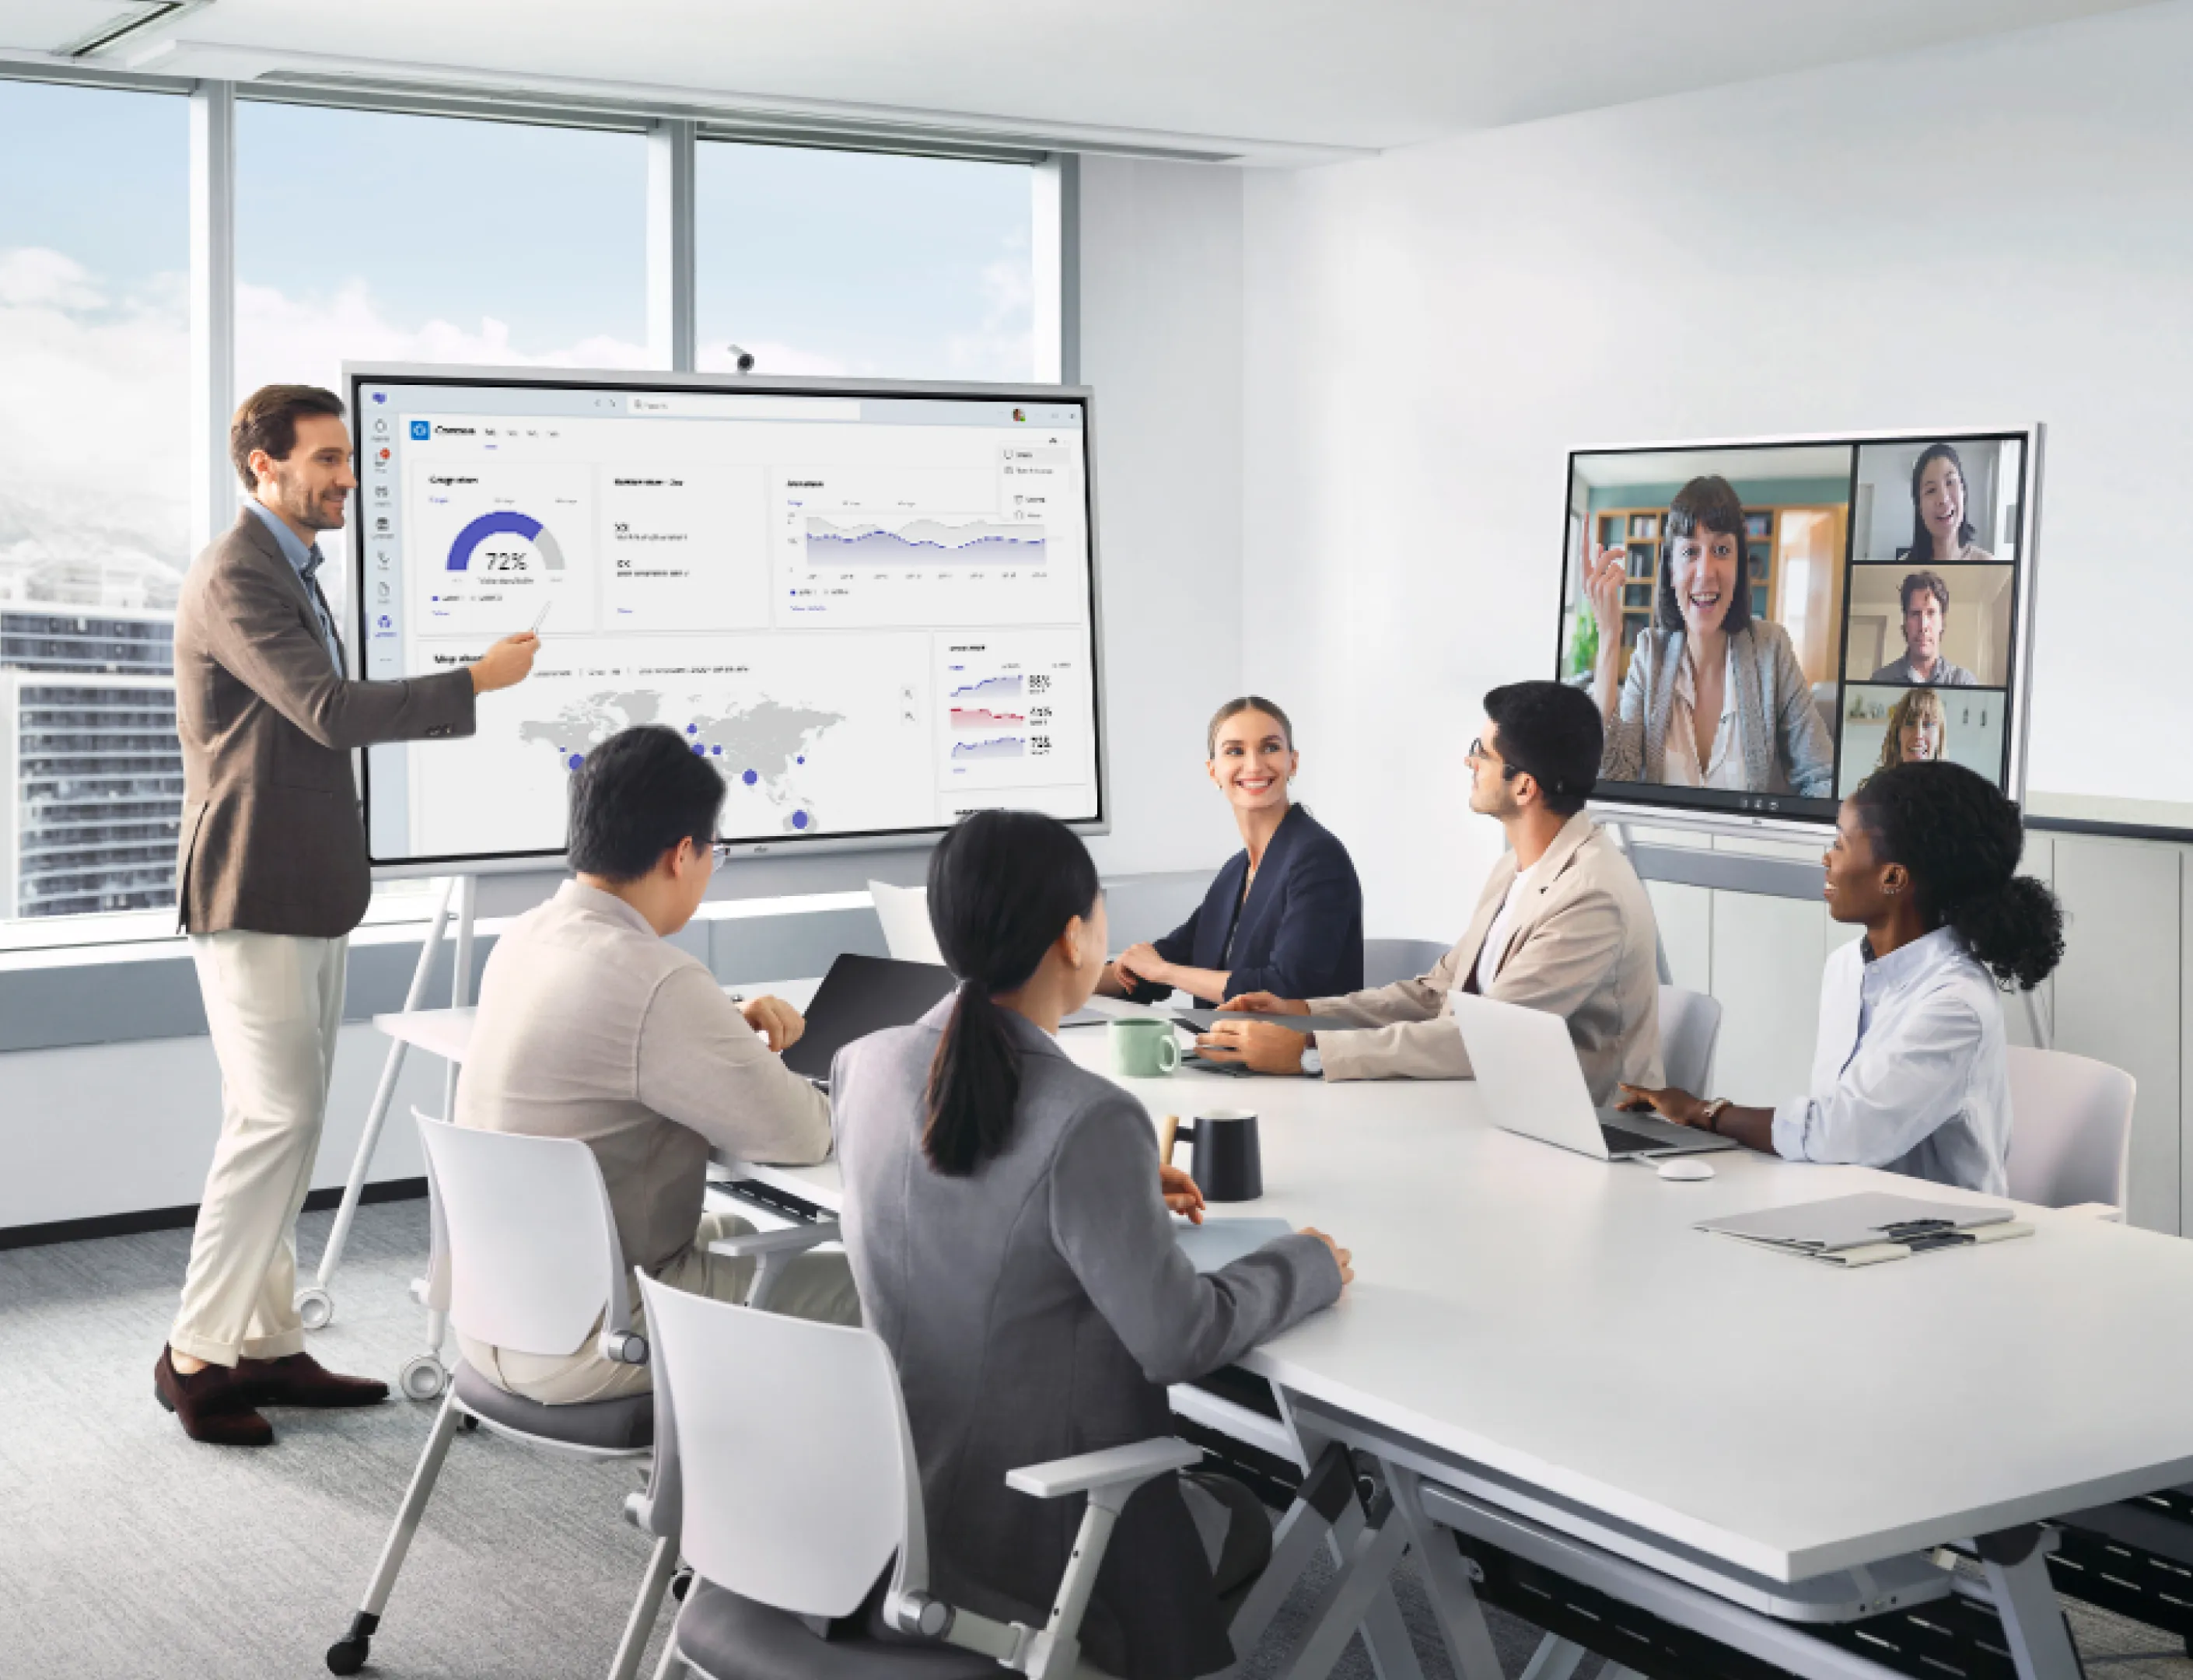
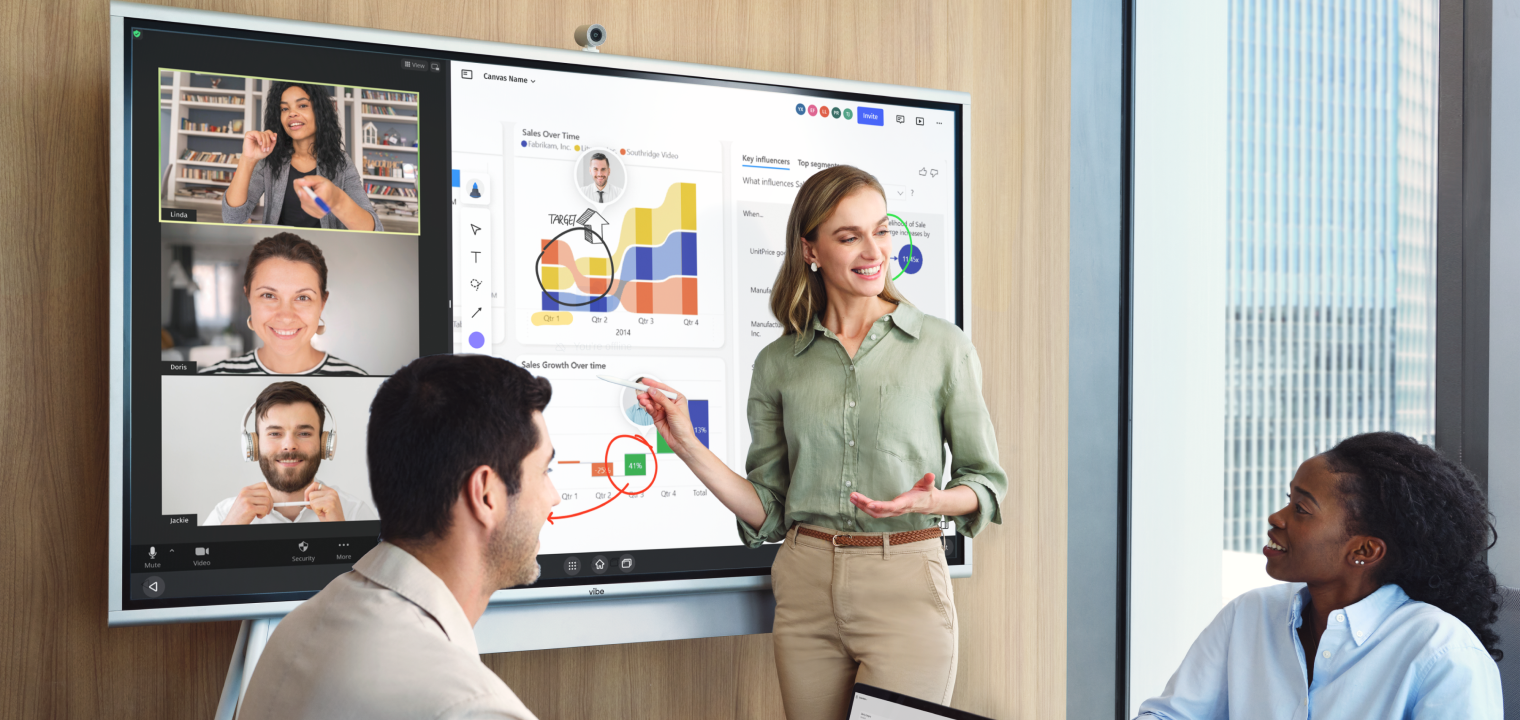 Team using Vibe Board in split-screen mode for hybrid meeting.
Processing and Connectivity
Your entire setup hinges on reliable processing. Use a mini-PC or cloud-based system with AV optimization to handle real-time video and collaboration apps without lag. In high-stakes meetings, a system crash or audio delay is unacceptable. AV-grade systems (around $400–$1,500) ensure seamless performance and bandwidth optimization.
What Hardware to Use in Different Room Types
Choosing the right video conferencing hardware depends heavily on your space. A setup that works for a solo remote worker won’t cut it in a 12-person meeting room. Below, we break down the ideal hardware configurations for four common room types based on space needs, user count, budget, and complexity.
Remote / Personal Setup
For one solo remote worker, this is what you’d need.
Hardware:
-
4K webcam (e.g., Logitech Brio, Elgato Facecam Pro)
-
USB mic/headset (e.g., Blue Yeti, Jabra Evolve 265)
-
Compact desktop speaker or soundbar (e.g., Creative Pebble V3)
Budget: $500–$800
Most of the cost here comes from the webcam resolution and microphone quality. You can cut costs by using a laptop’s built-in webcam or speakers, but the experience suffers noticeably.
Setup Complexity: Low
This is a plug-and-play configuration, perfect for home offices or hybrid workers. It requires minimal IT involvement—just USB connections and basic software preferences.
Huddle Room (2–6 people)
Hardware:
-
All-in-one video bar (e.g., Logitech MeetUp, Neat Bar)
-
AI-powered wide-angle camera (e.g., Owl Labs Meeting Owl 3)
-
Wall-mounted display or touchscreen (e.g., Samsung Flip 2, Vibe Board S1)
Budget: $2,000–$4,000
This hardware is pricey because of the smart camera technology (auto-framing, 360° views) and the quality of the room display. All-in-one bars help reduce the need for separate components. But you want to make sure you’re getting a high enough quality camera.
Setup Complexity: Moderate
These setups usually require light IT involvement—mounting hardware, installing the software platform, and managing cable routing. Expect 1–2 hours for setup.

Medium Room (6–12 people)
Hardware:
-
PTZ camera (e.g., Logitech Rally, AVer CAM520 Pro2)
-
Table mic pods or beamforming mic arrays (e.g., Shure MXA310, Poly Trio C60)
-
Smart whiteboard (e.g., Google Jamboard, Vibe Board S1)
Budget: $5,000–$8,000
This room type requires higher-end AV gear. PTZ cameras provide dynamic framing, and ceiling or table mic arrays improve audio pickup across larger spaces.
Setup Complexity: Medium to High
Installation involves AV mounting, cable management, and software configuration. You will also want IT support to ensure performance and reliability.
Large / Executive Boardroom
Hardware:
-
Full-room collaboration kits (e.g., Cisco Room Kit Pro, Poly Studio X70, Logitech Rally Plus)
-
Ceiling microphones (e.g., Sennheiser TeamConnect Ceiling 2)
-
Multiple auto-framing cameras
-
Touch controller panel (e.g., Crestron, Logitech Tap)
Budget: $10,000–$15,000+
Pricing reflects the need for advanced acoustics, expansive camera coverage, and automated switching between presenters. These setups often include integrated control systems.
Setup Complexity: High
Requires professional installation, network configuration, and continued IT maintenance. These are mission-critical environments where reliability, scalability, and seamless integration matter most, so it’s worth getting setup help.
Video Conferencing Hardware Budget Planning
Investing in video conferencing hardware is more than just buying a camera and calling it a day. A well-planned budget accounts for the full lifecycle of your setup—from hardware to installation, software, and support. Below is a breakdown of key budget considerations and a sample cost snapshot for a medium-sized meeting room.
Cost Breakdown: What Goes Into the Budget
Here’s each category you should have in your budget and what that includes:
|
Category |
Description |
|
Hardwave |
Cameras, microphones, speakers, displays, processing units |
|
Installation |
AV setup, wall mounting, cable routing |
|
Software licensing |
Zoom Rooms, Microsoft Teams Rooms, or other conferencing platform subscriptions |
|
Training and onboarding |
User training or IT enablement for managed rooms |
|
Maintenance and updates |
Firmware upgrades, hardware troubleshooting, and replacement planning |
Let’s look at an example of a budget for a medium room and the tools included:
|
Item |
Estimated Cost |
|
Logitech Rally + Vibe Board S1 + mic pods |
~$6,500 |
|
Installation & setup |
~$1,000 |
|
Software & subscriptions (annual) |
~$500 |
|
Total Year 1 Cost |
~$8,000 |
|
Estimated 3-Year Ownership Cost |
~$9,500 |
While this budget might look expensive, it’s important to understand what having a great setup can save you. Video conferencing hardware can give you these benefits for your ROI:
-
Fewer business trips and reduced travel expenses
-
Time saved by smoother meeting launches and fewer technical delays
-
Better team collaboration that leads to faster decisions and stronger results
For example, a company with 12 remote employees using high-quality video setups can save $12,000+ per year in travel and productivity costs.
Financing vs. Purchasing: What Makes Sense?
One of the most important budget decisions you’ll make is whether or not you’ll purchase your hardware outright or finance it. The right answer for your company will depend on many factors, including the size of your business:
-
Small businesses may benefit from financing or subscription-based options like Logitech Select or Zoom Hardware as a Service (HaaS) to minimize upfront investment.
-
Enterprises often purchase outright to maximize long-term ROI and retain full infrastructure control.
Don’t forget to explore tax incentives or depreciation benefits you might be eligible for while purchasing hardware assets outright.
Should You Choose All-in-One or Modular Systems?
When planning your video conferencing setup, one key decision is whether to go with an all-in-one system or build a modular configuration. Each has its advantages depending on your space, budget, and long-term needs.
1. All-in-One Systems
An all-in-one system gives you all the hardware you need for a great setup in one package, so you’re only paying once for all your tools.
Pros:
-
Quick to deploy with minimal wiring
-
Space-saving and sleek design
-
Ideal for small to medium rooms
Cons:
-
Limited customization options
-
Less scalable as room size or tech needs grow
2. Modular Systems
A modular system lets you pick and choose pieces of your setup from different providers and put it together in a perfectly curated configuration.
Pros:
-
Highly customizable (camera, mic, speaker, display of your choice)
-
Scalable for large rooms or multi-room deployments
-
Better integration with advanced AV and control systems
Cons:
-
Requires AV expertise to install
-
Higher upfront investment
Actionable Insight: Choose all-in-one for ease and speed. Choose modular for power, flexibility, and future-proofing your workspace.
Must-Have Features That Make a Real Difference
When it comes to video conferencing hardware, the right features can make or break the meeting experience. Below are the essential capabilities to look for—tailored by room size and use case—so you can invest in tools that truly elevate collaboration.
4K Video Resolution
-
Best for: Medium and large rooms
-
Why it matters: Delivers crisp visuals for group visibility and shared content clarity.
-
Optional for: Personal or huddle rooms, where 1080p is often sufficient and more cost-effective.
Auto-Framing & Speaker Tracking
-
Best for: Rooms with 6 or more people
-
Why it matters: Automatically focuses on the person speaking, keeping remote participants engaged and minimizing manual camera control.
-
Optional for: Small rooms with stationary participants.
Beamforming Mics + Echo/Noise Cancellation
-
Best for: Medium to large spaces where participants are spread out
-
Why it matters: Enhances voice pickup and filters out background noise for clean audio across the room.
-
Less critical for: Solo setups or small huddle rooms using desktop or headset mics.
Platform Certification (Zoom, Teams, Meet)
-
Best for: All setups—from solo users to global enterprises
-
Why it matters: Certified devices gives you plug-and-play compatibility, smoother setup, and fewer support issues.
-
Especially critical for: IT-managed environments and standardized deployments.
Remote IT Management Tools
-
Best for: Multi-room offices or distributed teams
-
Why it matters: Enables centralized control, firmware updates, and diagnostics without being physically on-site.
-
Not necessary for: Home offices or one-off setups.
Pro Tip: Don’t get distracted by specs you’ll never use. Focus on the features that solve real collaboration challenges for your team—daily.
Platform Compatibility Guide
Not all platforms interact with hardware the same way, and you want hardware that’s going to work with the platforms you’re already using. These are some of the mosts common platforms and what hardware tools might work best.
Zoom Rooms
If you’re using Zoom, this platform works best with Logitech Rally, Neat Bar, DTEN, Poly Studio hardware. When you use these tools paired with your Zoom Rooms, you get native room controls, whiteboarding, and calendar integration features.
Note: USB-only hardware may function but lacks Zoom-native controls and remote diagnostics.
Microsoft Teams Rooms
Microsoft Teams users will benefit from choosing hardware from Yealink MVC Series, Logitech Tap, Poly G-Series. Pairing these tools with Microsoft Teams lets participants join with one touch and by getting close to the hardware.
Note: Certified hardware ensures smooth Teams calendar sync and Microsoft 365 compatibility.
Google Meet
If you’re using Google Meet, get hardware from ASUS Google Meet Hardware, Logitech Series One, Lenovo Series One. This will give you automatic updates, instant join, and remote fleet management features.
Note: Standard USB devices can work, but may miss out on Google Workspace management tools.
Certified vs. Non-Certified Hardware
|
Certified Hardware |
Non-Certified Hardware |
|
Native platform controls |
Limited or no in-app controls |
|
Auto firmware updates |
Manual or unsupported updates |
|
Remote management tools |
No centralized diagnostics |
|
Stable, tested integrations |
Higher risk of bugs or disconnects |
Bottom Line: Certified gear ensures you get the full benefit of your chosen platform—fewer hassles, better meetings.
How to Get Started — Your Setup Checklist
Getting the right video conferencing hardware doesn’t have to be overwhelming. Whether you’re outfitting a home office or a full boardroom, following a simple checklist can ensure smooth setup and long-term success. Here’s where to start:
-
Measure your meeting space (L x W)
-
Pick your video conferencing platform
-
Match camera FOV (field of view) to room size
-
Choose the right mic type (desk, ceiling, beamforming)
-
Decide on your speaker setup
-
Confirm hardware is certified for your platform
-
Run a test meeting before official launch
Common Mistakes to Avoid
Many video conferencing issues stem from improper setup or neglecting long-term system maintenance. These problems can lead to poor call quality and wasted time. In fact, outdated meeting tech costs employees 3+ hours/week in lost productivity. Even 10 minutes lost per meeting can cost hundreds per room annually. By steering clear of the following mistakes, you can keep your meetings professional, efficient, and interruption-free:
-
Mounting the camera too low or too high. Misaligned cameras lead to awkward angles and poor speaker visibility—remote attendees miss visual cues and engagement.
-
Using built-in laptop mics in medium or large rooms. These mics aren’t designed for group conversations and lead to muffled or distant audio.
-
Ignoring lighting or room acoustics. Poor lighting causes visual fatigue, while echo-prone rooms lower audio clarity and team focus.
-
Using uncertified hardware. Without certified hardware, you increase the chances of dropped calls, audio glitches, and software conflicts—resulting in more IT support requests.
-
Skipping firmware/software updates. Leads to compatibility issues and security vulnerabilities.
-
Not checking your warranty coverage. Warranties vary by brand. For example, Logitech has a warranty of 2–3 yrs and Poly has 1–2 yrs. If you want longer warranty options, choose a brand that provides that.
-
Neglecting firmware update tools. Use tools like Logitech Sync or Zoom Admin Portal to keep everything updated and working properly.
Pro Tip: Treat your video conferencing hardware like any other IT asset—regular checkups and maintenance prevent costly disruptions down the line.
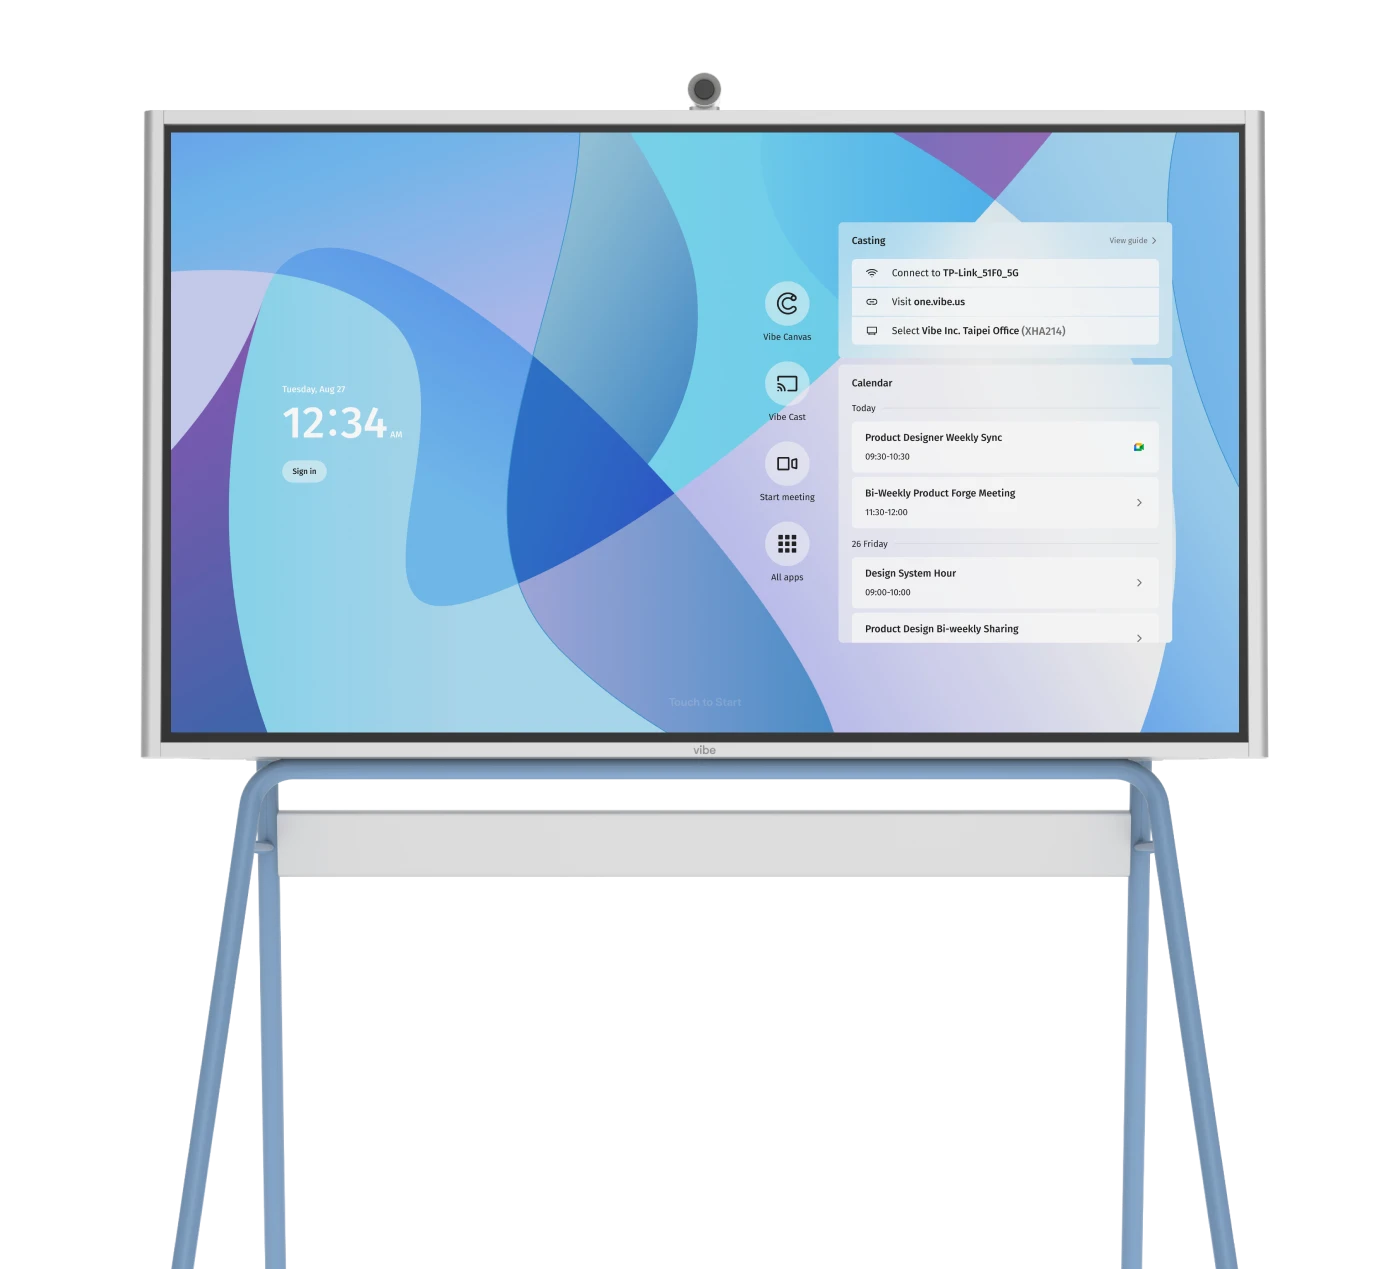
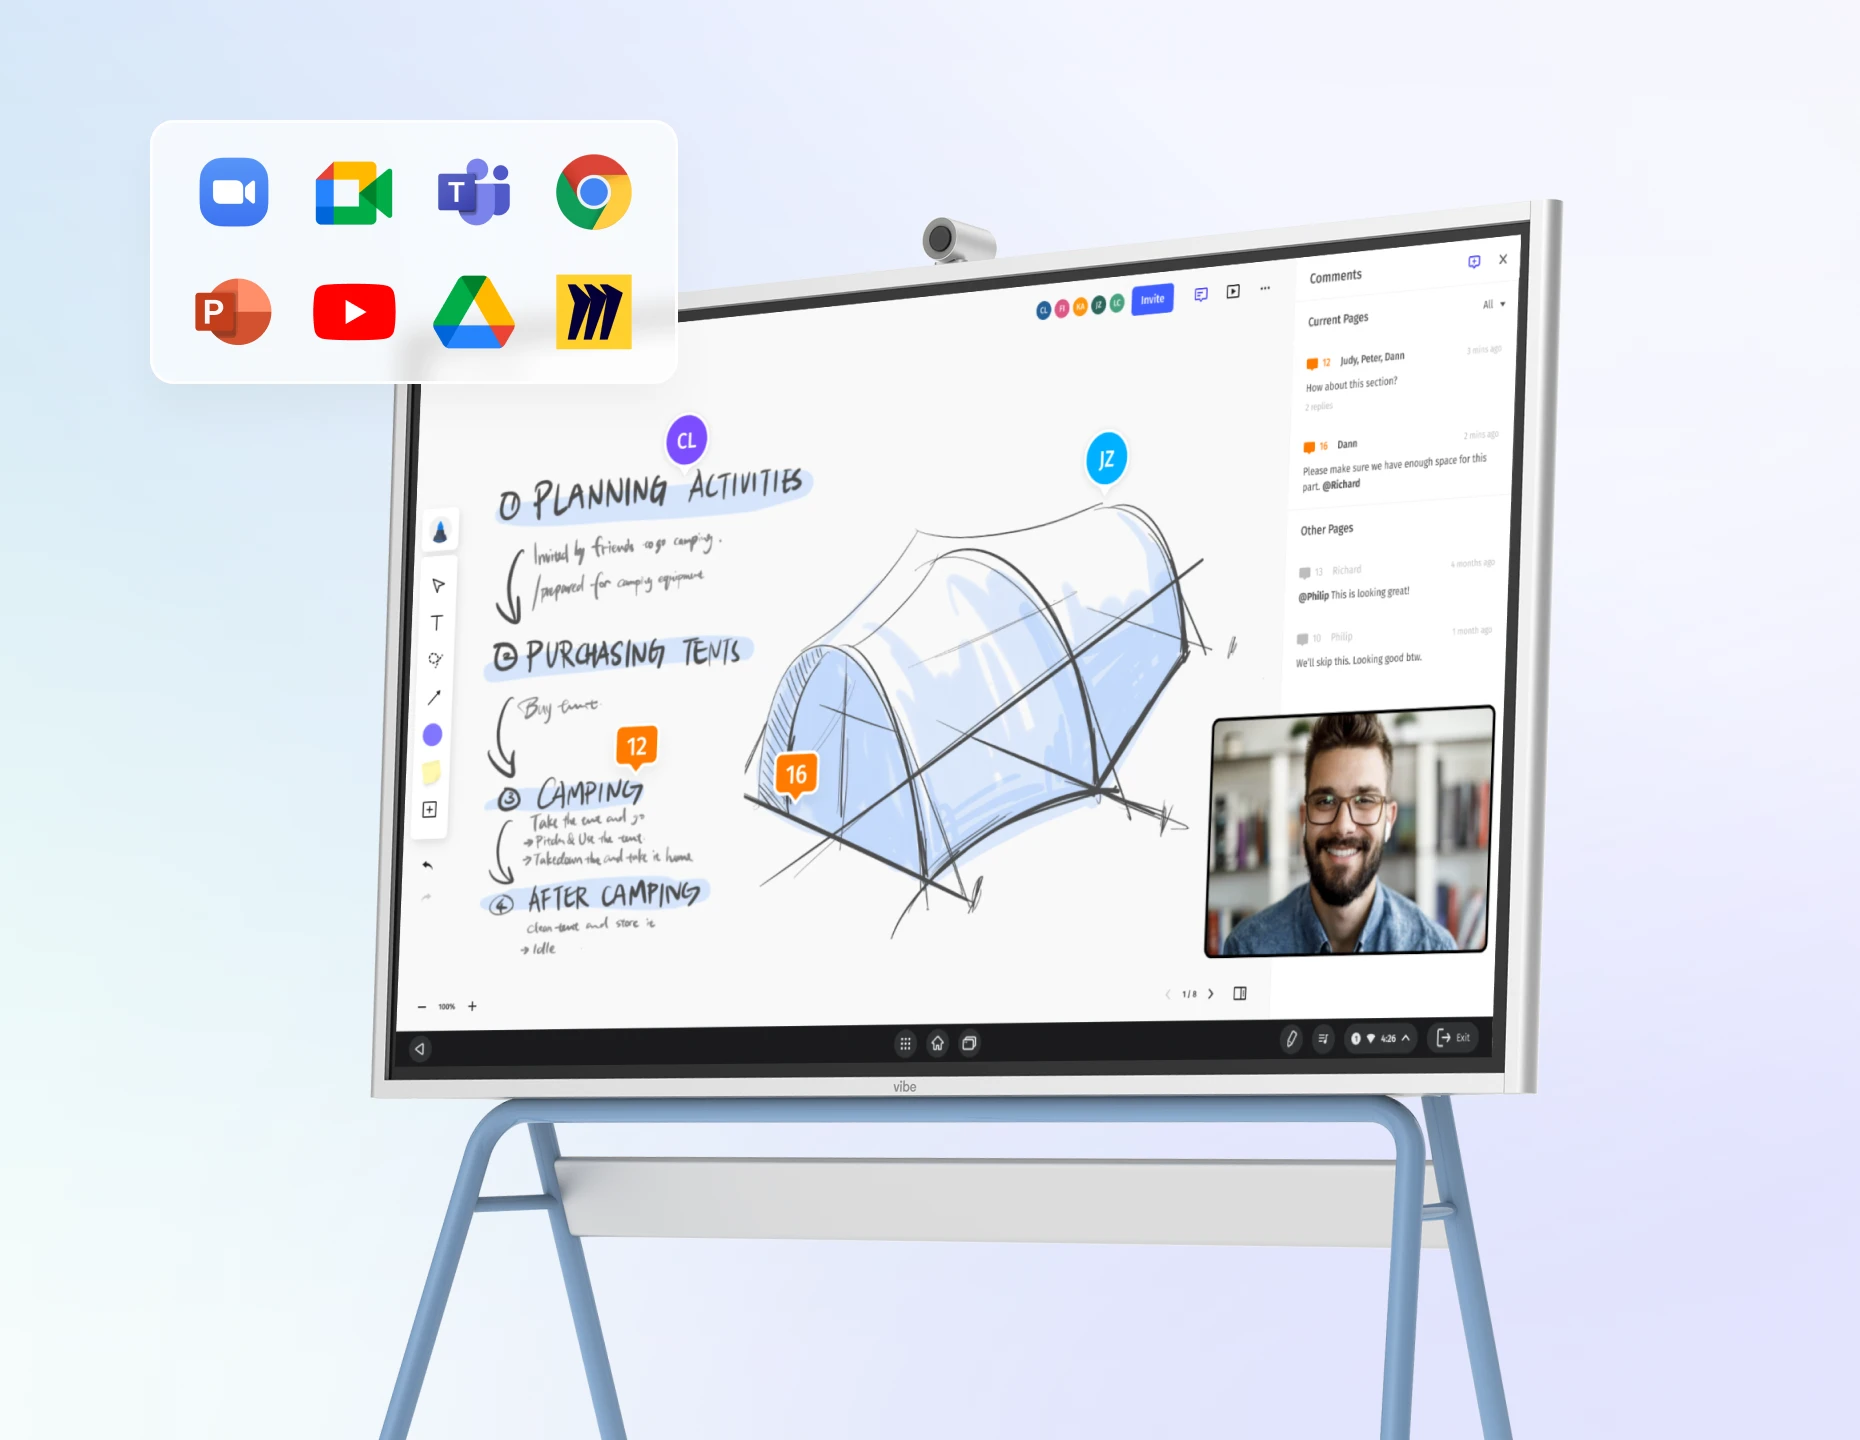
Vibe Board S1: A Smarter Way to Run Your Meetings
The Vibe Board S1 transforms any room into a dynamic, all-in-one collaboration hub. This 4K smart display supports 20-point multi-touch and runs over 250+ app integrations like Zoom, Microsoft Teams, and Office 365—making it easy to launch meetings, present content, or collaborate in real time.
With cloud-based whiteboarding and AI handwriting recognition, teams can ideate visually, even across locations. Participants can instantly connect, share, and co-create from any device—no cables or delays.
Pair the board with the Vibe Smart Camera for an immersive meeting experience. It features a 4K wide-angle lens, auto-framing, gallery view, and a 6-microphone array with advanced echo and noise cancellation. An integrated AI chip enables smart speaker tracking, and it mounts in one simple step to the Vibe Board S1.
Ready to upgrade your meetings? Request a demo today!
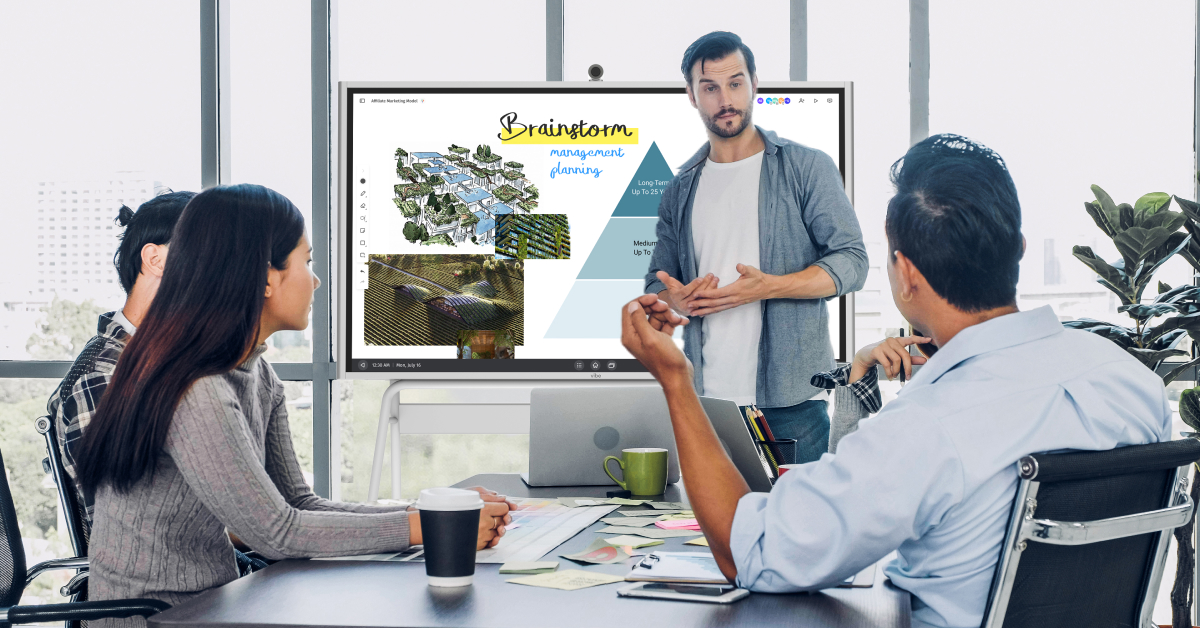
 Team collaborating in a hybrid meeting using Vibe Board S1.
Video Conferencing Hardware FAQ
What is video conferencing hardware?
Video conferencing hardware includes the physical components—cameras, microphones, speakers, displays, and processing units—that make virtual meetings possible. These tools ensure participants can see, hear, and collaborate effectively, whether in a small huddle room or a large executive boardroom.
What hardware do I need to run a video conference?
At a minimum, you’ll need a webcam, microphone, speakers, and a display screen. For larger rooms or professional settings, consider all-in-one bars or modular AV bundles with smart cameras, beamforming mics, and interactive displays to improve the experience.
What’s the best setup for video conferencing?
There’s no one-size-fits-all answer. Your ideal setup depends on your room size, number of users, and platform. Leading solutions come from trusted brands like Logitech, Owl Labs, Poly, and Vibe, offering everything from simple plug-and-play kits to enterprise-grade systems.
How do I avoid technical issues in video meetings?
Start by using certified hardware for your conferencing platform (Zoom, Teams, Meet). Run regular test meetings, stay on top of firmware and software updates, and assign someone—especially in IT-managed environments—to monitor and maintain the setup.
-1sbltxxq4FYxHrXrwJVLsCDNsXpqNa.webp)
-5Zp0pmSytvcuYDVs1LvuwplKuRneK0.webp)