

Although the number of remote workers continues to increase, your conference rooms are likely to see more use than ever before. Modern conference room setups must be reliable, and it’s crucial to maintain the necessary components and organization to make that possible. Preparation is especially critical for hybrid teams—remote and on-site workers benefit greatly from a seamless meeting experience that cuts down on wasted time and delivers effective collaboration. When your next meeting arrives, be prepared for success with this conference room setup checklist.
- Match the conference room layout to the room's purpose.
- Hybrid success hinges on clear audio, right-sized visuals, and smart camera placement.
- A quick preflight (network, test call, screen share) prevents most glitches.
- Following a simple checklist keeps meetings focused and effective.
Common Conference Room Types
Every meeting has a rhythm—discussion-heavy, presentation-focused, or collaborative—and the room layout should amplify that intent from the moment people sit down. A clear, intentional conference room setup helps reduce friction for hybrid teams, keeps attention where it belongs, and ensures technology supports participation rather than slowing it down.
Boardroom Style
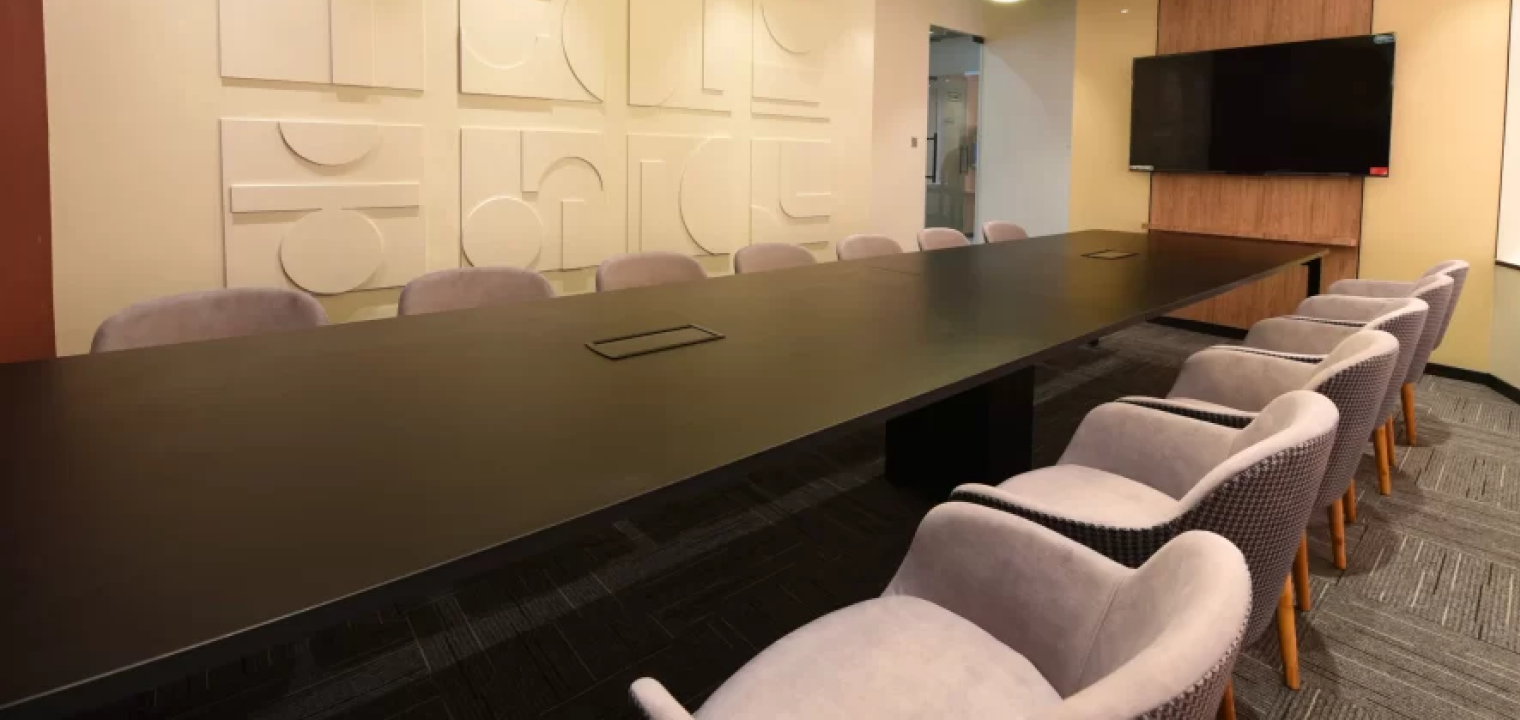
For collaborative decision-making, interviews, and client sessions, a central table creates equal presence and eye contact, keeping conversation tight and outcomes clear. It’s best for small to mid-sized groups where discussion is the priority and integrated power and AV keep workflows smooth.
Classroom Style
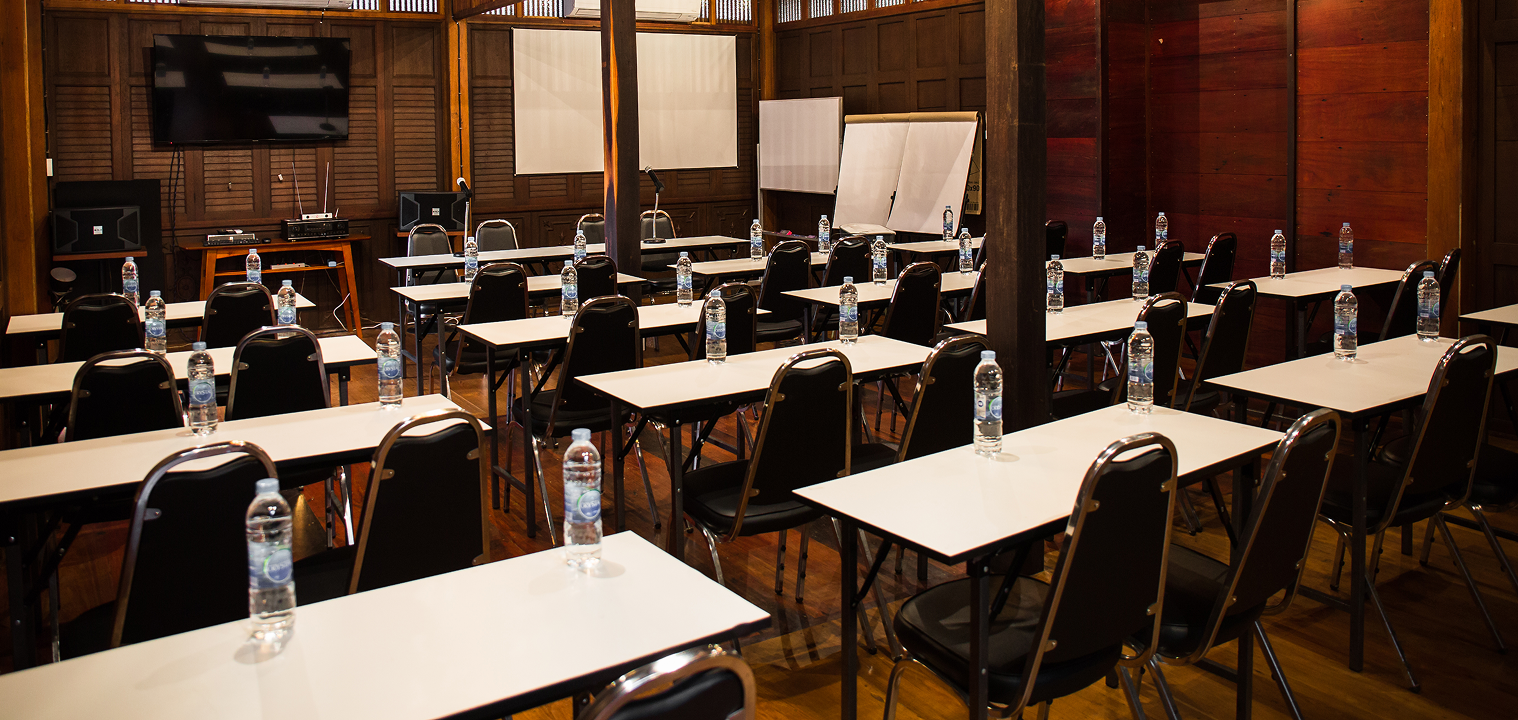
When content delivery takes center stage, rows facing the front give everyone a clean line of sight to the presenter and screen. This layout scales well for team trainings and briefings, trading higher capacity for less peer-to-peer interaction.
U-shaped Style
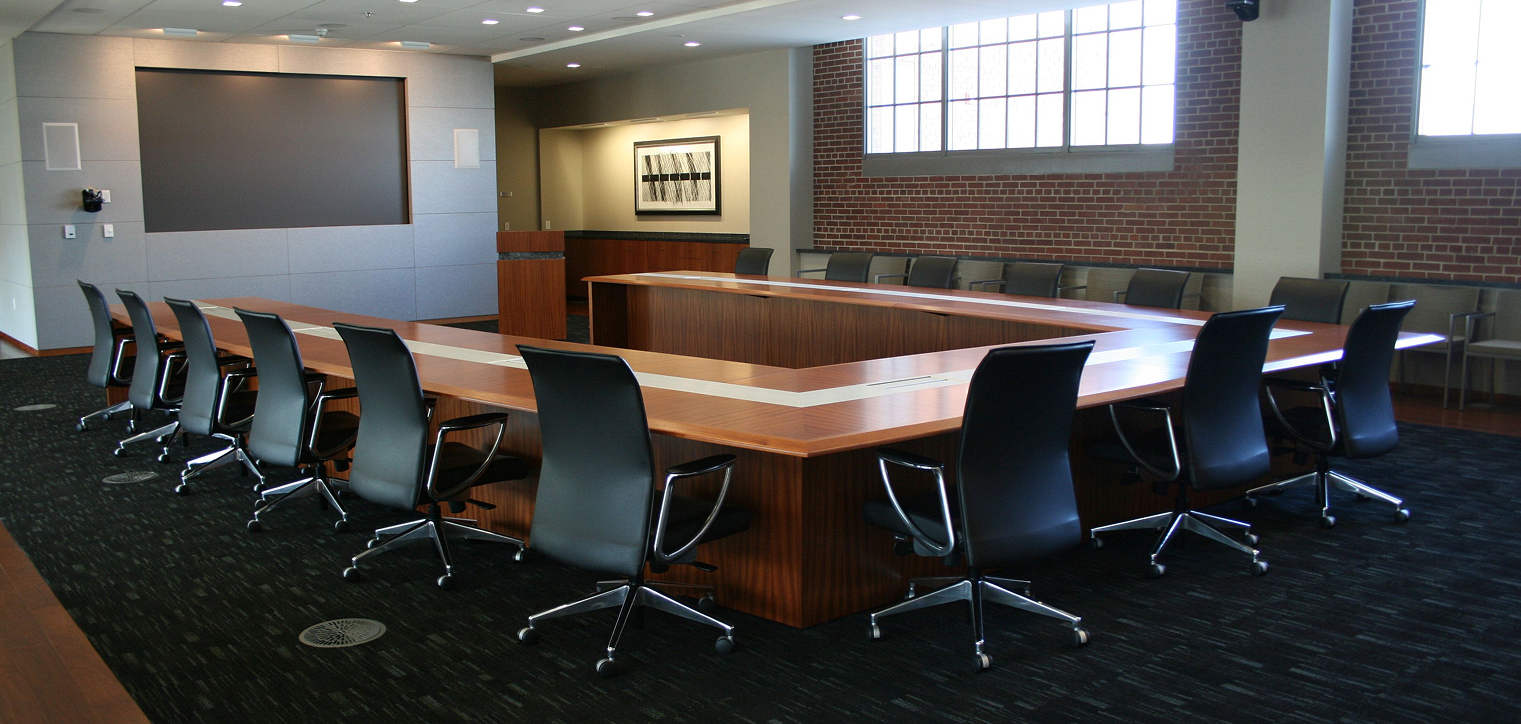
Facilitators can command the front while participants still see one another, striking a balance between presentation and discussion. It’s a strong fit for demos, workshops, and hybrid calls where camera placement benefits from an open sightline.
Theatre Style
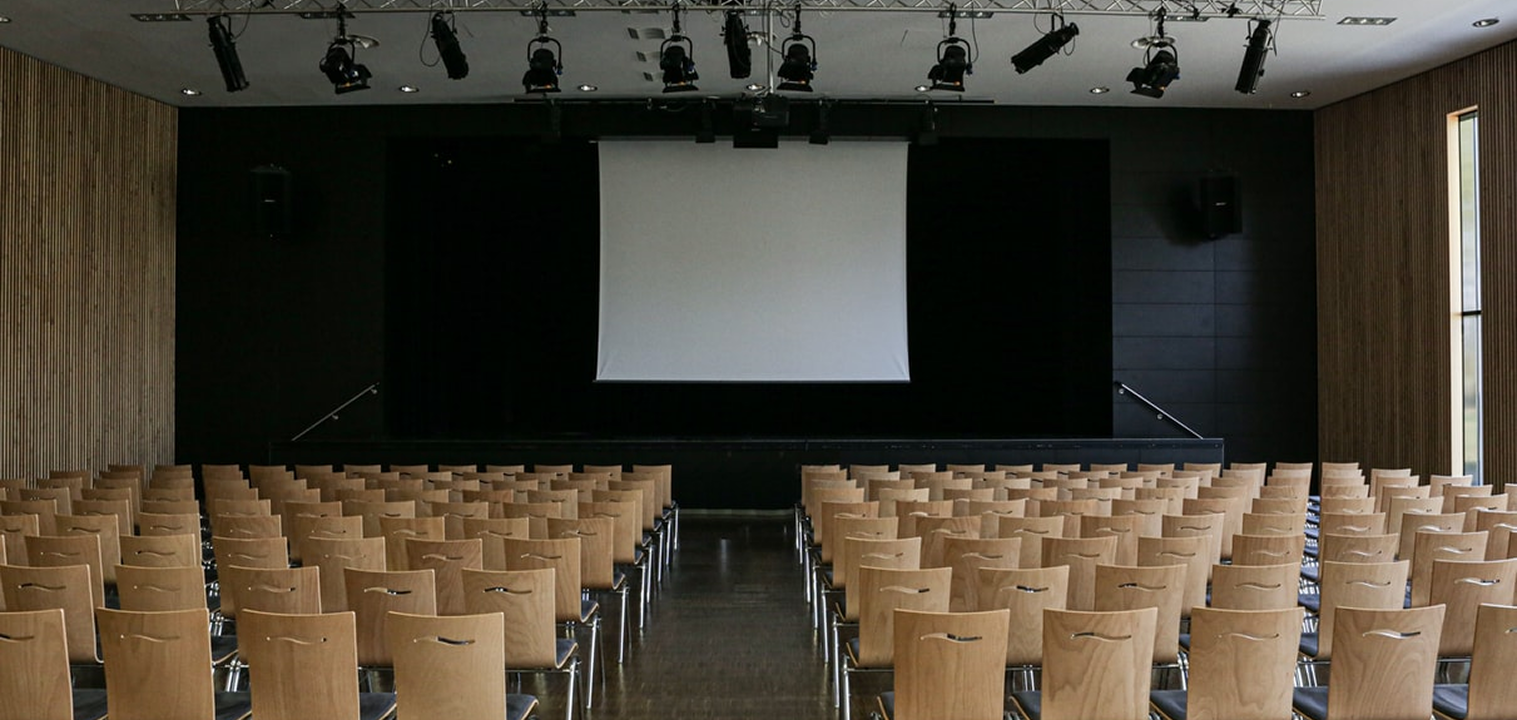
If the goal is maximum attendance and attention on the speaker and their multimedia presentation, chairs-only seating is the most efficient choice. It shines for town halls and all-hands, where clear AV and sightlines matter more than desks for note-taking.
How to Choose a Conference Room Style
Picking the right conference room setup starts with stopping to consider the room’s purpose, discussion, delivery, or facilitation, then matching the format with these common considerations:
-
Meeting objective: discussion (boardroom), training (classroom), facilitation (U-shaped), or presentations to large audiences (theatre).
-
Group size: scale with classroom/theatre; stay with boardroom/U-shaped for smaller to mid-sized teams.
-
Interaction level: high engagement favors boardroom/U-shaped; theatre minimizes participation; classroom balances capacity with focus.
-
AV and visibility: confirm sightlines to displays and clear audio pickup; plan camera angles for hybrid equity.
-
Room shape and ergonomics: leave comfortable aisles, adequate clearance, and power access without overfilling the space.
-
Duration and comfort: longer sessions benefit from desk space, ergonomic seating, and charging at the seat.
-
Flexibility: modular furniture makes it easy to switch layouts as meeting formats change.
7 Conference Room Setup Best Practices
Before diving into our detailed checklist, it’s important that you align on purpose, people, and platform—then use these best practices to keep your preparation and meetings focused. These guidelines focus on tips for the essentials (reliable tech, clean audio, clear visuals, and hybrid-first workflows) so preparation turns into strong performance when it’s showtime.
1. Check the video conferencing hardware
The first thing to do before your next meeting is to examine all of the conference room equipment. This includes:
-
displays like laptops, desktops, tablets, projectors, and TV screens
-
camera and microphones, including built-in computer equipment and any external devices
-
speakers, whether they are components of a computer, TV, VoIP conferencing phones, or standalone systems
-
internet connection points, whether it’s via WiFi or an Ethernet cable
-
video conferencing software that you’ll be using to make video calls, display meeting participants, and route the sound through
Ensure that everything is working correctly and note any hardware that might require an upgrade. (It’s always better to upgrade proactively. No one wants their conference room equipment to stop working in the middle of an important meeting.)
Related: Choosing the Best Headphones for Video Conferencing
2. Wireless internet connectivity and backup source
Wireless internet connectivity is essential for most things in the modern business world, and conference rooms are no exception. Wi-Fi technology makes all of your video conferencing hardware and software easy to use. Sometimes, though, Wi-Fi signals become spotty, weak, and unable to handle the amount of data needed for video meetings.
You’ll want to have a backup plan in case something happens to your Wi-Fi connection. Ideally, your conference room should include a hard-wired Ethernet backup. This way, if something does happen to your internet connection, you already have it covered.
3. Test the audio on the video conferencing
One thing that every meeting attendee loathes is poor audio quality during a video conference. When you can’t clearly hear or be heard, it can result in mistakes and confusion. So while you can rely on a laptop microphone in a pinch, we suggest using external microphones in your conference rooms.
The integrated laptop microphones are typically low-quality and cause your words to come out muffled or distorted. And in some cases, you’ll get voice echoing problems. Installing a system with high-quality microphones and speakers is one of the best upgrades you can make for your meeting room.
4. Optimize the conference room for full-view video
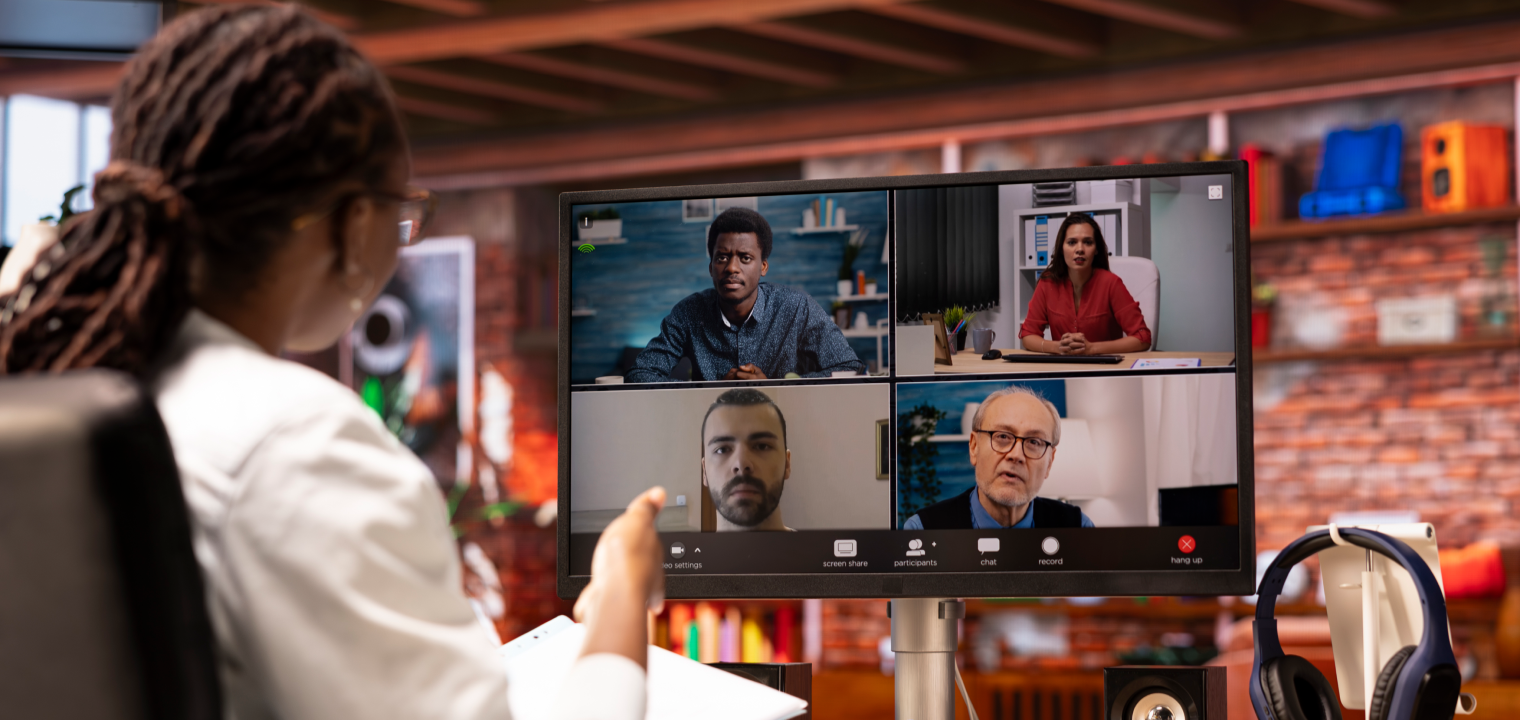
Upgrading to a full-view video system is another great way to increase productivity during meetings. If your remote employees are conferencing with your in-office team, you want them all to feel as present and engaged as possible. A 360-degree conference camera can help accomplish this by giving everyone a full view of the conference room.
You can even find smart cameras that allow for a full room view while highlighting whoever is currently speaking. This helps to make the video discussion feel more organic, breaking down the barriers employees usually feel during teleconferences.
5. Ensure the VC system works with 3rd party apps
Most offices have software they already use for video conferences (like Zoom), and it’s important to ensure that any upgrades you make are compatible with that software. You shouldn’t make your employees learn the ins and outs of new software every time you update your video conferencing system; implement solutions that seamlessly integrate into your existing workflows instead. (For an added bonus, find upgrades that coordinate with your company calendar app.)
Related: How to Make Your Conference Calls Sound Better
6. Double-check technology functions
Whether you made equipment upgrades or not, always set everything up and walk through your system prior to the meeting. This ensures you have time to fix any last-minute hiccups and make any adjustments before your meeting. Work out the tech bugs before your meeting so that you don’t have to worry about them while presenting during the conference.
7. Quickly dry-run your presentation
Take a few minutes to rehearse your content from start to finish. You don’t need to practice word-for-word, but focus on key areas that you want to have an impact. This quick practice helps you spot timing issues, identify missing information, refine your delivery, and confirm that visuals and transitions flow smoothly. A dry run builds confidence and ensures you’re ready when it’s time to present. Remember not to be stuck to a script—make sure you plan with the flexibility to address audience questions, feedback, and hesitations.

Conference Room Setup Checklist
Build the room around how teams actually work—start with furniture that fits the space, then layer in AV, connectivity, and clear operating norms so meetings start on time and stay on track. Use these sections as a fast pre‑flight before every session to keep focus on outcomes, not troubleshooting. Here is our ultimate conference room set up checklist:
1. Furniture and Ergonomics
Right-sized tables and adjustable chairs create comfort, clear sightlines, and enough personal space for laptops, notebooks, and elbow room. Aim for generous table clearance and ergonomic seating to prevent fatigue during longer sessions and workshops.
-
Choose a table that leaves clear walking space on all sides.
-
Give each seat enough elbow room and table space.
-
Provide chairs with height and armrest adjustments.
-
Add power in or under the table for easy charging.
-
Keep cables organized with grommets or trays.
2. Displays, Audio, and Cameras
Everyone should see and hear clearly—both in-room and remote—without straining or repeating. Calibrate displays, right-size screens to viewing distance, and place cameras and mics for equitable framing and intelligible speech.
-
Pick a screen size that is easy to read from the farthest seat.
-
Set the display to 16:9 and test slides for small text.
-
Place the camera at eye level facing the group.
-
Use a wide‑angle camera if the whole room isn’t visible.
-
Test microphones and speakers for clear sound and no echo.
-
Keep labeled spare HDMI, USB‑C, and DisplayPort adapters ready.
3. Extra AV Details
Small optimizations make hybrid meetings feel natural—set camera height at eye level, avoid backlighting, and give presenters confidence views. Distribute microphones for consistent pickup and consider dual displays for content‑plus‑gallery flexibility.
-
Avoid backlighting; close blinds if windows are behind people.
-
Set camera presets for speaker view, group view, and whiteboard.
-
Use ceiling or table mic arrays so every seat is heard.
-
Turn on noise suppression and echo cancellation.
-
Add a second display to show slides on one screen and people on the other.
-
Provide a small "confidence" screen facing the presenter.
-
Use dimmable lights and task lights to reduce glare on faces and screens.
-
Tidy all cables; secure any that cross walkways.
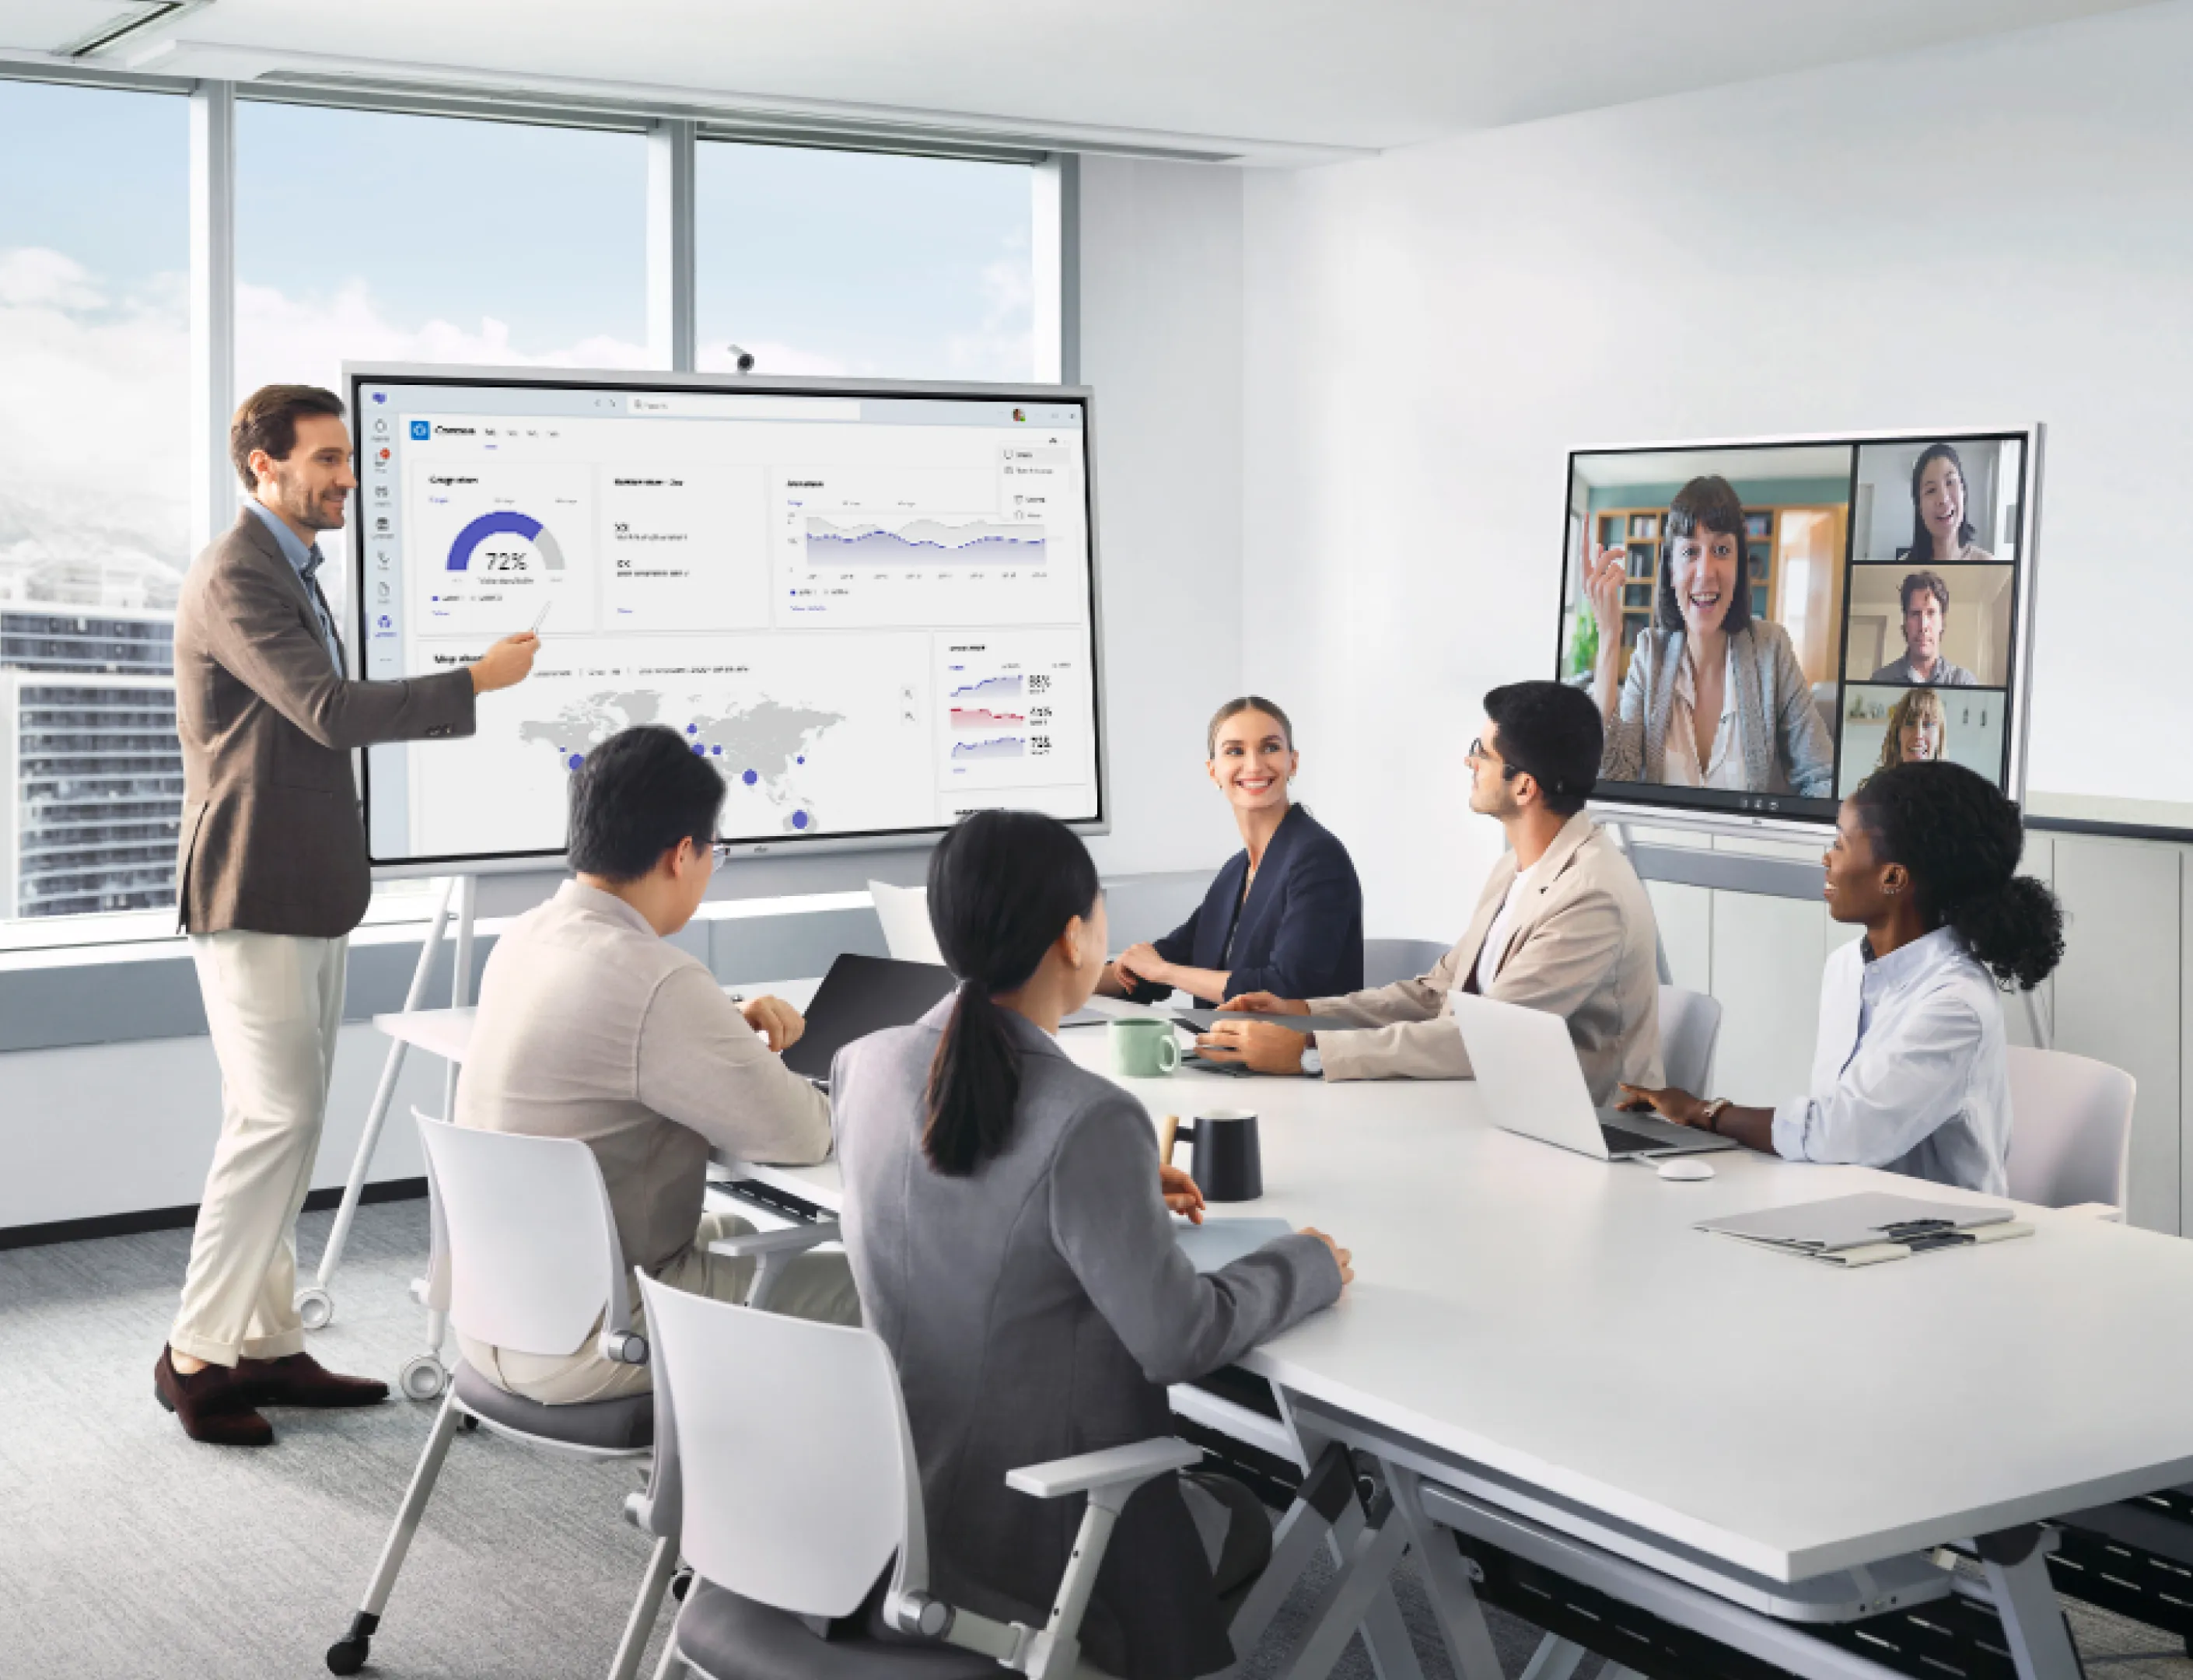
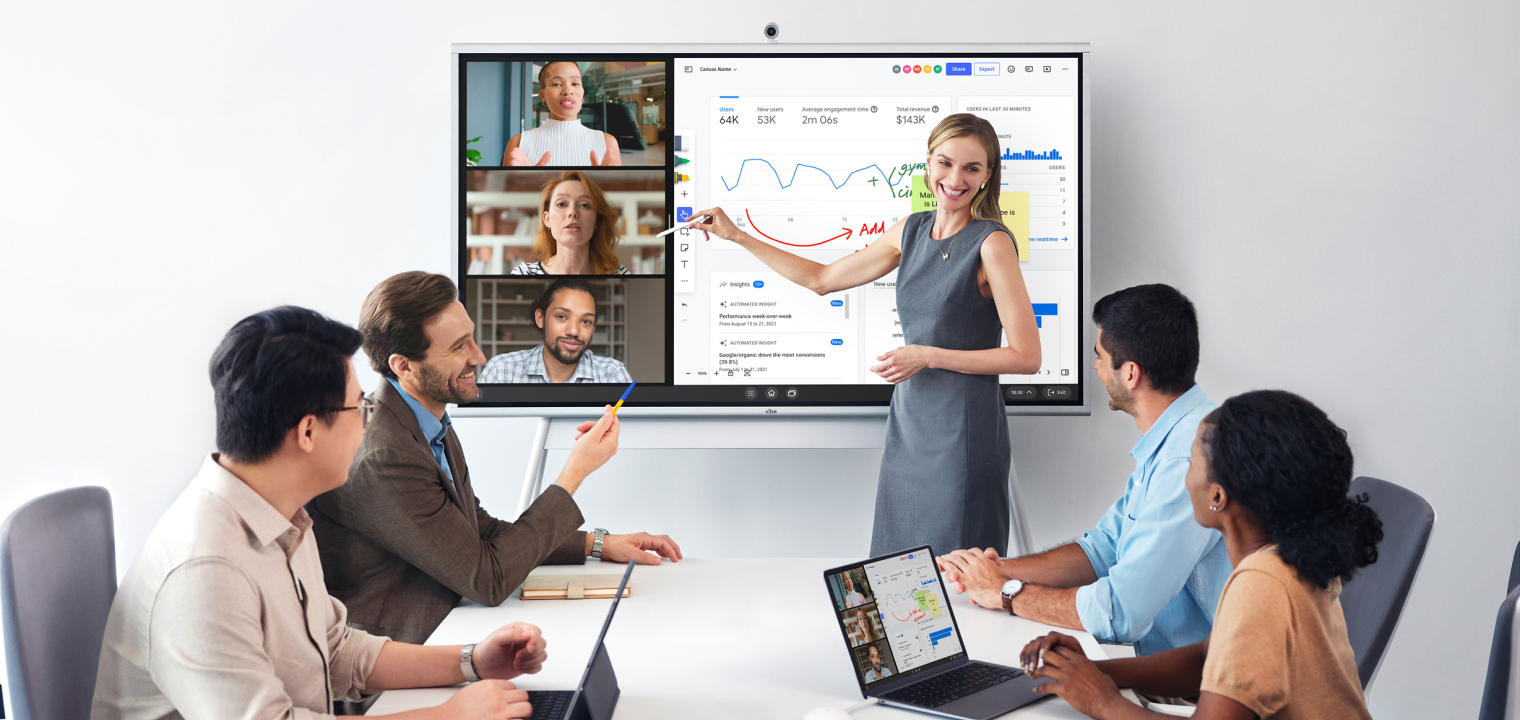
 Team using the Vibe Board to conduct a smooth hybird meeting.
4. Connectivity and Software
Stable, fast connections keep hybrid collaboration smooth and prevent mid‑meeting stalls. Validate Wi‑Fi reliability, keep Ethernet as backup, and confirm conferencing apps, screen sharing, and calendar integrations work before people arrive.
-
Test Wi‑Fi speed and delay in the room.
-
Make sure a wired Ethernet port is available at the table.
-
Sign in to the video app and update it before the meeting.
-
Do a quick test call to check audio, video, and screen share.
-
Confirm recording and screen‑sharing permissions work.
-
Sync the room calendar and verify join links on the room panel.
5. Networking and Reliability
Plan for resilience, not just speed—have a simple failover path and make guest access easy but secure. Keep updates predictable and labeled so issues can be rolled back quickly when needed.
-
Set up a backup connection (second Wi‑Fi or wired failover).
-
Post a QR code for guest Wi‑Fi with limited access.
-
Reserve bandwidth or prioritize video traffic during busy times.
-
Schedule firmware and app updates outside meeting hours.
-
Keep a change log and a simple rollback plan.
-
Label wall ports and patch cables clearly.
-
Confirm PoE power is sufficient for cameras and touch panels.
Now that you’ve completed the conference room setup checklist, everything is set: the room is comfortable, the screen and sound are clear, and the connection is stable. Do a quick test call, open the deck, and hit join—now ready to start on time and stay productive.
Consult a Conference Room Setup Checklist for Efficiency
When your conference room is set up for efficiency and productivity, it makes it easier for your hybrid team to communicate and collaborate intuitively. It’s crucial to provide a high-quality for your business to stay on top of your video conferencing setup in each conference room, to help remote employees feel connected with those in the office and able to contribute equally especially when many companies are adopting a hybrid remote/in-office workplace. Stay ahead of the curve, research and implement video conferencing system solutions that are easy to adopt, ensuring your employees actually want to use them.
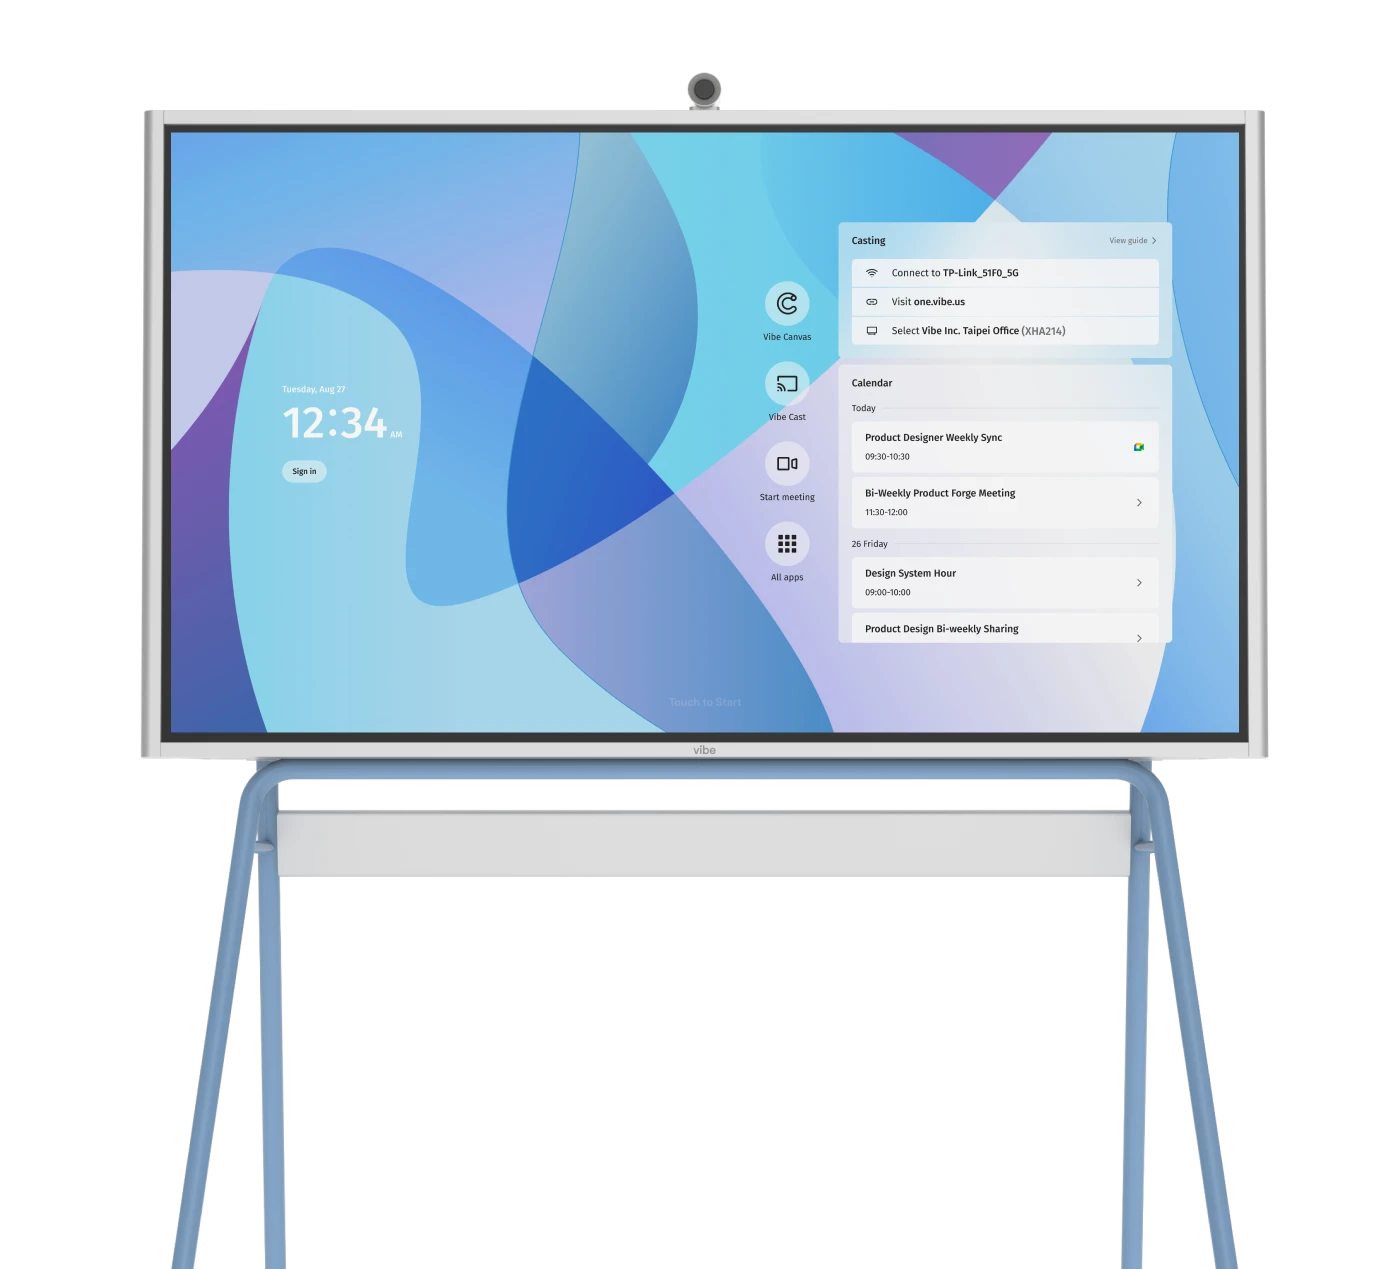
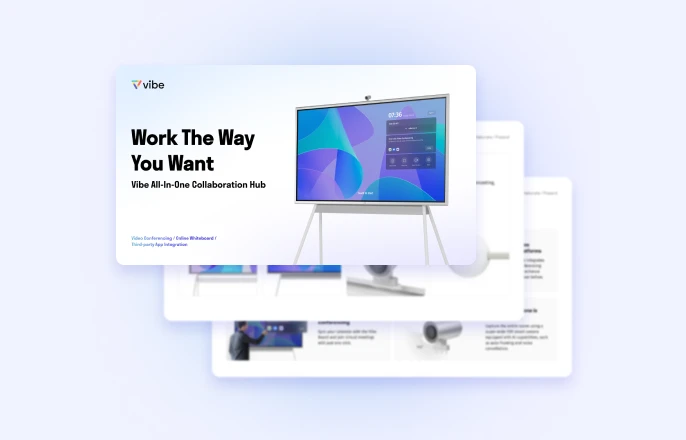
Vibe Board S1: The Ultimate Conference Room Companion
Make meetings effortless with Vibe Board S1—the all‑in‑one smart whiteboard built for hybrid teams, real‑time collaboration, and crystal‑clear presentations. Turn every room into a high‑impact conference room with fast setup, intuitive touch, and seamless video calls with integration for over 250 leading applications.
Book a demo and see how Vibe can elevate your hybrid meetings today.
Watch the video to explore how Vibe helps teams run smarter meetings:
Conference Room Setup Checklist FAQs
What is the difference between a meeting room and a conference room?
A meeting room is typically smaller and more flexible, suited for quick huddles, team discussions, and informal collaboration. A conference room is larger and more formal, designed for presentations, trainings, or executive sessions with more advanced AV. Think "small and agile" for meeting rooms vs. "bigger and presentation-ready" for conference rooms.
What should I have in my conference room?
Comfortable seating and a right-sized table with easy access to power at each seat. A clear display, an eye-level camera, quality AV equipment, labeled spare adapters, and neat cable management. Reliable connectivity and essentials like a whiteboard with fresh markers.
How do you prepare a conference room for a meeting?
Run a quick preflight: test displays, cameras, microphones, speakers, and join a short test call. Check Wi‑Fi speed and have Ethernet as backup, then open the deck and confirm screen sharing and recording if needed. Set up the room: adjust lighting, arrange seating for sightlines, tidy cables, and place supplies.