

You’re standing in front of a new smart board for the first time. Your finger hovers over the screen. Which app opens your slides? Does the pen need batteries? That flustering moment is more common than you might think, and it’s exactly where smart boards are either your most convenient resource or your greatest adversary.
We’re here to make sure your smart board experience is the former. Smart boards in conference rooms and other work settings make your collaboration limitless—and with more hybrid and remote environments, they aren’t going anywhere. These interactive displays are built to make collaboration more visual, more interactive, and easier to follow in real time, which is key for group work and engagement.
This guide focuses on how to use a smart board effectively, going beyond the buttons and helping you master your device with confidence.
- Smart boards combine touch, digital ink, and software into a single collaborative workspace.
- Most core actions work the same across devices, even when brands differ.
- Calibration and input setup solve the majority of early frustration.
- The real value comes from using smart board features to think and work visually together.
What a Smart Board Is and How They Work
A smart board is a type of interactive whiteboard that lets you touch, write, and manipulate digital content directly on the screen. "SMART Board" is often used as a catch-all term, but it originally refers to products from SMART Technologies. Today, many interactive whiteboards follow the same core principles, even if the software and menus look different. Modern examples include boards from Vibe, Promethean, Microsoft, and systems built around platforms like Google.
At a technical level, smart boards combine touch sensors, a high-resolution display, and software that translates physical input into digital actions. When you tap, write, or gesture, the board responds instantly by opening apps, drawing digital ink, or moving on-screen objects. Most modern boards support multi-touch gestures, built-in whiteboarding tools, and direct access to apps or browsers, which is why understanding what a smart board is and how it works is so important.
Because visual information accounts for roughly 90% of the data transmitted to the brain, interactive displays are especially effective for teaching, planning, and group problem-solving. That visual processing advantage is what makes the best smart boards more powerful than traditional office whiteboards or slide-only presentations.
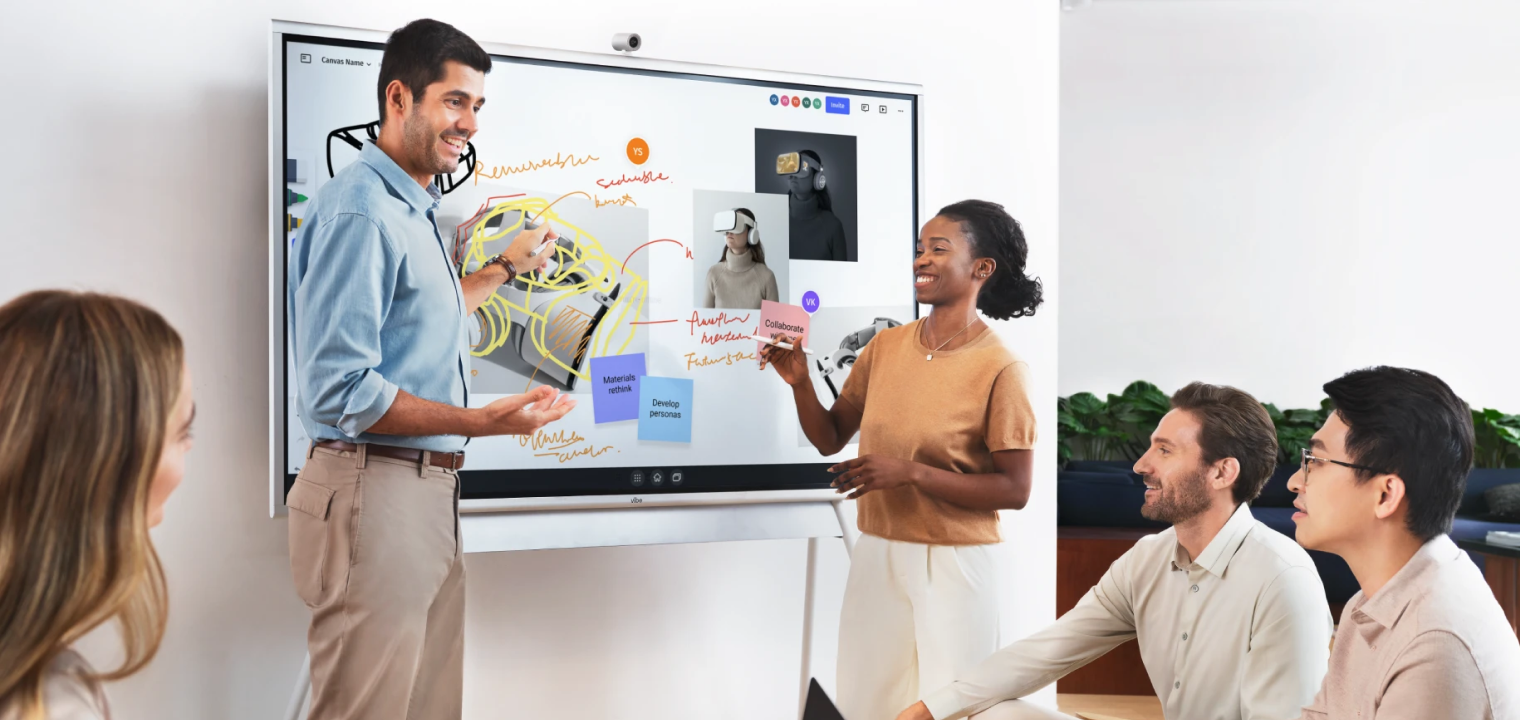
 Team collaborating around Vibe Board during a meeting, using digital tools to enhance engagement and presentation.
How to Use a Smart Board: Step by Step
Feeling lost about how to use the tech powering your classroom or office? We can help. Here is the step-by-step guide on how to use a smart board.
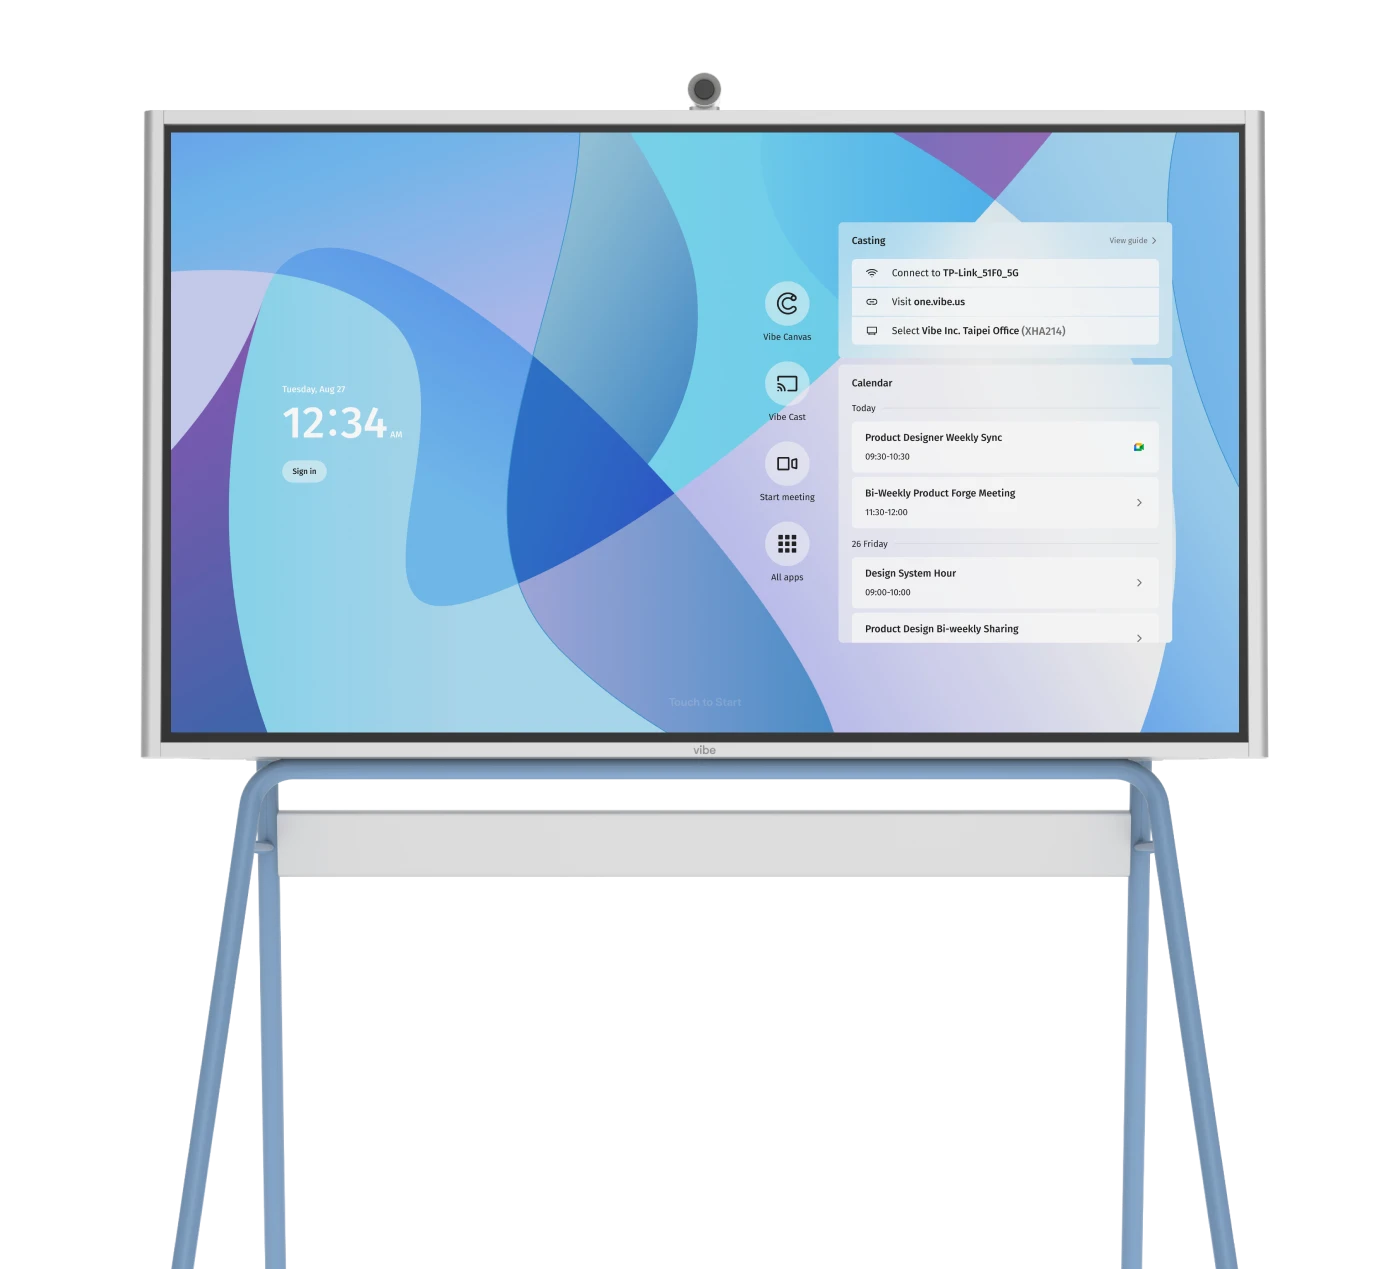
1. Getting Started — Power and Connections
Power and connection steps vary by brand, but most interactive whiteboards follow the same basic flow. Once you know where to look, you can usually go from a blank screen to presenting in under a minute.
-
Power on the board: Locate the physical power button, often on the side or bottom bezel. Press once and wait for indicator lights and the home screen to appear.
-
Select the correct input: If nothing shows up, open the input or source menu and choose the active connection (HDMI, USB-C, wireless casting, or built-in apps on all-in-one boards).
-
Connect your device:
-
HDMI or DisplayPort: Sends video from a laptop or desktop.
-
USB: Allows the board to register touch input from your computer when required.
-
Wireless casting: Use AirPlay, Chromecast, or Miracast if the board and device support it.
-
-
Open required software: Some boards need a whiteboarding app, presentation app, or classroom software opened before touch and pen tools work properly.
In action, this simply looks like a meeting facilitator who powers on the board, plugs in HDMI and USB from a laptop, mirrors the screen, and opens the whiteboard app.
2. Calibrating for Accurate Touch
Calibration aligns where you touch the screen with what appears visually. It’s usually needed during first-time setup, after moving the board, or when taps start landing slightly off target. Many newer boards like Vibe rarely need it if at all, but knowing how to recalibrate saves time if issues do pop up.
General calibration steps that work across most boards:
-
Open calibration or orientation settings: Access this through the settings menu, tools panel, or a physical button near the frame. Most boards include a built-in alignment tool.
-
Tap each target precisely: Touch each calibration point carefully and consistently. Use steady pressure and avoid rushing through the sequence.
-
Test accuracy before presenting: Tap small icons, close a window, or draw a straight line. If touch still feels off, repeat the process.
Older projector-based interactive whiteboards need recalibration more often because even slight projector shifts affect alignment.
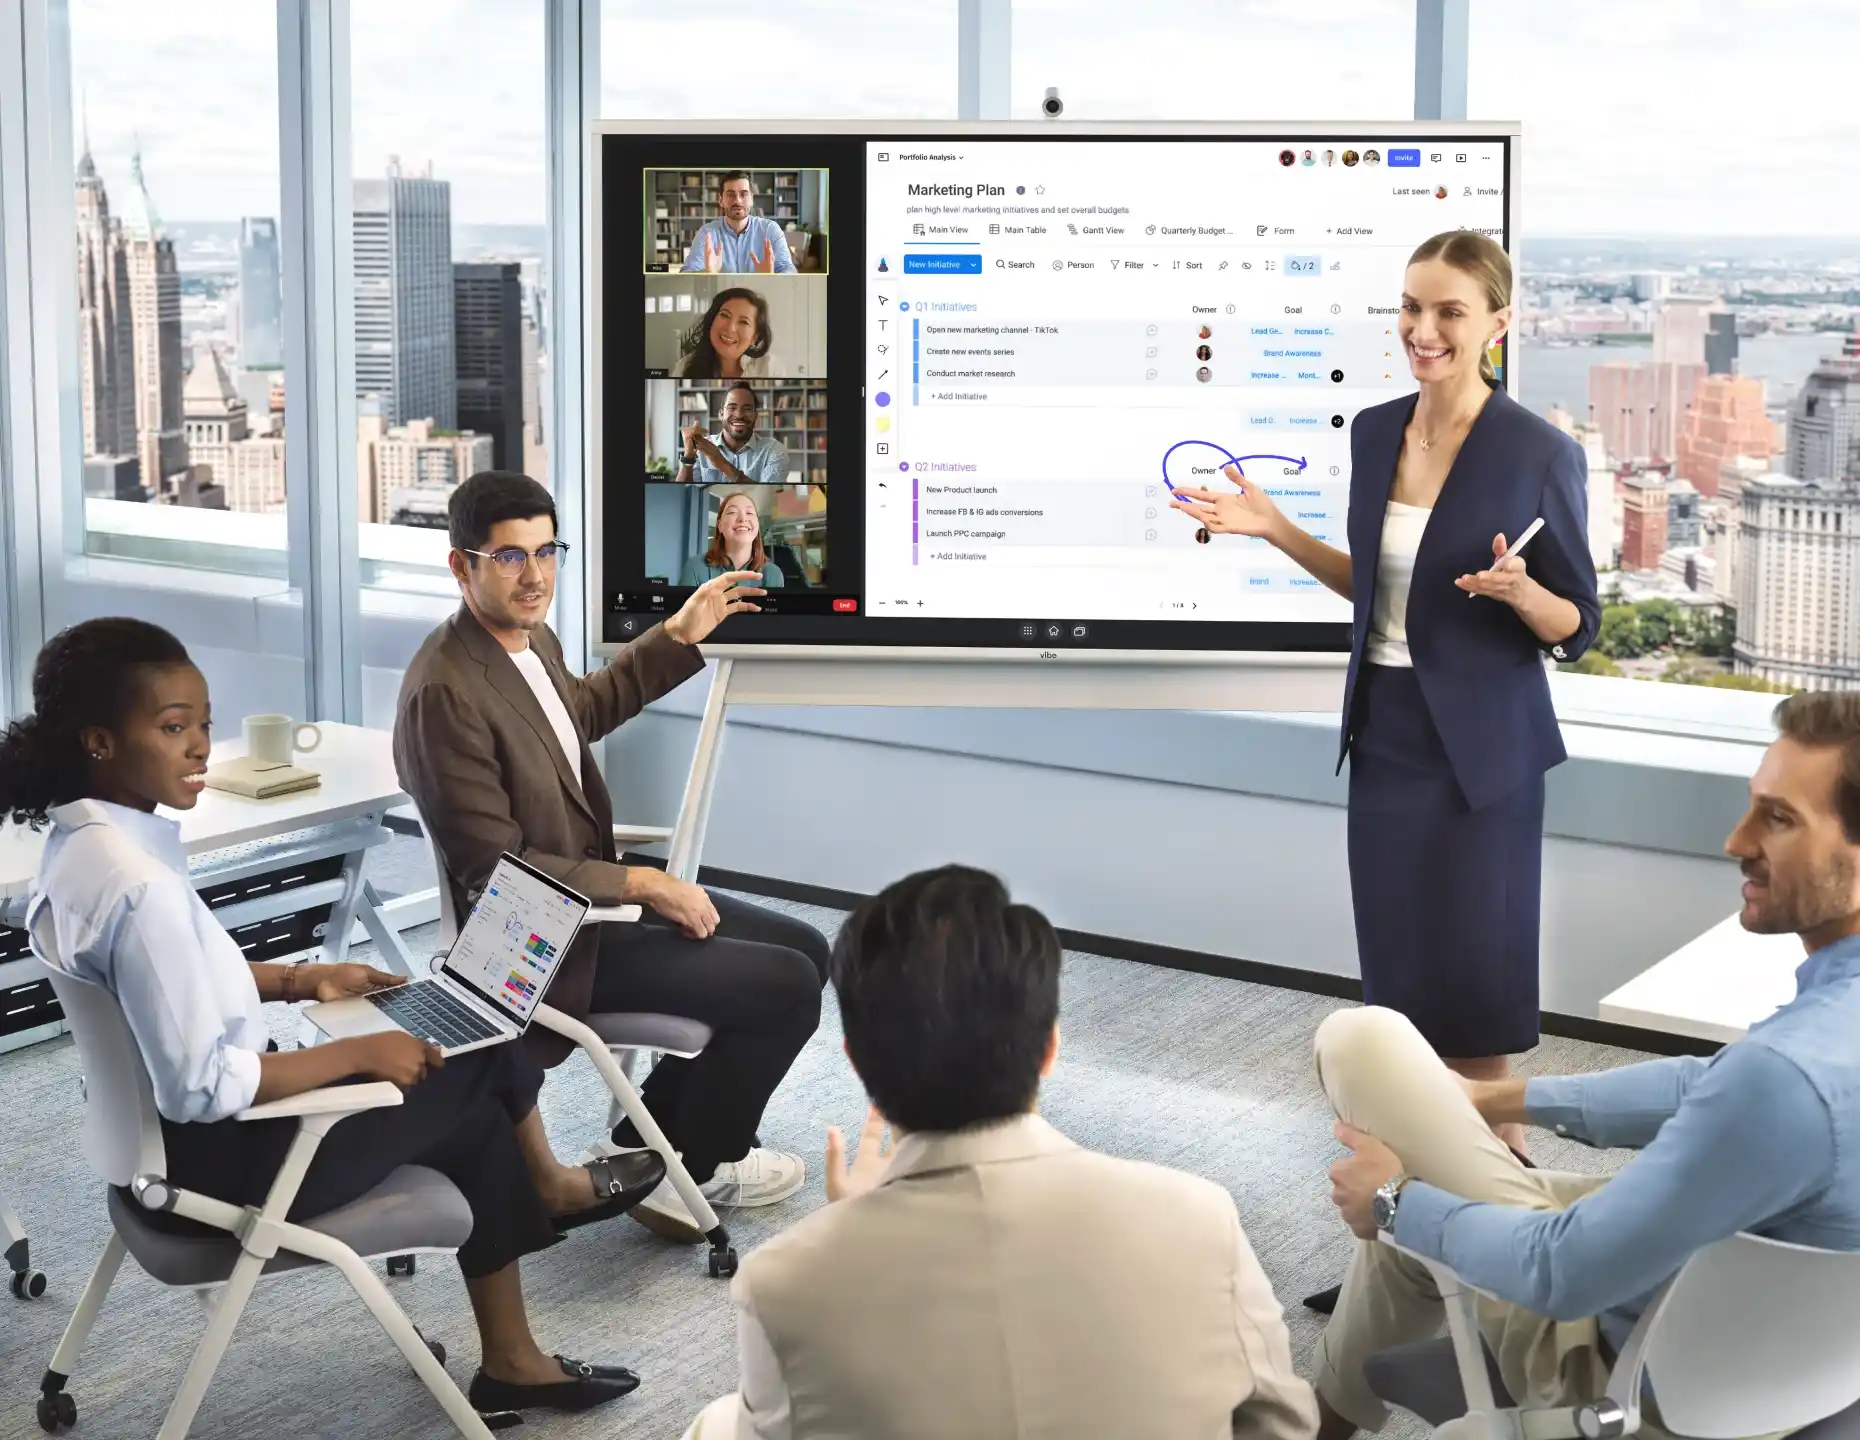
 Team using Vibe Board to brainstorm and capture ideas collaboratively in one space.
3. The Basics — Touch, Writing, and Tools
Most smart boards respond to touch the same way modern phones and tablets do. Tap once to select, double-tap to open, and touch-and-hold to reveal more options. You can drag objects to reposition them, swipe to move through pages or slides, and use two fingers to pinch, zoom, rotate, or pan across content. These gestures apply whether you’re navigating a presentation, a browser, or a blank canvas.
Writing tools work on top of nearly any content. Picking up a pen or stylus usually activates digital ink automatically, with color and thickness controlled by the toolbar or pen tray. You can write directly over documents, websites, videos, or a clean whiteboard surface. Erasing is handled through a dedicated eraser tool or gesture-based actions like circling ink to clear it. Toolbars typically include undo and redo, shape tools, highlighters, screenshots, and capture options so notes don’t disappear when the session ends.
If your pen isn’t writing, start simple: check the battery if it’s an active stylus, confirm the pen isn’t set to eraser mode, and make sure a whiteboarding or annotation tool is open and active. Most issues come down to the wrong tool being selected, not a hardware problem.
Using Smart Board Software
Most boards fall into one of three software setups: a built-in whiteboard app, a system that runs standard desktop or Android apps, or a hybrid that supports both. Built-in whiteboards are best for quick sketching, brainstorming, and note capture. Full operating systems allow you to open browsers, presentation tools, documents, video conferencing, and collaboration platforms directly on the board without connecting a laptop.
Knowing when to use which tool keeps sessions moving:
-
Native whiteboarding: Early-stage thinking, group discussion, live annotation, and idea mapping.
-
Presentation or productivity software: Structured content, templates, reports, and slide-based reviews.
-
Video conferencing apps: Remote participants who need to see and interact with on-screen content.
-
Learning or project platforms: Work that needs to persist beyond the room or be shared later.
Setup usually follows the same pattern. Start by opening the primary app you’ll use before people arrive. Confirm touch and pen input work inside that app. If you’re running third-party tools, sign in once and save credentials securely so you’re not repeating the process every session. For shared spaces, log out at the end and clear temporary files to keep the board ready for the next group.
Advanced Smart Board Features for Deeper Collaboration
Once you’ve got the basics down, there is even more potential in your smart board. These tools will take your board beyond a fancy display and actually give you a place to compare ideas and work side-by-side, all from one source.
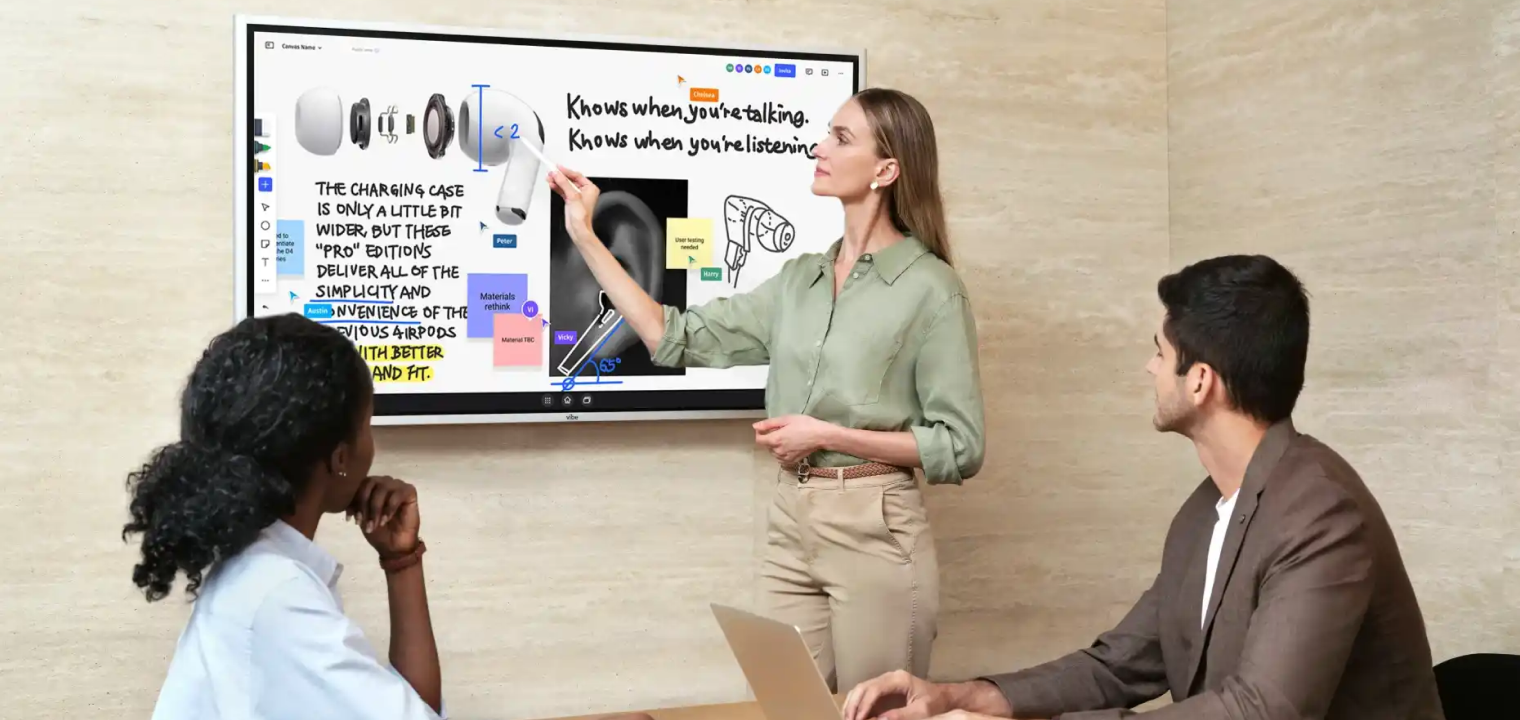
1. Annotation Over Applications
Annotation lets you write directly on top of websites, documents, videos, or dashboards without changing the underlying file. This is useful for highlighting key points, circling problem areas, or guiding attention during discussions. Most boards handle this through a dedicated annotation mode in the toolbar or notification panel. Open the app you want, activate annotation, write or draw, then capture a screenshot to save the marked-up version.
If annotations aren’t appearing, confirm annotation mode is active and visible. Some apps block overlays by default, in which case screen mirroring or opening the file in a different app usually resolves the issue.
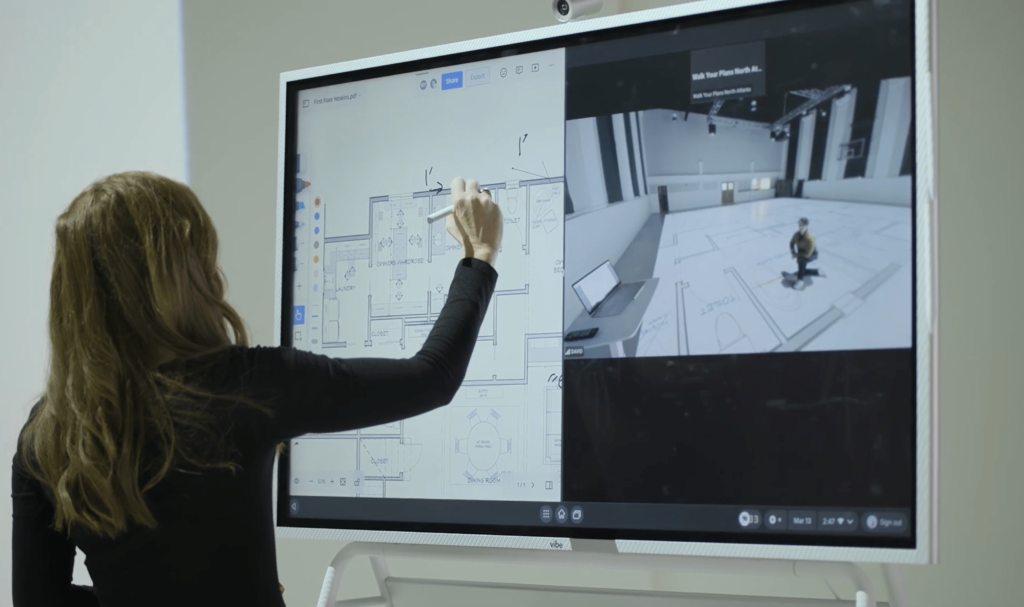
2. Split-Screen Mode
Split-screen allows two apps or inputs to display at the same time. Teams often use this to compare documents, reference notes while presenting, or view a dashboard alongside action items while video conferencing. In classrooms, it’s useful for showing instructions next to live work. The key benefit is no interruption: no app switching.
3. Wireless Screen Sharing
Wireless sharing makes it easy for people to put content on the board without swapping cables or crowding around one laptop. Anyone can cast from a laptop, tablet, or phone, which keeps meetings moving for hybrid online collaboration.
Most boards work the same way. Your device and the board need to be on the same WiFi network, then you select the board from your system’s cast menu. Mac users typically use AirPlay, Windows devices rely on Miracast or board-specific tools, and Chromebooks cast through Chromecast. Once connected, you can choose to mirror your screen or extend it.
If sharing doesn’t connect right away, the fix is usually simple. Double-check the WiFi network, restart the board’s casting receiver, or fall back to HDMI when video playback needs to be rock solid. Wireless is convenient, but cables still win when reliability matters.
4. Cloud Saving
Cloud saving keeps collaborative decisions and work accessible after the session ends. Most boards connect to Google Drive, OneDrive, or Dropbox through account sign-in. Once linked, files can be saved automatically or manually to a shared folder. Some teams prefer saving at key milestones, while others rely on auto-save syncing every few minutes.
For sensitive material, it’s worth confirming where files are stored and whether the board keeps a local cache. When privacy matters, use encrypted cloud storage or local-only saves.
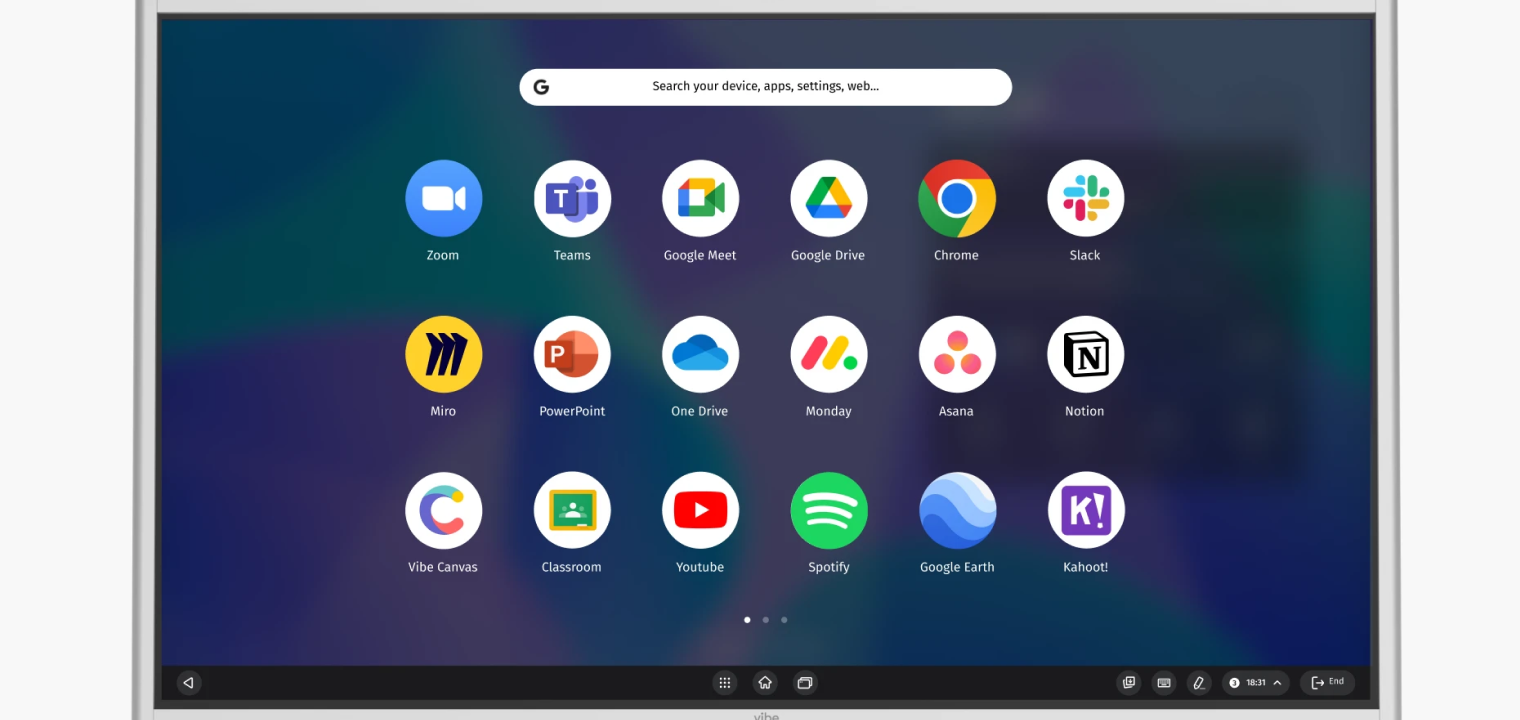 Vibe Board interface displaying various integrated productivity apps and tools.
How to use a Smart Board in the Workplace
In the workplace, smart boards work best when they streamline meetings instead of adding steps. Teams use them to think visually and keep everyone aligned while ideas are still forming. When discussions happen on a shared screen that anyone can interact with, outcomes feel more concrete than notes taken after the fact. This is where a smart board for office environments earns its place.
Brainstorming sessions are a natural fit. Digital sticky notes let teams capture ideas quickly, then drag, group, or color-code them as patterns emerge. Instead of debating which ideas matter most, teams can cluster themes together in real time and save the board as a shared artifact. That kind of collaborative workspace keeps momentum going after the meeting ends.
Smart boards also shine during workflow mapping and planning. Teams can annotate over flowcharts, timelines, or project boards, marking dependencies, bottlenecks, and handoffs as they talk through them. A project manager might flag blockers directly on a sprint board, save the annotated version, and use it to guide follow-up tasks. Nothing gets lost between discussion and documentation.
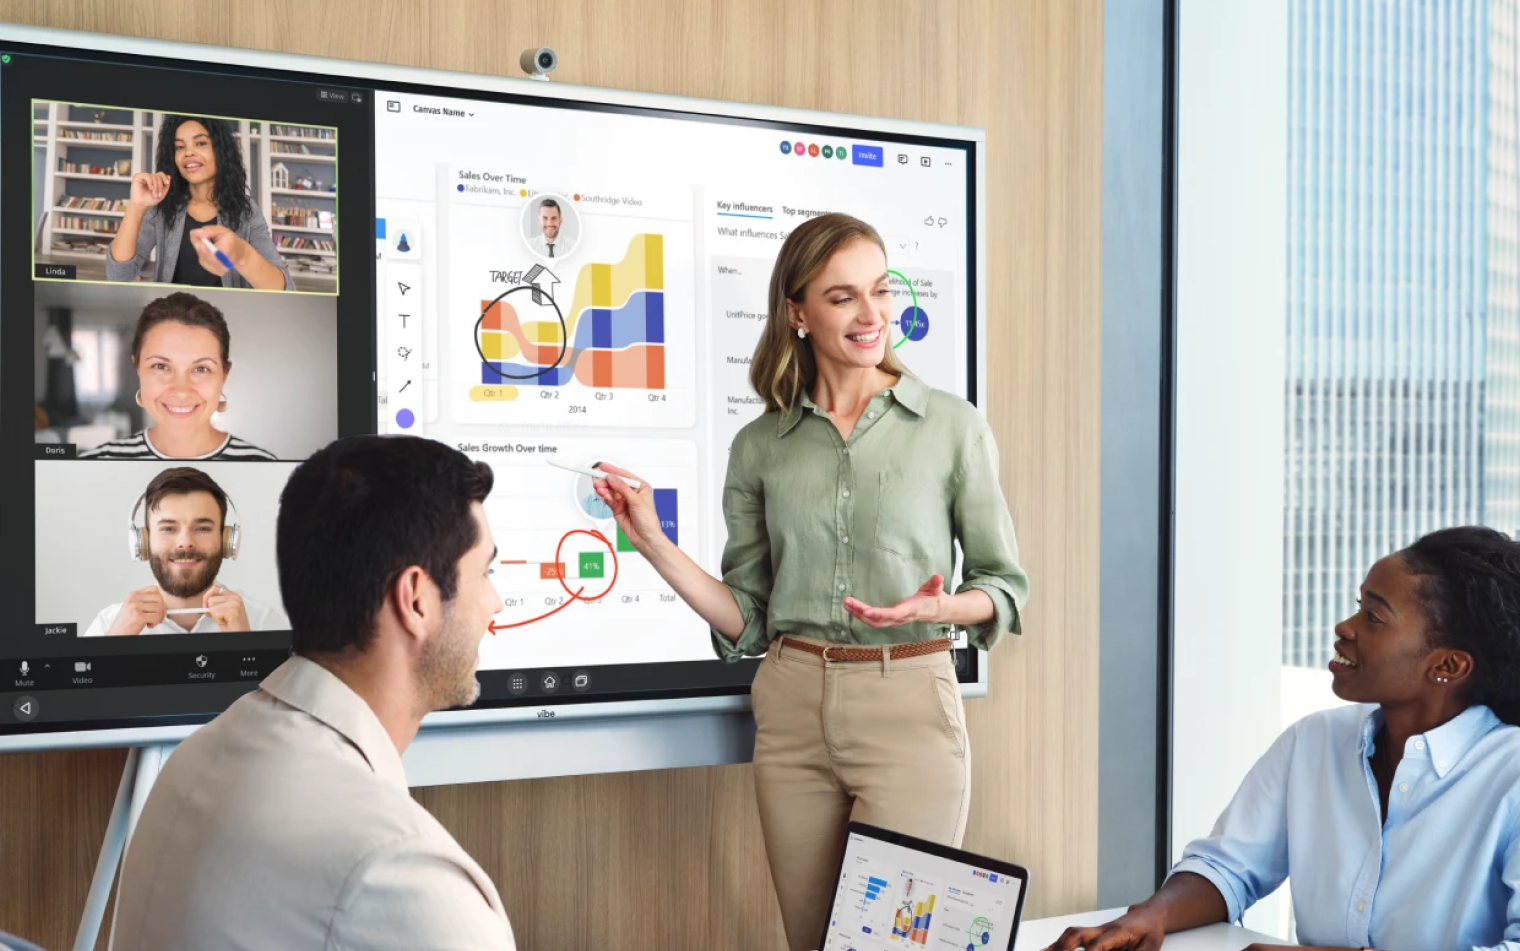
For hybrid meetings, wireless sharing removes the bottleneck of a single presenter. Multiple contributors can cast without passing cables, while remote participants see the same annotations appear live. Sales leaders often use this setup to review KPI dashboards, drawing attention to key trends or quarterly targets while notes sit alongside the data. Split-screen views make it easy to keep metrics and action items visible at the same time, which is especially useful in conference rooms built around shared decision-making rather than slide decks.
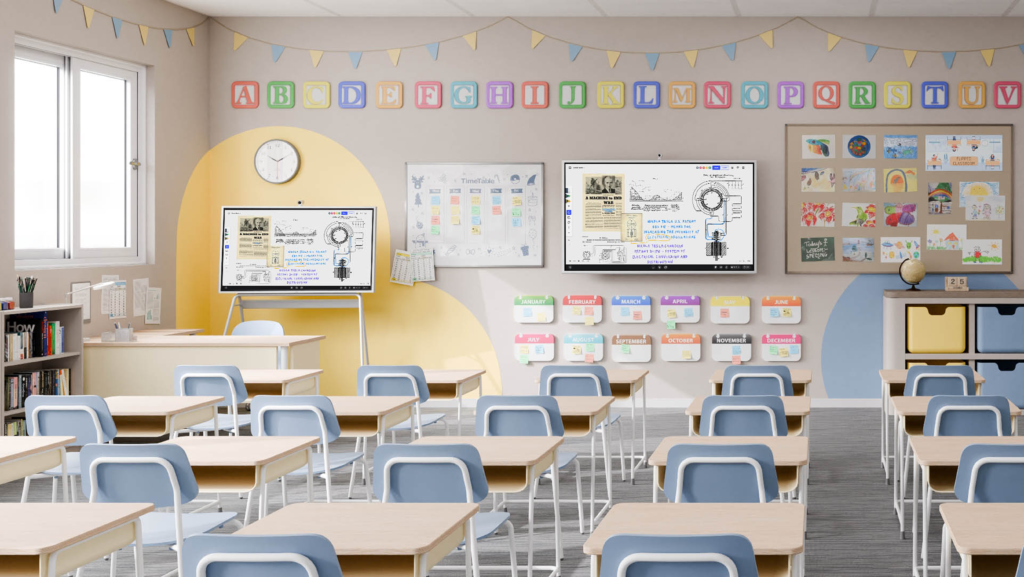
How to use a Smart Board in the Classroom
In classrooms, smart boards help lessons stay interactive without adding complexity for teachers or students. Instead of standing at the front, clicking through slides, instructors can move fluidly between content, writing, and discussion. A smart board for classroom use turns lessons into shared activities where students can see ideas take shape and participate directly.
Interactive tools make concepts easier to grasp. Teachers can use draggable elements for sorting and matching activities, run quick quizzes or polls to check understanding, and bring in manipulatives like virtual counters or magnetic letters. Timers and countdown tools help manage transitions, while annotation layers allow instructors to write over images, videos, websites, or documents without leaving the lesson flow. Many of these techniques align closely with proven interactive learning strategies that keep students engaged through participation.
Subject-specific use is where smart boards really shine. In math, teachers can solve equations step by step using digital ink, then rewind or save the process for review. In language arts, texts can be annotated live, with parts of speech labeled and key passages highlighted as a class. Science lessons benefit from zooming into diagrams or labeling structures collaboratively, while social studies classes can annotate maps, draw routes, or compare timelines side by side.
Visual learning plays a big role here. Studies show that learners retain up to 65% of information when visuals are included, which explains why interactive displays often hold attention longer than lecture-only instruction. A science class labeling organism structures together or students completing drag-and-drop vocabulary challenges keeps learning active instead of passive.
Vibe Board S1: Fueling More Effective Modern Collaboration
Eventually, knowing what to tap or how to cast another device will become second nature. The real challenge is keeping collaboration fluid once people are in the room and others are joining remotely. That’s where many smart boards start to feel fragmented. Too many logins. Too many cables. Too much time spent setting up instead of working. Modern teams expect interactive tools to stay out of the way while ideas move fast.
The Vibe Board S1 is designed around that expectation. It brings whiteboarding, annotation, presentations, and browser-based work into a single system that’s ready as soon as you walk up to it. Built-in apps remove the need to juggle laptops. Wireless casting works across devices without slowing meetings down. Cloud-connected whiteboarding keeps work accessible after the room clears out.
If you’re looking for a smart whiteboard that supports real work instead of getting in the way of it, the Vibe Board S1 is built for that reality. Explore how the Vibe Board S1 supports modern collaboration, or request a demo to see it in action.
 Diverse team aligning project ideas during hybrid in-person and virtual collaboration session.
How to Use a Smart Whiteboard FAQs
How to use a smart whiteboard simply for beginners?
Power on the board, connect a laptop or open the built-in whiteboard app, and start interacting with the screen using touch or a pen. A few minutes of tapping, writing, and erasing is usually enough to get comfortable.
Do you need a computer to use a smart whiteboard?
Older interactive whiteboards require a connected computer. Many modern smart boards run independently and support wireless casting, which reduces the need for dedicated hardware.
How do you save your work on a smart whiteboard?
You can save files locally on the board, export them as PDFs or images, or store them directly in connected cloud accounts when supported.