
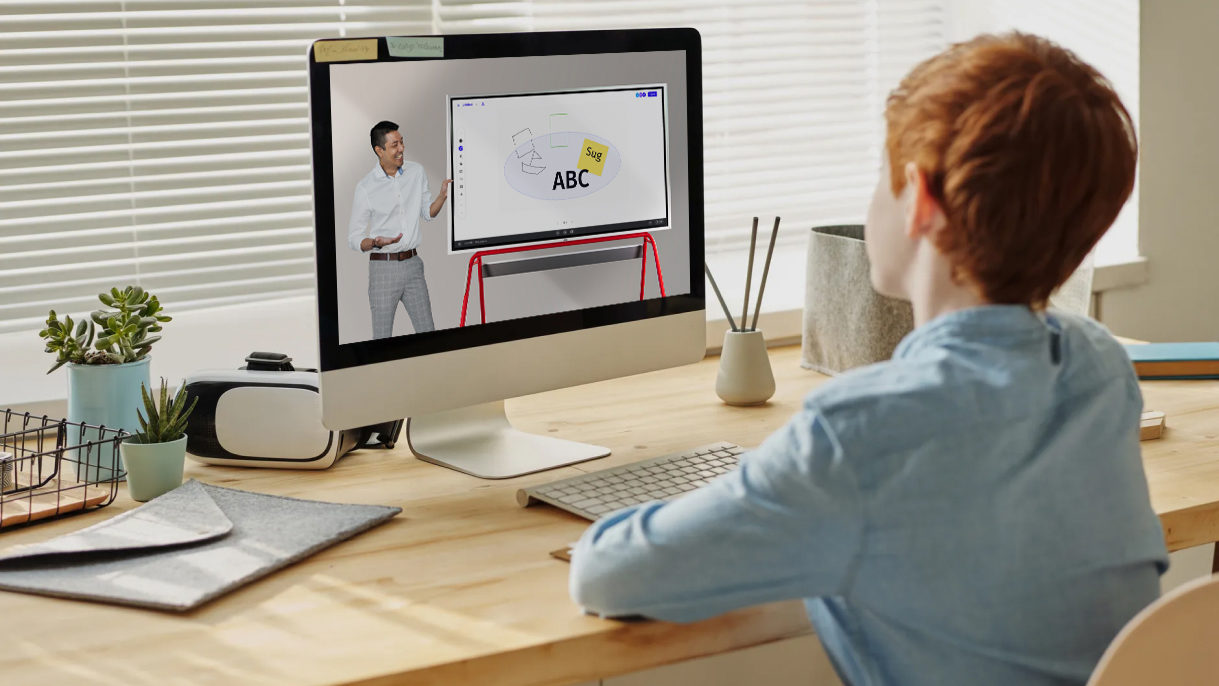
It happens in the middle of your best lesson.
You’ve got students hooked. You’re explaining a concept and the energy is right. You reach for the marker to draw it out — but you’re at the laptop, not the whiteboard. So you walk to the whiteboard, but the slide you need is on the projector behind you. You grab the remote, the HDMI cable falls out of the port, and by the time you’ve reconnected everything, half the class has checked out.
Nobody warned you that teaching in 2026 meant managing four devices at once.
This is where most conversations about digital teaching tools go wrong. They offer a longer list of apps — one more platform, one more subscription, one more thing to log into. But the real issue isn’t that you need better tools. The real issue is fragmented classroom workflows that interrupt teaching at exactly the wrong moments.
- Digital lesson delivery is a six-stage connected workflow: Plan → Present → Annotate → Collaborate → Save → Share — each stage flowing into the next without interruption.
- The biggest barrier to effective classroom technology isn't access or training — it's time lost managing disconnected systems during instruction.
- A connected digital classroom eliminates the 'application hop' by keeping all content — slides, video, annotation, and live markup — on one surface.
- Start by fixing the single most disruptive transition in your teaching day, not overhauling everything at once.
- The Save stage gives your classroom memory — turning one-time lessons into a reusable, shareable archive that compounds in value year over year.
This guide is built around a different idea: digital lesson delivery works when it works as one connected flow from the moment you start planning to the moment students review their notes at home. When your classroom doesn’t reset every time you switch tasks, you can do what you came here to do — teach.
As part of our broader resource on classroom collaboration tools for teachers, this guide drills into the specific workflow of lesson delivery: what it means, how to build it, and which tools support each stage without adding friction.
What Digital Lesson Delivery Actually Means for Today’s Teachers
Digital lesson delivery is the practice of using connected digital tools to plan, present, annotate, collaborate, capture, and distribute lesson content — within a single, continuous classroom workflow.
The definition matters because it’s commonly misunderstood. Digital lesson delivery is not:
-
Using a projector to display PowerPoint slides
-
Having students complete assignments on tablets
-
Running a quiz through an app at the end of class
Those are individual digital activities. Digital lesson delivery is a connected system where each stage flows into the next without interruption.
According to ISTE Standards for Educators, effective digital pedagogy is not about tool adoption but about redesigning learning environments — moving from passive content delivery to active, participatory instruction. The workflow is the pedagogy.
The gap most teachers face isn’t access to tools — it’s tool fragmentation. A 2023 EDUCAUSE report on teaching with technology found that the most significant barrier to effective technology use wasn’t training or budget: it was the time lost managing disconnected systems during instruction. Teachers are problem solvers. The problem to solve is workflow continuity.
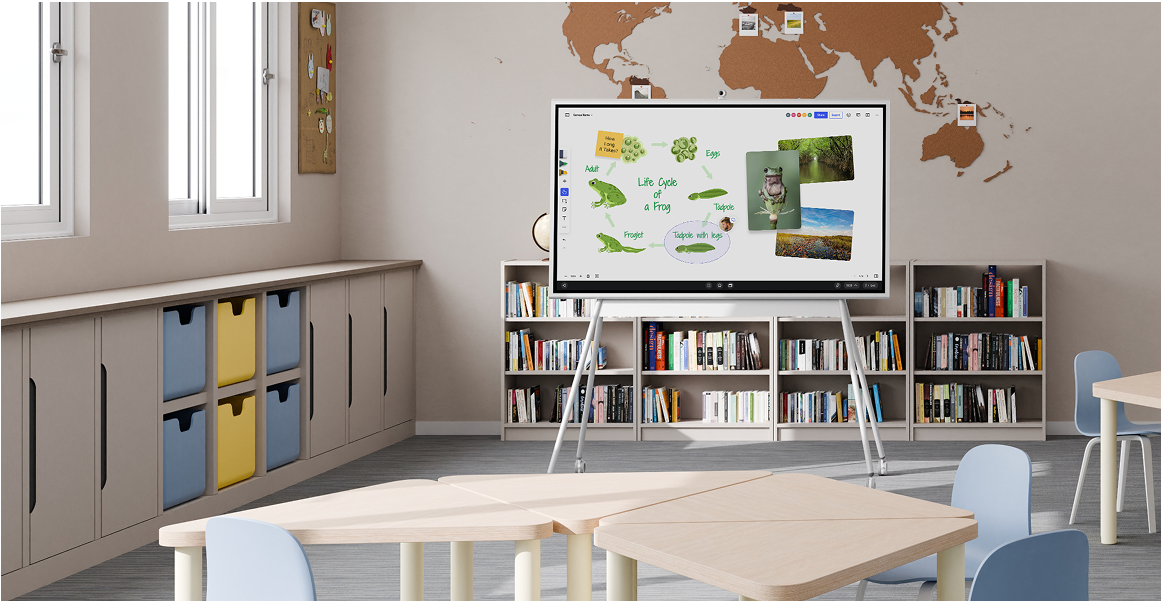
 Vibe higher education solution transforming classroom teaching and learning
The Digital Lesson Delivery Framework
The framework has six stages: Plan → Present → Annotate → Collaborate → Save → Share. Each stage maps to a real classroom moment. None of them work in isolation — the value is in how they connect.
Plan: Preparing Your Lesson at Home
The Scenario (Plan)
It’s Sunday evening. You’re building tomorrow’s lesson on the water cycle. You have a Google Slides deck, three videos saved to YouTube, a diagram you want to sketch live, and a set of discussion questions. They live in four different places. You’ll have to switch between them at least six times during the class.
What Planning Looks Like in a Connected Workflow
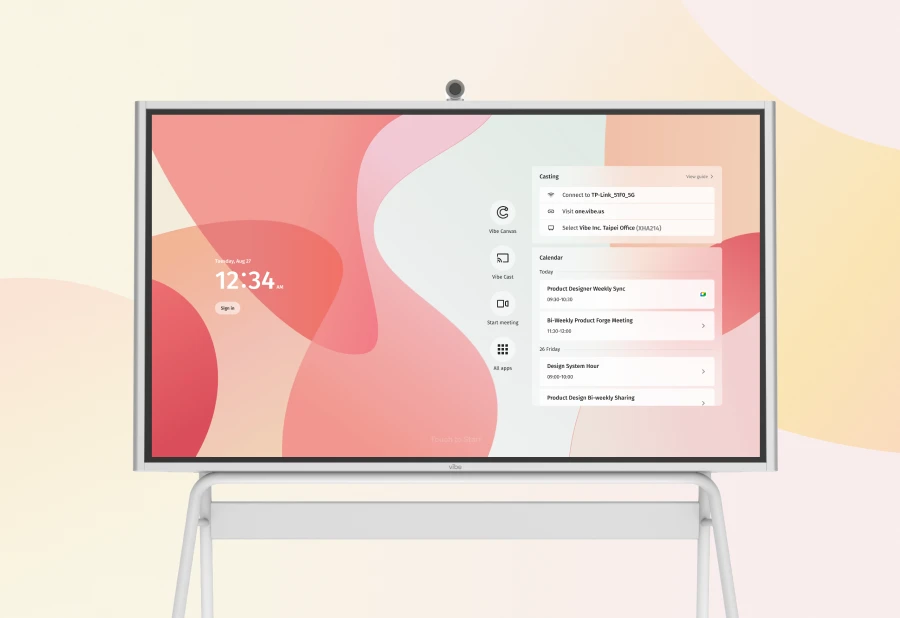
Planning in a digital lesson delivery system means building your lesson as a single workspace rather than a collection of separate files. Instead of "slides here, video link there, whiteboard moment somewhere in the middle," you organize everything — annotatable content, embedded media, blank whiteboard space for live sketching, discussion prompts — in one place before you ever walk into class.
Practically, this means choosing a central workspace tool that can hold multiple content types. Presentation files, browser tabs, whiteboard canvases, and annotation layers should all be accessible without switching applications. When your lesson is pre-loaded into a single workspace, tomorrow-morning setup becomes pressing one button instead of reconnecting cables, opening four apps, and praying the projector detects your laptop.
Digital tools for the Plan stage:
-
Lesson workspace platforms (e.g., Vibe Board’s canvas environment, Nearpod, Pear Deck)
-
Collaborative document tools with multimedia embedding (Google Slides with embedded video, Canva for Education)
-
Content repositories tied to your workspace (pre-saved whiteboard templates, subject-specific annotation layers)
Setting Up Reusable Lesson Templates
One planning habit that dramatically reduces setup time is building reusable lesson templates in your workspace tool. A template for a 50-minute discussion-based lesson might include: a warm-up prompt slide, a blank annotation canvas, a structured note section for student responses, and a closing reflection prompt. You customize for content; the structure is already there.
Present: Beyond Slides on a Projector
The Scenario (Present)
First period, Monday. You launch the lesson. Students look at the front of the room. You’ve got your slides up, but two minutes in you realize you need to show a video, then come back to the slide, then draw something, then show the video again. The transitions eat five minutes you don’t have.
What Presenting Looks Like in a Connected Workflow
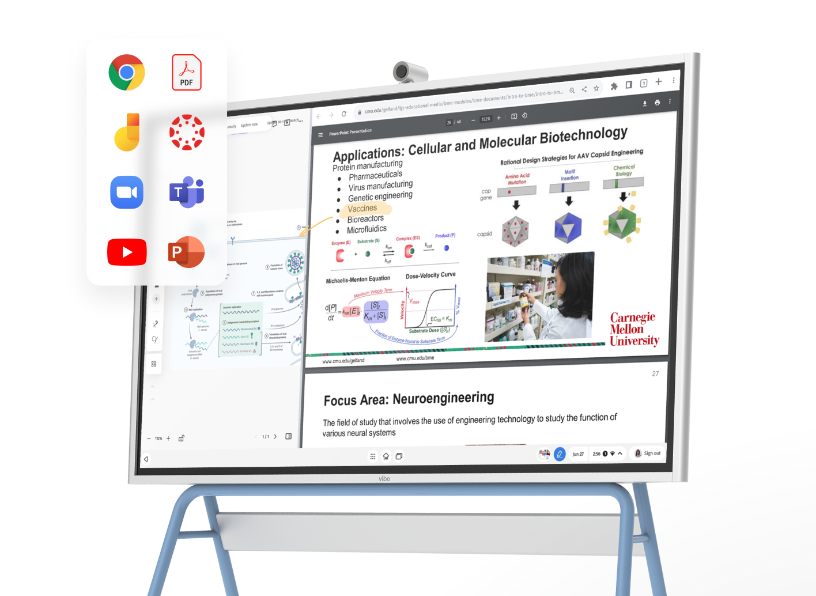
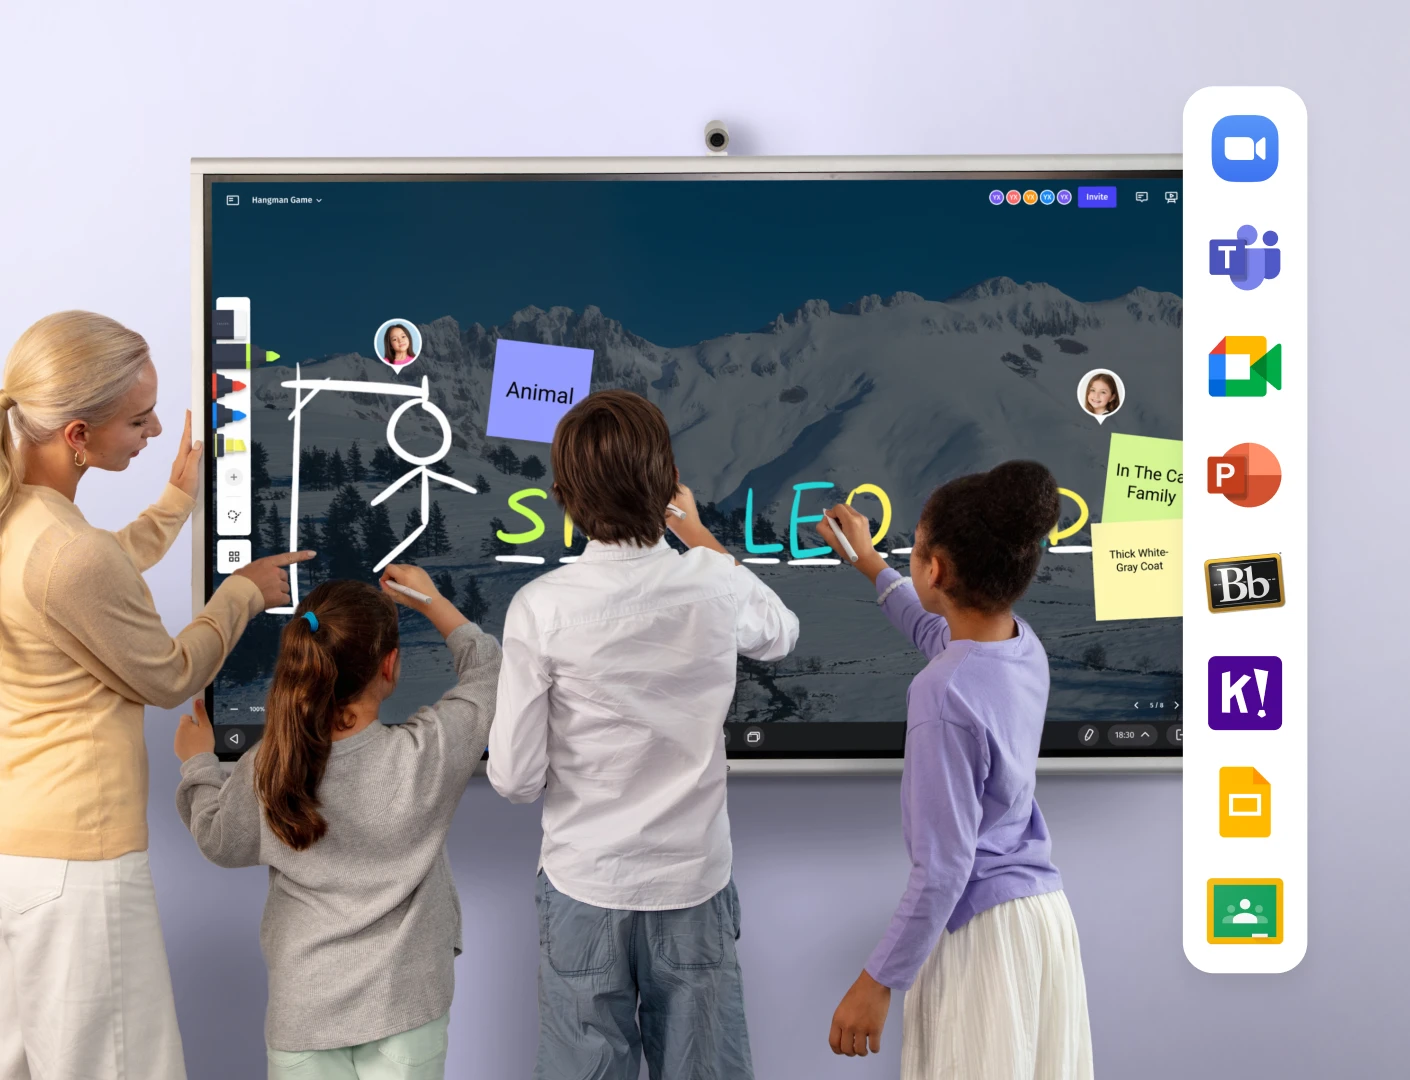
Presenting in a digital delivery framework means your display is a dynamic teaching surface, not a static slide viewer. The key difference: you don’t leave one application to enter another. Video, diagrams, annotations, and live markup all happen in the same visual environment.
According to the U.S. Department of Education’s guidance on technology in teaching and learning, effective digital presentation shifts instruction from "delivery" to "dialogue" — where the display becomes a thinking surface that responds to the class, not a backdrop to teacher monologue. This only works if the teacher can navigate fluidly without stopping to manage technology.
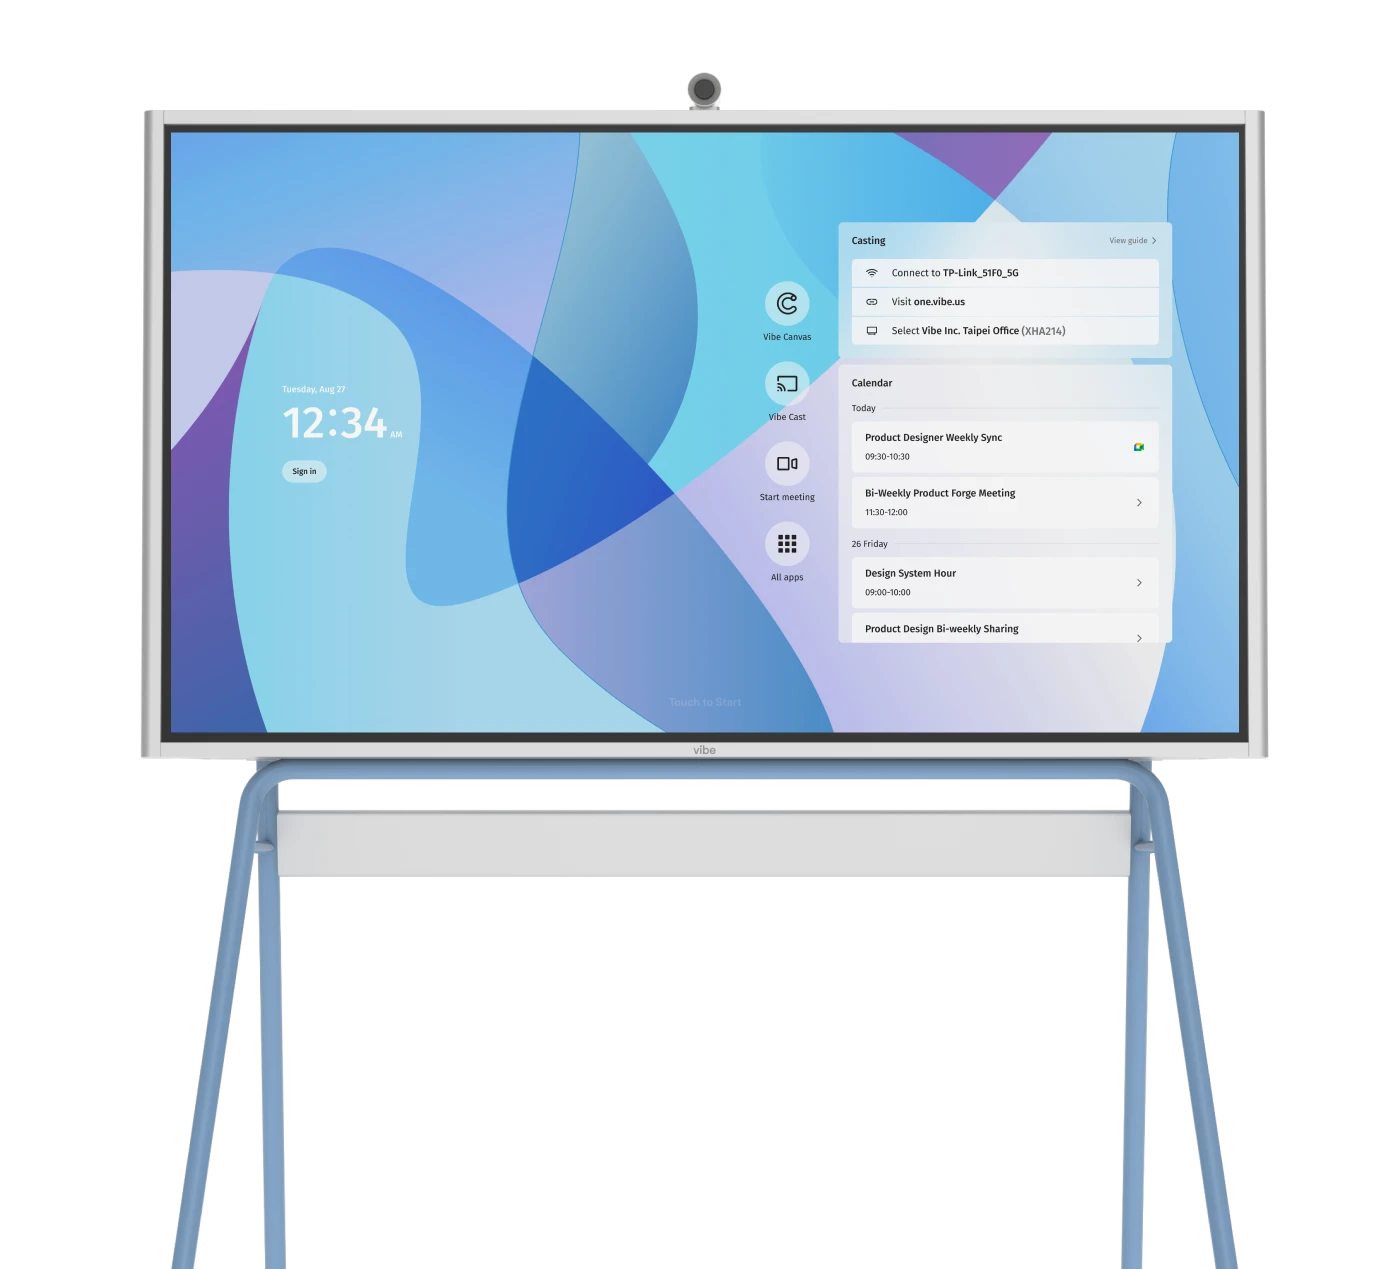
For teachers using a connected display like Vibe Board, the presenting stage means the lesson workspace built during planning appears exactly as prepared — no re-syncing, no cable switching, no HDMI negotiation. Tap to advance, swipe to bring in a new element, touch to draw. The screen responds to teaching intent instead of requiring technical workarounds.
Digital tools for the Present stage:
-
Interactive display boards with touch input (Vibe Board, SMART Board, Promethean)
-
Wireless screen mirroring (for teachers using laptops or tablets to drive the display)
-
Lesson delivery platforms with teacher-controlled pacing (Nearpod, Pear Deck, ClassPoint)
Managing Multi-Source Content Without Switching Apps
The most common presentation problem is the "application hop" — slides in one tool, video in another, browser tab in a third. A connected workflow solves this by embedding media directly into the lesson workspace before class. Embedded YouTube videos play within the canvas without opening a new application. Pre-annotated images appear on the same surface as the live whiteboard. The teacher never leaves the workspace to manage content.
Annotate: Live Markup During Explanation
The Scenario (Annotate)
You’re working through a math problem — quadratic equations, mid-lesson. You want to circle the discriminant, draw the parabola, label the roots, and cross out the step where students typically make an error. With a whiteboard, you lose what’s on the projector. With a projector, you can’t draw on the slide. You end up doing neither clearly.
What Annotating Looks Like in a Connected Workflow
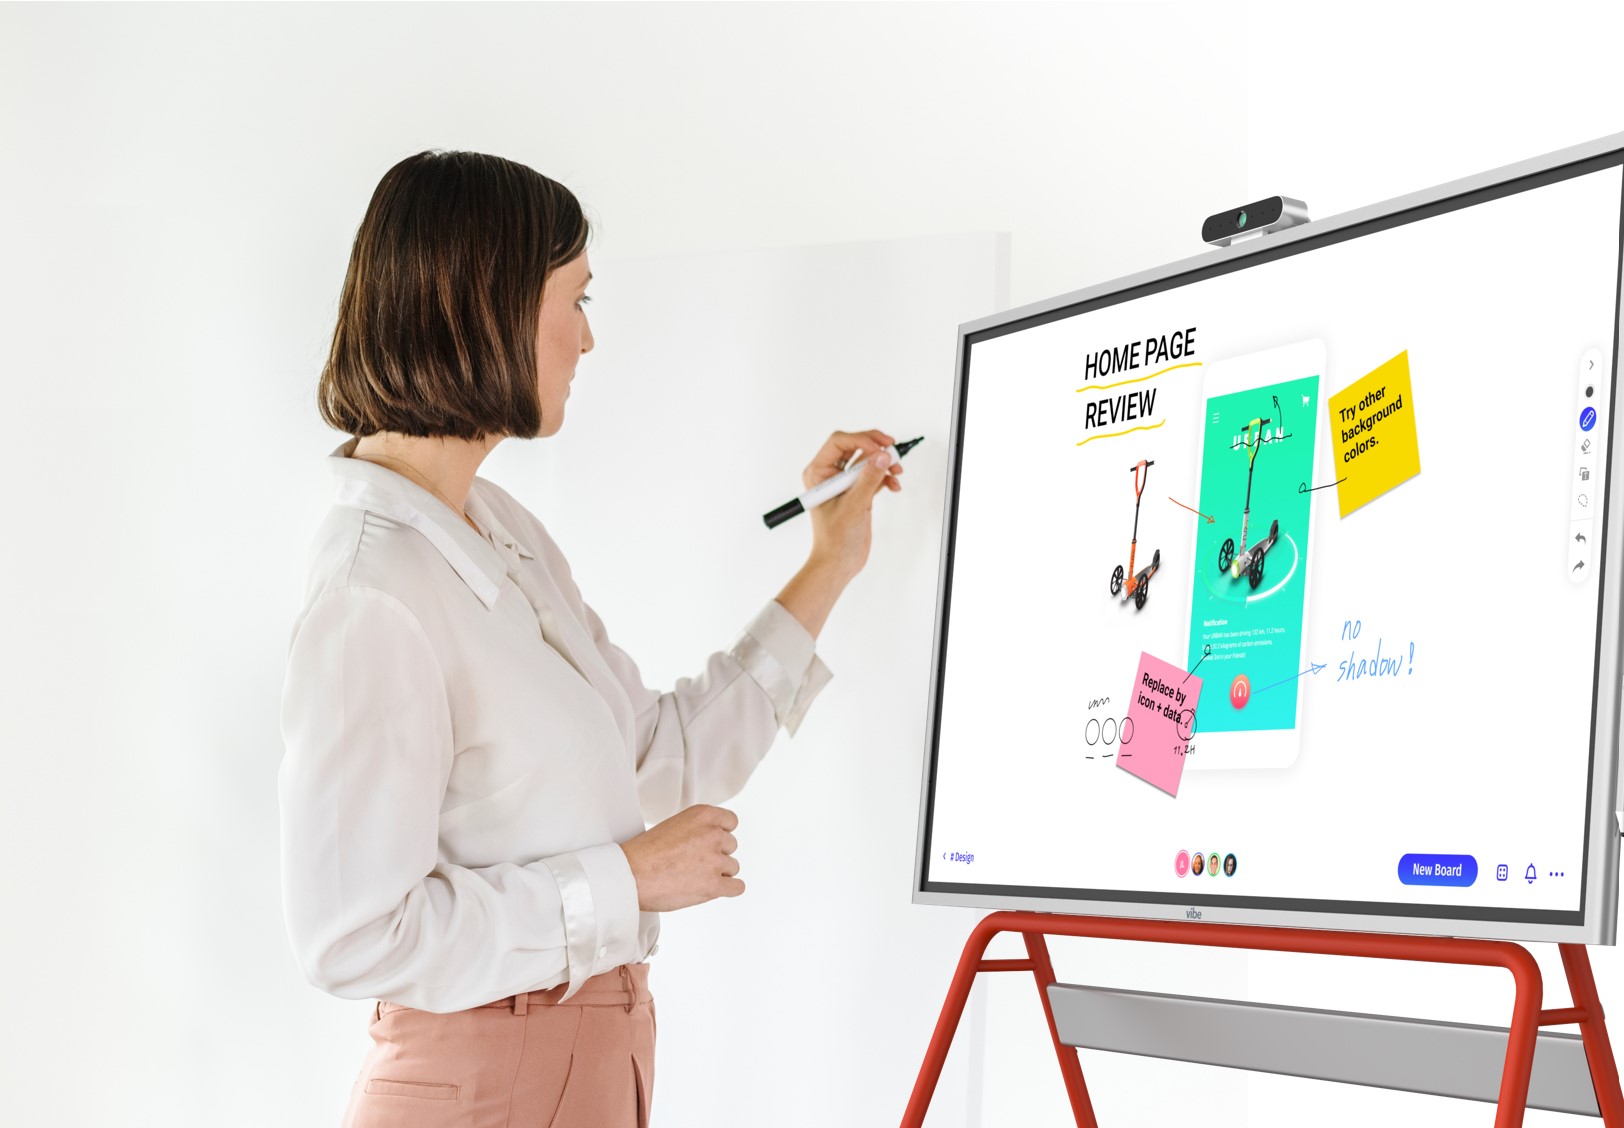
Annotation is the stage where a connected digital classroom most visibly outperforms a projector-plus-whiteboard setup. Real-time markup means writing, drawing, highlighting, and underlining directly on top of displayed content — a diagram, a document, a video frame — without switching surfaces.
Research published by RAND Corporation on improving teaching effectiveness found that explicit visual modeling — showing worked examples with visible teacher reasoning — significantly improves student comprehension in STEM subjects. Annotation tools make this visible in real time without the teacher having to stand at a separate board while students watch the slide on screen.
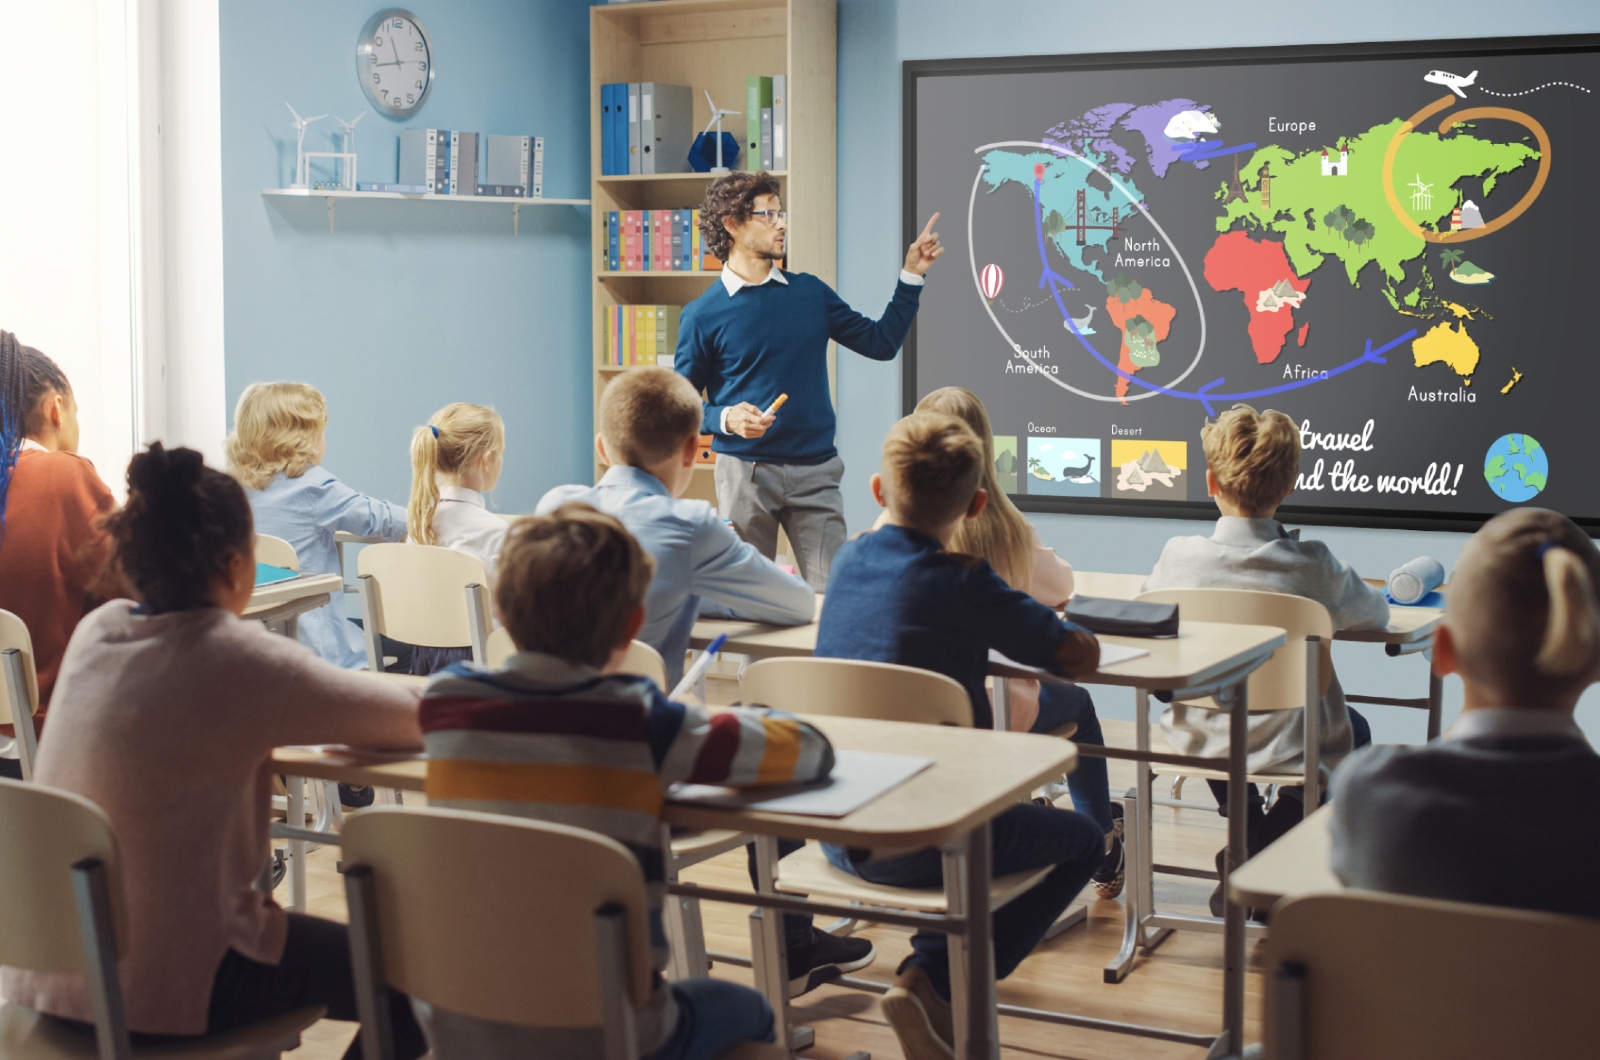
In practice, this looks like: you’re displaying a map during a history lesson and you draw migration routes directly on top of it. You’re analyzing a poem and you underline imagery in red, circle structure in blue, all live in front of the class. The annotation stays attached to the content, not lost on a whiteboard that gets erased. When students open the lesson recap later, they see the annotated version — not a blank slide.
Digital tools for the Annotate stage:
-
Interactive whiteboard displays with stylus or touch annotation (native to Vibe Board, SMART Board, Promethean ActivPanel)
-
In-app annotation layers (annotation tools built into Google Slides, Microsoft PowerPoint, or PDF viewers)
-
Screen annotation overlays (tools like Annotate.net or built-in iPad annotation for teachers not yet using a full interactive display)
Saving Annotations as Lesson Records
A critical annotation habit: don’t let the markup disappear at the end of class. Save annotated slides or canvases as a lesson record. Students who were absent, students who need to review, and teachers who want to reuse the worked example all benefit from a saved, annotated version. This connects directly into the Save stage — annotation and saving are designed to work together.
Collaborate: Student Interaction During Class
The Scenario (Collaborate)
Group activity, halfway through the lesson. You want groups to work on separate sections of a shared diagram — four groups, one screen. With a projector, one group presents while the others watch. With a printed worksheet, nothing is visible to the class. You want students working together visibly, in real time, on the shared canvas.
What Collaborating Looks Like in a Connected Workflow
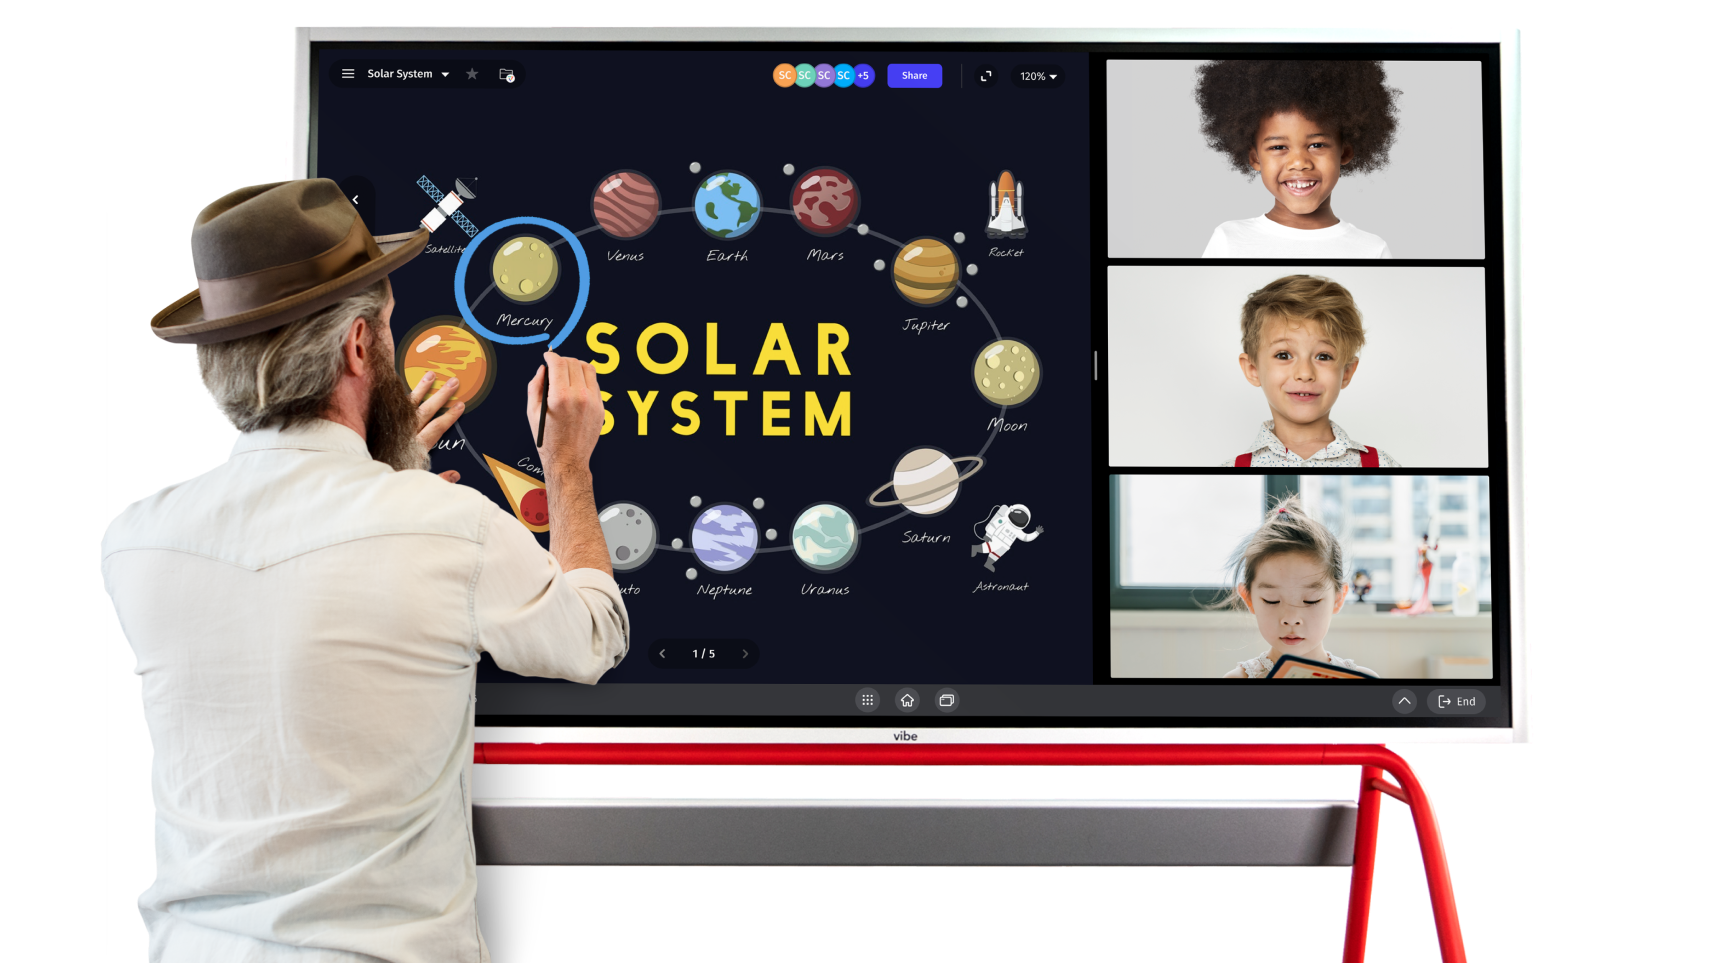
Collaboration in a digital lesson delivery framework means students actively contribute to the shared display, not just watch it. This happens in two forms: teacher-directed collaboration (teacher invites student input on the main screen) and peer collaboration (students work simultaneously on a shared digital space, visible to the class).
According to Edutopia’s research on classroom technology and engagement, participation-based technology — where students can directly interact with lesson content rather than passively observe — produces measurably higher engagement and better retention, particularly for visual and kinesthetic learners. The key word is "interact": passive display doesn’t create collaboration, interactive display does.
For related strategies on building collaborative classrooms, the guide on how to use an interactive whiteboard in the classroom covers participation techniques in detail.
Digital tools for the Collaborate stage:
-
Shared canvas collaboration (Vibe Board multi-user canvas, SMART Lumio, Jamboard replacement tools)
-
Student response systems (Kahoot!, Mentimeter, Poll Everywhere for live input visible on the teacher display)
-
Device-to-display mirroring (students casting from tablets or laptops to the shared screen)
Structuring Collaboration Without Losing Control
Effective digital collaboration isn’t "everyone edit the canvas at once." It’s structured turn-taking or defined zones. Assign each group a section of the canvas. Display a visible timer. Bring individual student work to the main display deliberately. The collaboration stage works best when the teacher controls the display as a conversation facilitator, not as a passive screen.
Save: Capturing the Lesson at the End of Class
The Scenario (Save)
End of period. The board is covered in annotations, student contributions, worked examples, and discussion notes. Tomorrow a different class needs the room. You take a photo on your phone — blurry, poorly lit, saved somewhere in a camera roll you’ll never find again. The lesson disappears.
What Saving Looks Like in a Connected Workflow
Saving in a digital workflow is not archiving — it’s continuity. Captured lesson content becomes the review material students access that evening, the starting point for tomorrow’s lesson, and the baseline you return to next year when you teach this unit again.
A connected digital classroom saves automatically or in one tap. The annotated canvas from today’s worked example, the student responses from the group activity, the video timestamp where the class paused to discuss — all of it stays in the lesson workspace, organized by date and topic, accessible from any device.
This single capability closes the gap that makes physical classrooms feel disposable. When students who missed class can access the annotated lesson record, when the substitute teacher tomorrow can see what the class covered, when you can pull up last year’s introduction to photosynthesis and annotate it differently — the classroom has memory. And memory is continuity.
Digital tools for the Save stage:
-
Automatic canvas saving (built into Vibe Board, SMART Board, Promethean ActivPanel)
-
Cloud-synced lesson libraries (Google Drive integration, OneDrive, direct export to LMS)
-
Lesson recording tools (screen + audio capture for absent students or async review)
Share: Distributing Lessons to Students
The Scenario (Share)
Homework assigned. Three students were absent. Two students want to review the annotated diagram from today’s problem walkthrough. One parent emails asking what was covered this week. With a traditional classroom, each of those requests requires you to recreate something by hand or memory. In a connected workflow, you’ve already saved it — sharing is one step.
What Sharing Looks Like in a Connected Workflow
Sharing is the downstream benefit of everything you saved. A completed lesson in a digital workflow isn’t a static file — it’s a record that contains the presentation, the live annotations, the student contributions, and any embedded media. Sharing that record to students via your LMS (Google Classroom, Canvas, Schoology) takes one export action.
For ideas on how this connects to student engagement and review practices outside the classroom, the guide on how digital whiteboards improve student engagement in K-12 covers the evidence for asynchronous review and participation tools.
The sharing stage also has a long-term benefit for teachers: over time, you build a library of saved, annotated, sharable lessons. Each year’s lesson informs the next. The work compounds. Instead of rebuilding from scratch every September, you’re refining and improving a lesson archive that gets better with each iteration.
Digital tools for the Share stage:
-
LMS export tools (direct push to Google Classroom, Canvas, Schoology)
-
Direct share links from the workspace (Vibe Board share links, SMART Lumio shared lessons)
-
PDF or image export of annotated canvases for students who need offline access
Essential Digital Tools by Lesson Stage
|
Stage |
Core Function Needed |
Tool Examples |
Connected-Classroom Advantage |
|---|---|---|---|
|
Plan |
Single workspace for multi-format content |
Vibe Board Canvas, Nearpod, Pear Deck |
Build once, present anywhere |
|
Present |
Dynamic display without app-switching |
Vibe Board, SMART Board, Promethean |
One touch surface for all content |
|
Annotate |
Live markup on top of any content |
Vibe Board stylus, SMART annotation, iPad overlay |
Annotations stay with the content |
|
Collaborate |
Students interact with the display |
Multi-user canvas, Kahoot!, Mentimeter |
Visible participation, not just response |
|
Save |
Automatic capture of lesson record |
Cloud sync, LMS integration, recording |
No manual archiving, always accessible |
|
Share |
One-step distribution to students |
Google Classroom export, direct share links |
Same file that was saved, ready to send |
Building Your Digital Lesson Workflow: Start Simple
The worst way to start with digital lesson delivery is to overhaul everything at once. The best way is to fix the single most disruptive friction point in your current teaching day and build outward from there.
Common starting patterns for different teaching contexts:
Pattern 1 — The Projector Teacher Moving to Interactive Display
You currently use a laptop + projector. Your main frustration: walking back to the laptop to advance slides while students watch you leave the board. Starting point: a wireless display solution or a full interactive board that replaces the laptop-to-projector pipeline. You get Annotate and Present immediately. Plan and Save follow naturally once the display is the center of the classroom.
Pattern 2 — The Whiteboard-First Teacher
You prefer physical writing but want to save your work and share it with students. Starting point: a digital whiteboard surface (Vibe Board or equivalent) that gives you the same tactile feel of writing but with auto-save and share built in. The physical workflow stays; the digital benefits layer on.
Pattern 3 — The Already-Digital Teacher Who Wants Fewer Tools
You’re using Google Slides, Google Classroom, a separate annotation app, a student response tool, and a screen recorder. Your frustration: five apps, five logins, five things that can break mid-class. Starting point: consolidate to one workspace platform that covers 3-4 of those functions natively. The goal isn’t more tools — it’s fewer, better-connected ones.
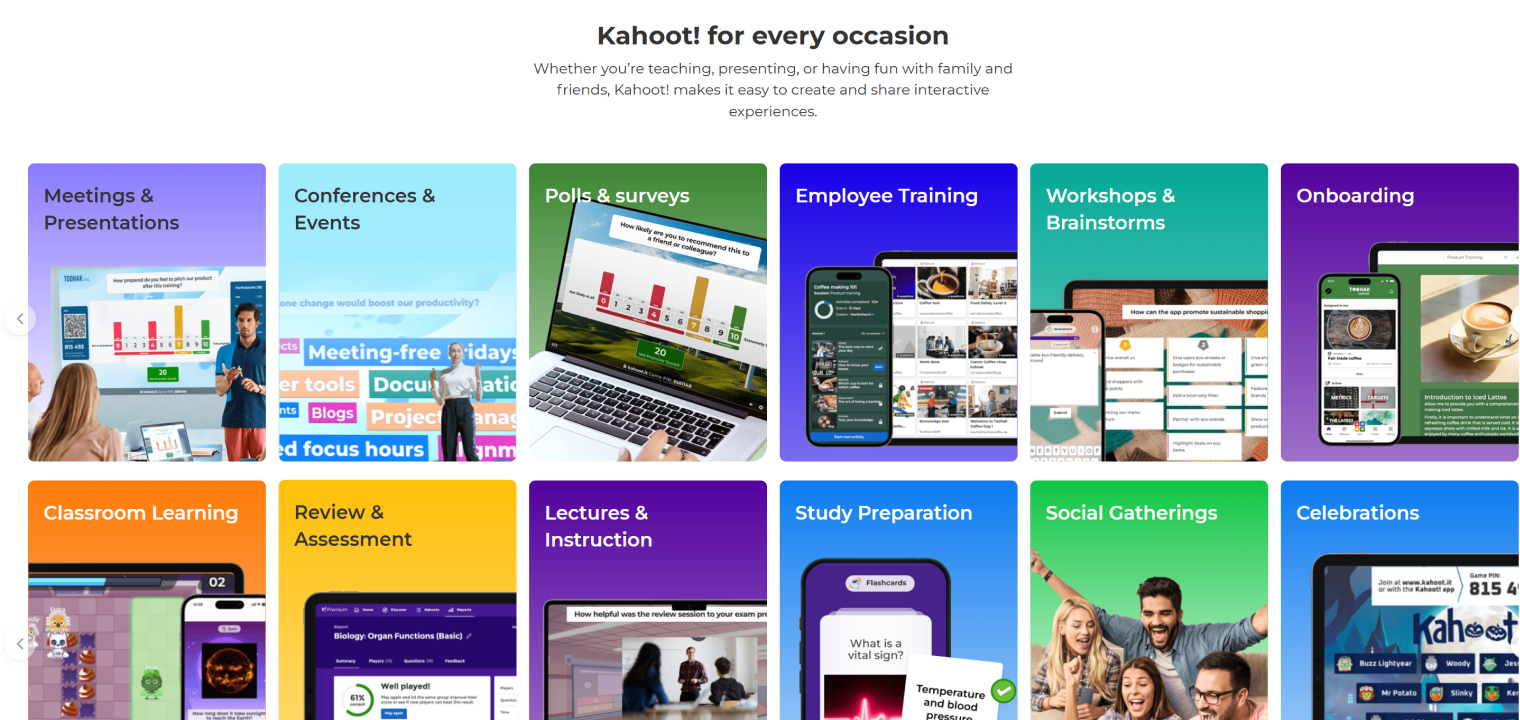 Kahoot! used for classroom learning and student engagement during interactive lesson activities
Subject-Specific Examples
STEM: Science and Math
In STEM subjects, the Annotate stage carries the most weight. Annotating worked examples live — circling the error in a student’s equation, drawing the force vectors on a diagram, highlighting the inflection point on a graph — is how teachers make thinking visible. A connected workflow means the annotated worked example is saved and shareable, not erased at the end of class. For lab-based science lessons, the Save stage matters enormously: capturing the class’s shared observations and hypotheses as a live document that students can access during the lab review.
Humanities: English, History, Social Studies
In humanities, the Collaborate and Share stages create the most value. Discussion-based classes benefit from a shared visible record: student contributions surfaced on the main display, annotated primary sources, and class notes that become the foundation for essay preparation. When a class annotates a poem or a historical document together — and that annotated version is saved and distributed — every student leaves with the same working document, not just the notes they happened to take.
Arts: Visual Art, Music, Drama
In arts subjects, the Plan and Present stages are foundational. Arts teachers often work with reference images, performance recordings, notation, and student-created work simultaneously. A connected classroom display can hold a reference painting alongside a student’s work-in-progress, or display sheet music while projecting a live performance recording. The canvas becomes a studio wall that adjusts in real time rather than a static display.
Troubleshooting Common Challenges
"The display isn’t connecting to my laptop mid-lesson."
This is a signal that the display is still in a dependent relationship with the laptop — the old projector-plus-laptop model. A connected classroom eliminates this by making the interactive display the primary device, not a screen for a laptop. Your lesson lives on the board’s workspace, not on the laptop’s desktop.
"Students are distracted by the technology, not focused on the lesson."
Technology-as-distraction usually means the tool is visible as technology — students see the interface, not the content. When the display behaves like a natural teaching surface (you write on it, tap it, annotate it), it becomes invisible as technology. The goal is not novelty; it’s fluency.
"I don’t have time to learn a new system."
The right framework for this: you’re not learning a new system, you’re learning one fewer transition. Every time a connection fails, a tab needs to reload, or you walk back to the laptop, that’s transition time. The learning investment in a connected workflow pays back in class time recovered within the first month of use.
"My school has inconsistent internet."
Connection-dependent tools fail in classrooms with unreliable WiFi. Choose workspace tools with offline capability — the lesson remains functional even if cloud sync is delayed. Build your workflow assuming the internet may not be reliable, and use cloud sync as a backup, not a requirement.
"I tried a smart board once and it was too complicated."
First-generation interactive boards had steep learning curves because they relied on proprietary software that required training. Current-generation interactive displays — including Vibe Board — are designed as direct-touch surfaces running familiar apps (Android-based, compatible with Google Workspace and Office 365). The question isn’t whether you can learn it; it’s whether the board is designed to match how you already teach.
FAQ
Q: What is digital lesson delivery?
Digital lesson delivery is a connected teaching workflow that uses digital tools to plan, present, annotate, collaborate, save, and share lesson content within a single classroom environment. Unlike using individual apps for separate tasks, a digital lesson delivery system connects each stage of a lesson into a continuous flow — so teachers can teach without stopping to manage technology between activities.
Q: What digital teaching tools do teachers actually need?
The essential digital teaching tools are those that support the core stages of a lesson without requiring teachers to switch between multiple applications. These include: an interactive display or digital whiteboard for presenting and annotating; a collaborative canvas or student response tool for participation; a cloud-synced workspace for saving lesson records; and an LMS integration for sharing content with students. The number of tools matters less than how well they connect. A single interactive display platform that handles presentation, annotation, and saving reduces the need for four separate tools.
Q: What is a digital classroom?
A digital classroom is a learning environment where the primary teaching and collaboration surfaces are digital — typically centered on an interactive display or digital whiteboard — connected to student devices and a shared workspace. The defining feature of an effective digital classroom is not the presence of devices but the continuity of the workflow: teachers can move from presenting to drawing to student collaboration to review without stopping to manage technology.
Q: How do I start using digital teaching tools without overwhelming myself?
Start with the single most disruptive transition in your current teaching day — the moment where you lose the most time switching between tools — and replace it with a connected digital solution. For most teachers, this is the projector-to-whiteboard switch mid-lesson. Solving that one transition builds the foundation for adding other stages of the digital delivery framework over time. You don’t need to overhaul the entire classroom at once.
Q: What’s the difference between a digital whiteboard and a smart board?
A digital whiteboard is a software tool — typically cloud-based — that provides a collaborative canvas for writing, drawing, and annotation. A smart board (or interactive whiteboard) is hardware: a large touch-sensitive display that serves as both the projection surface and the annotation tool. In a connected classroom workflow, the hardware (interactive display) and software (digital whiteboard application) work together: the board provides the touch surface, and the whiteboard software provides the persistent, shareable canvas. See how digital whiteboards improve student engagement for more detail on the distinction and the evidence for each.
Q: Can I use digital lesson delivery tools if my school has slow internet?
Yes. The most important criterion is choosing tools with offline functionality — the ability to write, annotate, and present without an active internet connection, with cloud sync happening when connectivity is restored. Interactive displays running Android-based platforms (like Vibe Board) store content locally and sync to the cloud asynchronously. This means your lesson remains functional even if the school WiFi is unreliable during class.
Q: How does an interactive display replace a projector and whiteboard?
An interactive display replaces the projector-plus-whiteboard combination by consolidating both functions into a single touch surface. The display shows content (replacing the projector), accepts direct touch and stylus input (replacing the whiteboard), and saves everything automatically (replacing the photograph of a whiteboard at the end of class). The workflow benefit is not just fewer devices — it’s the elimination of the transitions between devices that interrupt teaching. For a detailed comparison, see how to use an interactive whiteboard in your classroom.
Q: What makes a classroom "collaboration-ready" for digital lessons?
A collaboration-ready digital classroom has three components: a central interactive display that can accept input from multiple sources; student devices (tablets, laptops, or phones) that can connect to and interact with the display; and a shared workspace platform that persists across class sessions. The collaboration doesn’t happen because tools are present — it happens because the tools are connected. When a student can contribute to the shared canvas from their seat, when the teacher can bring any student’s work to the front of the room in one tap, and when the day’s collaborative work is saved and accessible for review — that’s a collaboration-ready classroom.