
The Real Problem: It's Not Too Many Tools
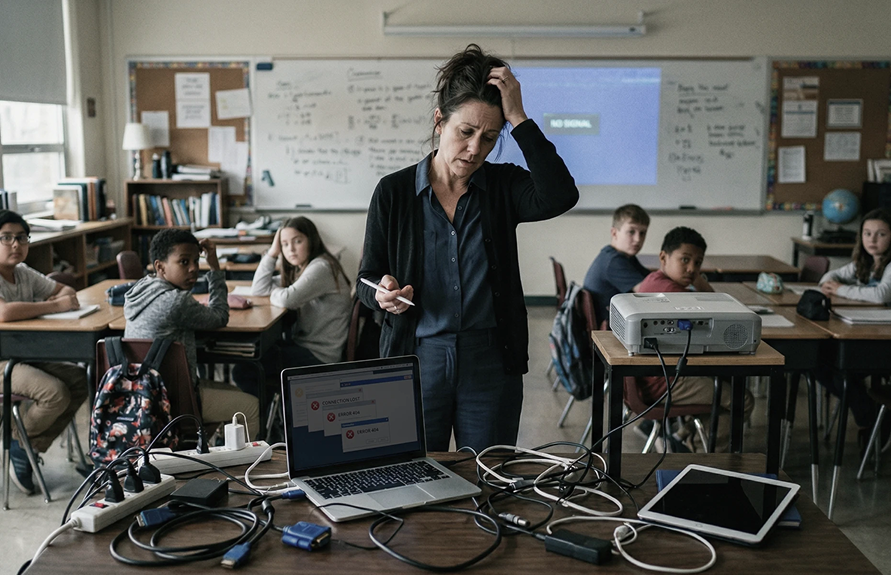
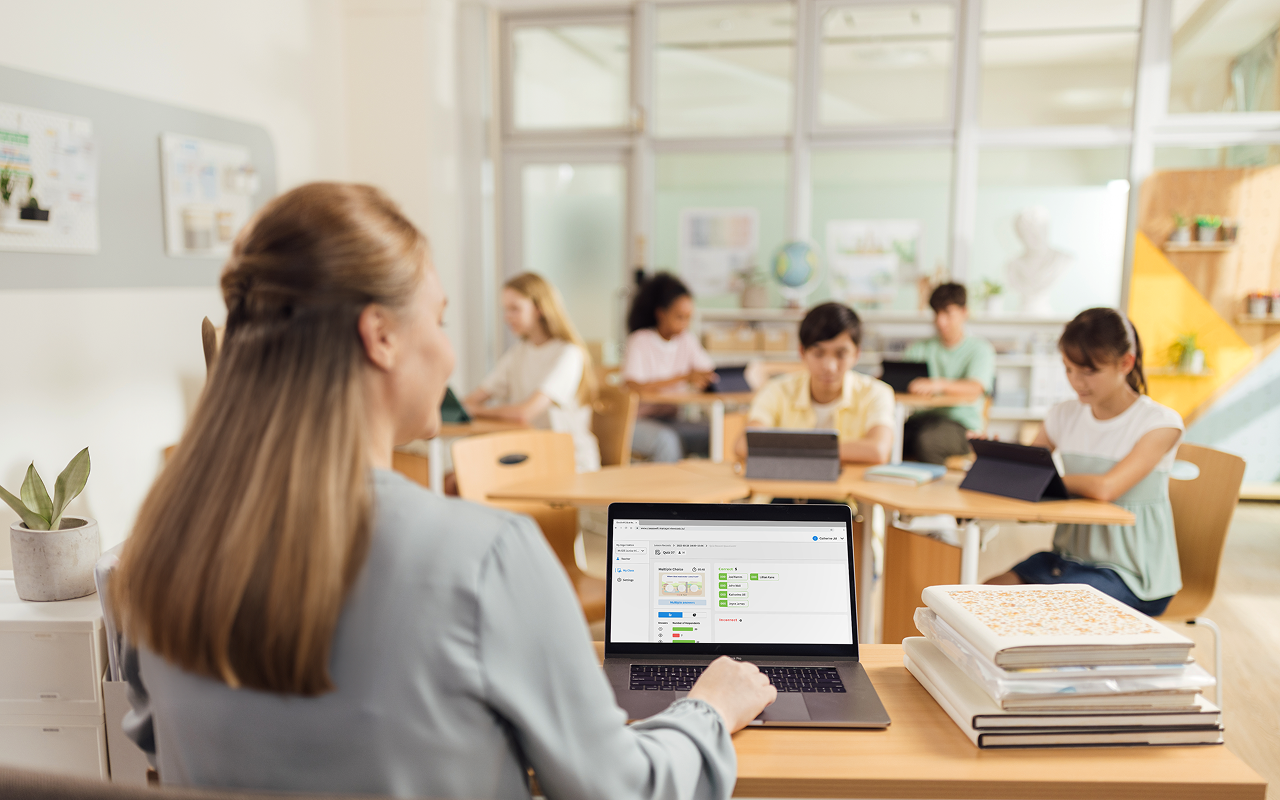
Picture this: you're mid-lesson, explaining a complex graph on your laptop. A student asks a question that deserves a visual answer. You reach for the dry-erase marker, sketch something on the whiteboard, then walk back to your laptop to pull up the next slide. By the time you've reconnected the thread, half the class has lost the moment — and three minutes have evaporated.
Most teachers have lived this exact scene. The assumption is that the problem is having too many devices or apps. The real issue isn't having too many tools — it's that they don't work together. A projector, a laptop, a physical whiteboard, and a student polling app are each doing their job in isolation. None of them know what the others are showing. None of them save to the same place. The teacher is the only thing connecting all of them, and that mental overhead costs instruction time every single lesson.
That fragmentation is the classroom technology problem teachers face in 2026. Not a lack of tools — a lack of workflow continuity between them.
- The real classroom tech problem is fragmentation, not having too many tools.
- A classroom collaboration environment unifies presenting, annotating, saving, and sharing in one connected workspace.
- Interactive displays are the hardware hub that makes every other tool work together.
- Teachers who evaluate tools by lesson-flow impact — not features — choose better.
- Starting with one pilot display is the most practical path to a fully connected classroom.
What Is a Classroom Collaboration Environment?
A classroom collaboration environment is a single, connected workspace where teachers can present, annotate, collaborate with students, save work, and share materials — all without switching between devices or apps during a lesson.
This is the defining concept for how modern classroom technology should work. It differs from simply having "more tools" because the emphasis is on connection, not count. A classroom collaboration environment has four characteristics:
-
One physical hub — typically an interactive display at the front of the room — that serves as the command center for everything happening in class
-
Seamless transitions — moving from presenting a slide to annotating it to pulling up a student's work requires a tap, not a workflow reset
-
Persistent context — notes, annotations, and shared work are saved and accessible, not erased when class ends
-
Student-facing participation — students can interact with content in real time, not just observe
The reason this framing matters: without a connected environment, teachers end up managing technology instead of teaching. According to the EdWeek Research Center, teachers spend an average of 6–8 minutes per class period on technology transitions and setup — time that compounds across a full teaching day and school year. A classroom collaboration environment eliminates most of those transitions by design.
Why Classroom Collaboration Tools Matter for K-12 Teachers
Classroom collaboration tools are not about making lessons more "digital." They are about protecting instruction time. When the tools work together, teachers stay in teaching mode. When they don't, teachers become AV coordinators.
The Instruction Time Argument
According to the Project Tomorrow Speak Up survey, 68% of teachers report that technology setup and mid-lesson troubleshooting regularly interrupts their teaching. That's not a hardware problem or a software problem — it's an architecture problem. Individual tools were not designed to hand off to each other. A slide deck doesn't know you want to annotate it. A whiteboard app doesn't know what slide you're on. A student polling tool doesn't know what question you just asked aloud.
The solution is not to remove tools. It's to connect them inside a unified environment so transitions happen invisibly, and teachers can stay focused on the lesson rather than the logistics.
The Student Engagement Argument
RAND Corporation research on K-12 technology effectiveness finds that student engagement increases significantly when students have active roles in lessons — not just watching content, but interacting with it. Collaborative tools that let students annotate shared content, respond to questions in real time, or contribute to a shared workspace transform observation into participation. That shift requires the right tools to be connected and ready, not scattered across apps a teacher has to manually orchestrate.

The Teacher Confidence Argument
ISTE (International Society for Technology in Education) notes that teacher confidence with technology is a leading predictor of how frequently those tools get used in class. Teachers who struggle with tool-switching use technology less — and students lose the engagement benefits as a result. A classroom collaboration environment lowers the cognitive cost of using technology, which raises confidence and consistency.
Types of Classroom Collaboration Tools
Not every classroom needs every category of tool. But understanding what each category does — and how it connects to the others — is essential before choosing what to deploy. The goal of any classroom collaboration stack is seamless transitions between these tool types during a lesson.
Interactive Whiteboards and Displays: The Hub
An interactive display is the hardware anchor of a classroom collaboration environment. It replaces the combination of a projector, physical whiteboard, and standalone laptop by combining all three functions in one touch-enabled surface. Teachers can write directly on it, pull up any app, mirror student devices, and save the entire session when class ends.

What distinguishes an interactive display from a projector
A projector throws an image onto a surface you can write on but cannot interact with. You need a separate computer to control what's on screen, a physical whiteboard to draw on, and a way to save your notes before you erase. An interactive display eliminates all three dependencies: you write directly on the screen, control apps with your finger, and save automatically.
The workflow comparison is not about image quality — it's about how many times you have to stop and switch contexts during a lesson. For a full breakdown, see Interactive Whiteboard vs Projector: Which Is Better for Teaching?
What to look for in 2026
The market has consolidated around 65″–86″ interactive flat panels running Android or Windows, with touch response measured in milliseconds rather than noticeable lag. Key teacher-relevant features include:
-
Multi-touch annotation (more than one student can write simultaneously)
-
Screen-sharing from student devices without cables
-
Built-in whiteboard software that saves sessions as files
-
App access without additional dongles or computers
For a side-by-side comparison of the leading brands, see Best Interactive Whiteboards for Teachers in 2026.
Student Response Systems
Student response systems are tools that let every student in the room respond to a question simultaneously — not just the one student you called on. They transform passive observation into active participation, and they give teachers real-time data on class understanding without waiting for a quiz.
The two formats: clickers and software
Traditional student response tools used physical "clickers" — handheld devices each student used to submit multiple-choice answers. Modern equivalents are almost entirely software-based: Kahoot, Nearpod, Pear Deck, Poll Everywhere, and Formative all run on devices students already carry. The teacher poses a question; students answer on their phones, tablets, or Chromebooks; the results appear on the interactive display in seconds.
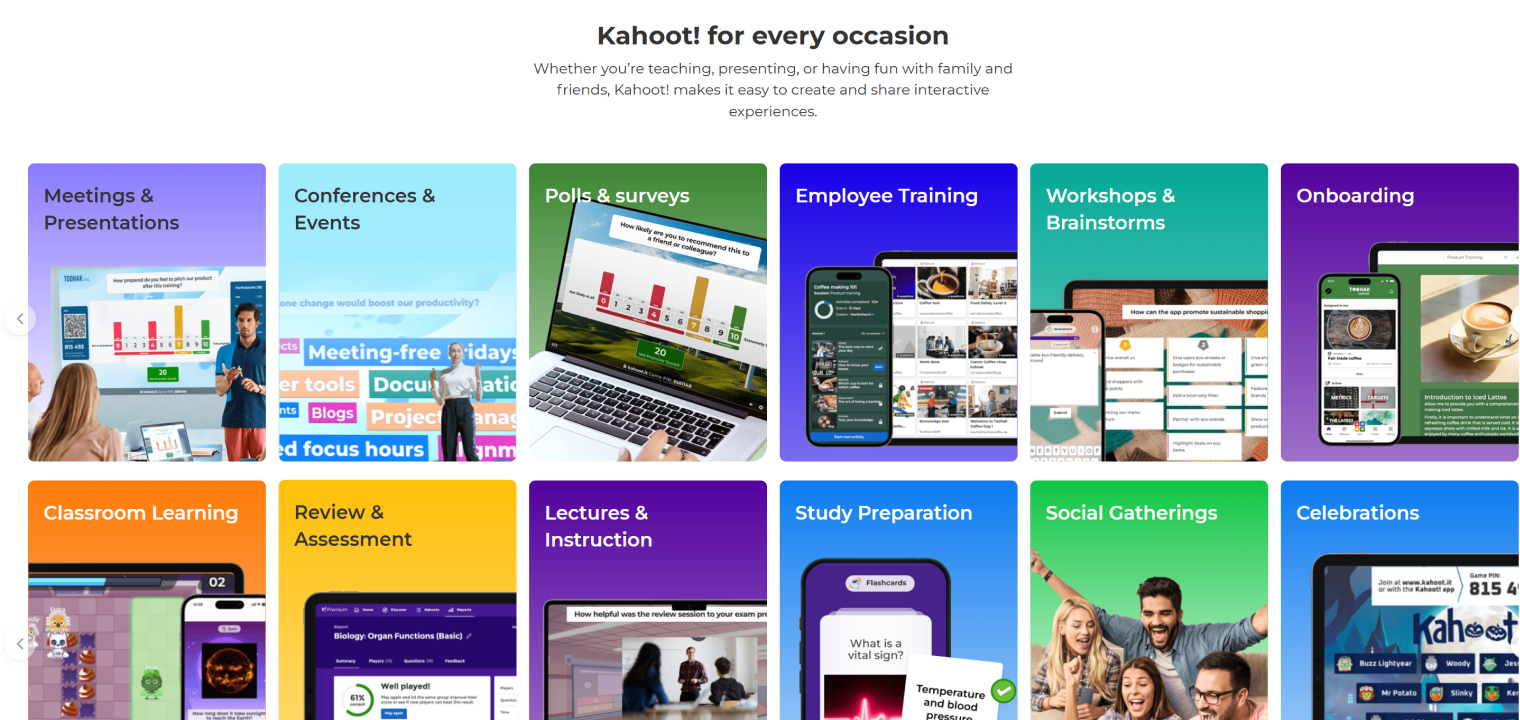 Kahoot student response system used in classroom learning and interactive teaching
How they connect to the collaboration environment
The critical question is not whether a student response tool works independently — most do. The question is whether it integrates with the interactive display so results appear where the class is already looking, and so the teacher does not have to switch apps or re-explain context. The most effective classroom setups embed polling and response tools directly into the lesson flow, so a teacher can pause a slide, ask a question, see results, and annotate the discussion — all without stepping away from the display. See How Digital Whiteboards Improve Student Engagement in K-12 Classrooms for classroom evidence on response system integration.
Digital Collaboration Platforms
Digital collaboration platforms are the software layer where students and teachers work on shared content simultaneously — Google Slides, Jamboard (now Google Workspace's collaborative canvas), Miro, Nearpod, and similar tools that create a live shared workspace.
Synchronous vs asynchronous collaboration
During a lesson (synchronous), collaboration platforms let students contribute to a shared document or canvas in real time while the teacher guides the activity. After class (asynchronous), the same platforms hold the work for review, extension, or continuation in the next session. A classroom collaboration environment uses both modes — but the synchronous experience during the lesson is what changes the energy in the room.

What breaks collaboration platforms in practice
The most common failure mode for digital collaboration platforms is the login. A teacher sets up a Jamboard activity, tells students to open their devices and go to the link, and spends three to five minutes waiting for students to navigate there, log in, and join the session. That friction erases the engagement benefit before the activity starts. Tools that integrate directly with the interactive display — so the teacher can launch the shared activity from the display and students can join with a QR code or one-tap — dramatically reduce this friction. The activity starts in thirty seconds instead of four minutes.
Content Sharing and Screen Mirroring
Content sharing and screen mirroring tools let any device in the room send its screen to the main display — without cables, adapters, or account logins. This is the tool type teachers most often overlook, and the one that produces the most visible mid-lesson interruptions when it fails.
Why this category matters for workflow continuity
Consider the classroom moment where a student produces excellent work you want to share with the class. In a projector-and-laptop setup, you have to ask the student to email it to you, open your email, download the file, open it in the right app, and then display it — while the class waits. With wireless screen mirroring built into the interactive display, the student taps a button on their device and their screen appears on the class display in seconds. You then annotate it, discuss it, and save it — all without interrupting the lesson's momentum.
Tools to know
|
Tool |
Platform |
Key Strength |
|---|---|---|
|
AirPlay |
Apple devices |
Seamless for iOS/macOS ecosystems |
|
Google Cast |
Android/Chrome |
Native on Chromebooks, no setup required |
|
Miracast |
Windows |
Built into Windows 10/11 without extra apps |
|
Vibe built-in casting |
Any device |
Works across platforms; no driver install |
The differentiator for classroom use is reliability and simplicity: a tool that works on the first attempt, every time, without a driver install or IT ticket.
Classroom Management Tools
Classroom management tools are software that let teachers monitor student device activity, limit access to specific apps during a lesson, and guide the class to the right content without walking to each desk. They close the gap between "I told students to open this" and "students are actually looking at this."
The difference between management and surveillance
There is a meaningful distinction between using classroom management tools to guide learning and using them for surveillance. The best classroom management software is designed around the teacher's workflow: lock all devices to the current activity, push the next resource to every screen, or allow open browsing during a research period. These are instructional levers, not monitoring systems. Tools like Dyknow, LanSchool, and GoGuardian's teacher console serve this purpose when used as learning tools rather than compliance tools.
How it connects to the collaboration environment
Classroom management tools work best when they integrate with the interactive display — so the teacher can push content from the front of the room, see a thumbnail of what every student is doing, and redirect the class to the next activity from one interface. When classroom management is a separate login on a separate device, it becomes one more thing to manage rather than a tool that simplifies management.
How to Evaluate Classroom Collaboration Tools: Teacher Criteria
Most technology evaluation frameworks are written for IT departments: Total Cost of Ownership, deployment complexity, compa
tibility matrices. Teachers need a different evaluation framework — one built around what happens during a lesson.
Evaluation Framework: The Lesson Flow Test
Before adding any tool to your classroom, run it through these five questions:
-
Can I use this without stopping to explain it? If students need a three-minute tutorial before they can participate in the activity, the tool will eat the benefit it provides. The best classroom collaboration tools are learnable in the first interaction.
-
Does it integrate with the tools I already use? A student response tool that requires a separate login, a separate screen, and a separate save location is adding friction, not reducing it. Ask: where do the results go? Can I see them on my main display? Can I annotate them?
-
What happens when it fails? Every tool fails. The question is whether failure is recoverable in thirty seconds or whether it collapses the lesson. Prefer tools with obvious fallbacks and offline modes.
-
Does it save in a format I can reuse? Session notes, student work, and annotations that live only in the tool's ecosystem are a trap. Look for tools that export to PDF, Google Drive, or your LMS.
-
Does my district already have a license? Before requesting a new tool, check: is this already available? Many schools have Google Workspace for Education or Microsoft 365 licenses that include collaboration features teachers have never activated.
 A lecturer is using Vibe Board for interactive medical instruction
The Workflow Comparison Test
Here is the practical workflow comparison for evaluating an interactive display as your collaboration hub:
|
Workflow Step |
Projector + Laptop + Whiteboard |
Interactive Display (Vibe Board) |
|---|---|---|
|
Start lesson |
Turn on projector, open laptop, connect HDMI cable |
Wake display, tap lesson file |
|
Annotate a slide |
Switch to whiteboard, draw, lose slide context |
Tap annotate on slide directly |
|
Show student work |
Student emails file, teacher opens, displays |
Student casts screen, teacher annotates |
|
Save session notes |
Photo of whiteboard with phone |
Auto-saved to cloud file |
|
Share lesson materials |
Export separately from each tool |
Share one link from session |
|
End of lesson reset |
Erase whiteboard, close apps, stow cables |
Lock screen |
The comparison is not about which setup is technically superior. It is about which one lets the lesson keep moving. For a detailed comparison of specific board hardware, see Vibe Board vs SMART Board vs Promethean: A Teacher's Guide and Smart Board Pricing Guide for Schools (2026).
The Classroom Collaboration Technology Stack for 2026
A complete classroom collaboration environment has three layers. Understanding the layers helps you identify which one is your current weak point.
Hardware Layer: The Interactive Display as Hub
The interactive display is the foundation. Every other tool in the stack connects to or through it. Without a capable display, collaboration tools remain fragmented — they work, but not together.
In 2026, the baseline classroom-capable interactive display has:
-
65″–86″ 4K touchscreen
-
Android 11 or higher (for app access without a connected laptop)
-
Dual-pen and multi-touch support
-
Built-in wireless casting (AirPlay, Miracast, or equivalent)
-
Built-in whiteboard software with cloud save
-
USB-C passthrough for a connected laptop (so teachers who prefer laptop-based lessons don't lose their workflow)
Optional but increasingly standard: built-in cameras and microphones for hybrid teaching days, where one group of students is in the room and another joins remotely. This capability matters for snow days, field trips, and the school-to-home continuity that became standard practice after 2020.
 A lab-style classroom setup with interactive display
The Vibe Board product page is designed specifically as a classroom collaboration hub: it runs a full Android environment, supports wireless casting from any student device, includes a built-in digital whiteboard that saves sessions to cloud, and allows teachers to access any app without connecting a separate laptop.
Software Layer: Apps and Integrations
The software layer is the set of apps your class runs during lessons. The right software stack is small, stable, and connected.
A functional 2026 classroom software layer typically includes:
-
A presentation app (Google Slides, PowerPoint, Keynote, or the display's native app)
-
A whiteboard app (the display's built-in tool, Jamboard, Miro, or FigJam)
-
A student response tool (Kahoot, Nearpod, Pear Deck, Poll Everywhere, or Formative)
-
A content sharing/casting tool (built into the display, or a district-deployed solution)
-
An LMS integration (Google Classroom, Canvas, or Schoology — so work saved on the display can be posted to student feeds automatically)
The common mistake is assembling this list from free trials and individual teacher preferences, ending up with a different tool stack in every classroom in the building. When the technology is inconsistent across rooms, teachers who cover for colleagues or use shared spaces are constantly re-learning workflows. District standardization — even just on the display and whiteboard app — removes that overhead. For the practical guide to running these tools in daily lessons, see The Teacher's Guide to Digital Lesson Delivery.
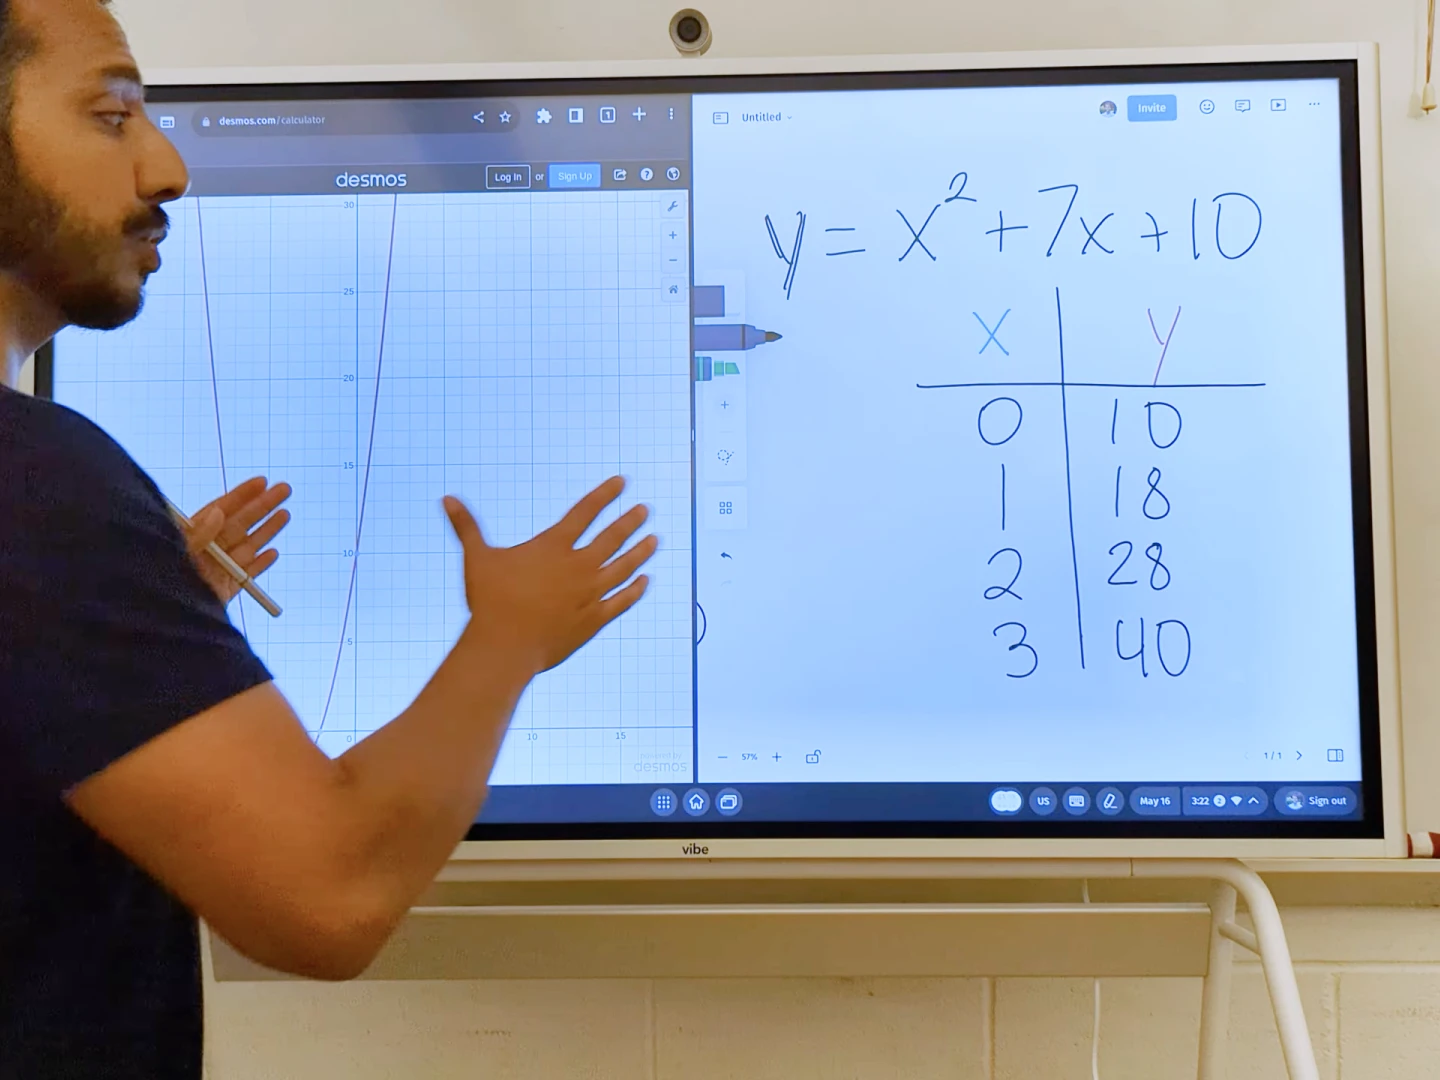 A math teacher is using whiteboard tools and online visualization platform to conduct teaching
Workflow Layer: How It Connects
The workflow layer is the sequence of steps a teacher follows to move through a lesson without stopping. Most technology implementations focus on hardware and software but skip workflow design — which is why teachers own good tools they do not use.
A sample Lesson Workflow for a connected classroom collaboration environment:
-
Before class: Open your lesson file on the display. Your slides, whiteboard templates, and student activity links are loaded. No connecting cables, no "searching for the projector."
-
Opening: Launch the lesson from the display. The first slide is already visible. Students see what you see.
-
Mid-lesson annotation: Tap the annotation tool directly on the slide. Write over the content without switching apps. Students see your annotations in real time.
-
Student response check: Launch a poll or Kahoot from the display. Students join on their devices. Results appear on screen in thirty seconds.
-
Student work share: Ask one student to cast their screen to the display. Annotate it with the class. Save the annotated version to Google Drive.
-
End of lesson: Save the full session (slides + annotations + student responses) to the class folder. Share a link via Google Classroom. Lock the display.
No cables disconnected. No whiteboard erased. No files emailed to yourself. Just teaching. For a step-by-step setup guide, see How to Use an Interactive Whiteboard in Your Classroom.
Real Classroom Examples
Scenario 1: The 8th Grade History Discussion That Kept Moving
Ms. Rodriguez teaches 8th grade history in a 38-student classroom in Phoenix. Before switching to an interactive display, her "primary sources" lessons followed a predictable pattern: she would project an image of a historical document, try to point at specific text with a laser pointer while standing near the projector, and then walk to the whiteboard to annotate key terms students identified. The walk between the projector and whiteboard took her back to the class, so she lost sight of students for fifteen to thirty seconds several times per lesson.
After her school deployed Vibe Boards as classroom hubs, her lesson flow changed. She opens the primary source document on the display. When students identify key terms, she circles them directly on the document with her finger while facing the class. When a student offers an interpretation she wants to push back on, she opens a split screen: document on one side, blank whiteboard on the other. She writes the competing interpretations side by side without losing the document. At the end of the lesson, she saves the annotated document and the whiteboard notes as a single file that goes directly to Google Classroom.
Scenario 2: The 5th Grade Math Class That Actually Collaborated
Mr. Chen teaches 5th grade math in a suburban district in Ohio. He had tried using Google Slides for collaborative problem-solving activities but found that the setup time — getting 28 students to the right slide in the right shared document without one student accidentally deleting another's work — consumed the first eight minutes of a twenty-minute activity window.
He restructured the activity around the interactive display. He projects the shared Miro board on the Vibe Board. Students have individual sections assigned by the display's color-coded zones. He can see all student work on the main screen while circulating. When a student makes an interesting error, he zooms into that section, uses annotation to highlight the error, and asks the class to diagnose it — without the student feeling singled out, because the annotation doesn't show the student's name. The activity now launches in ninety seconds. Mr. Chen uses the saved session to review which students struggled and adjusts the next lesson accordingly.
Getting Started: Building Your Classroom Collaboration Environment
Building a connected classroom environment does not require replacing everything at once. Start with the hardware hub — the interactive display — because everything else can be layered on top. Once you have a capable display, the software and workflow layers are largely software-defined and can be adjusted without a budget cycle.
Step 1: Audit your current tool fragmentation. List every device and app you currently use during a lesson and draw the transition points. How many times do you switch contexts per lesson? How many of those switches are visible interruptions to students? This audit is your baseline.
Step 2: Identify your highest-friction transition. For most teachers, it is one of three: projector-to-whiteboard, sharing student work, or saving lesson notes. The interactive display solves all three, but identifying your specific pain point helps you build the business case for your administration.
Step 3: Pilot with one unit. Most vendors — including Vibe — offer classroom pilot programs. Request one display for your room. Use it for two months. Track your setup time before and after each lesson. Track student participation rates during activities. These data points become your proposal when you advocate for full classroom deployment.
Step 4: Establish a consistent software stack. Work with your instructional technology coordinator to settle on two or three apps that every teacher in the building will use. Consistency removes the learning curve for students and enables teachers to share lesson files across classrooms.
Step 5: Design your lesson workflow template. Once you have the hardware and software, document your standard lesson flow. This template becomes your autopilot: you follow it until it feels as natural as writing on a whiteboard used to.
For pricing and procurement information to share with your administration, see the Smart Board Pricing Guide for Schools (2026). For a detailed comparison of which interactive display fits your specific teaching style, see Best Interactive Whiteboards for Teachers in 2026.
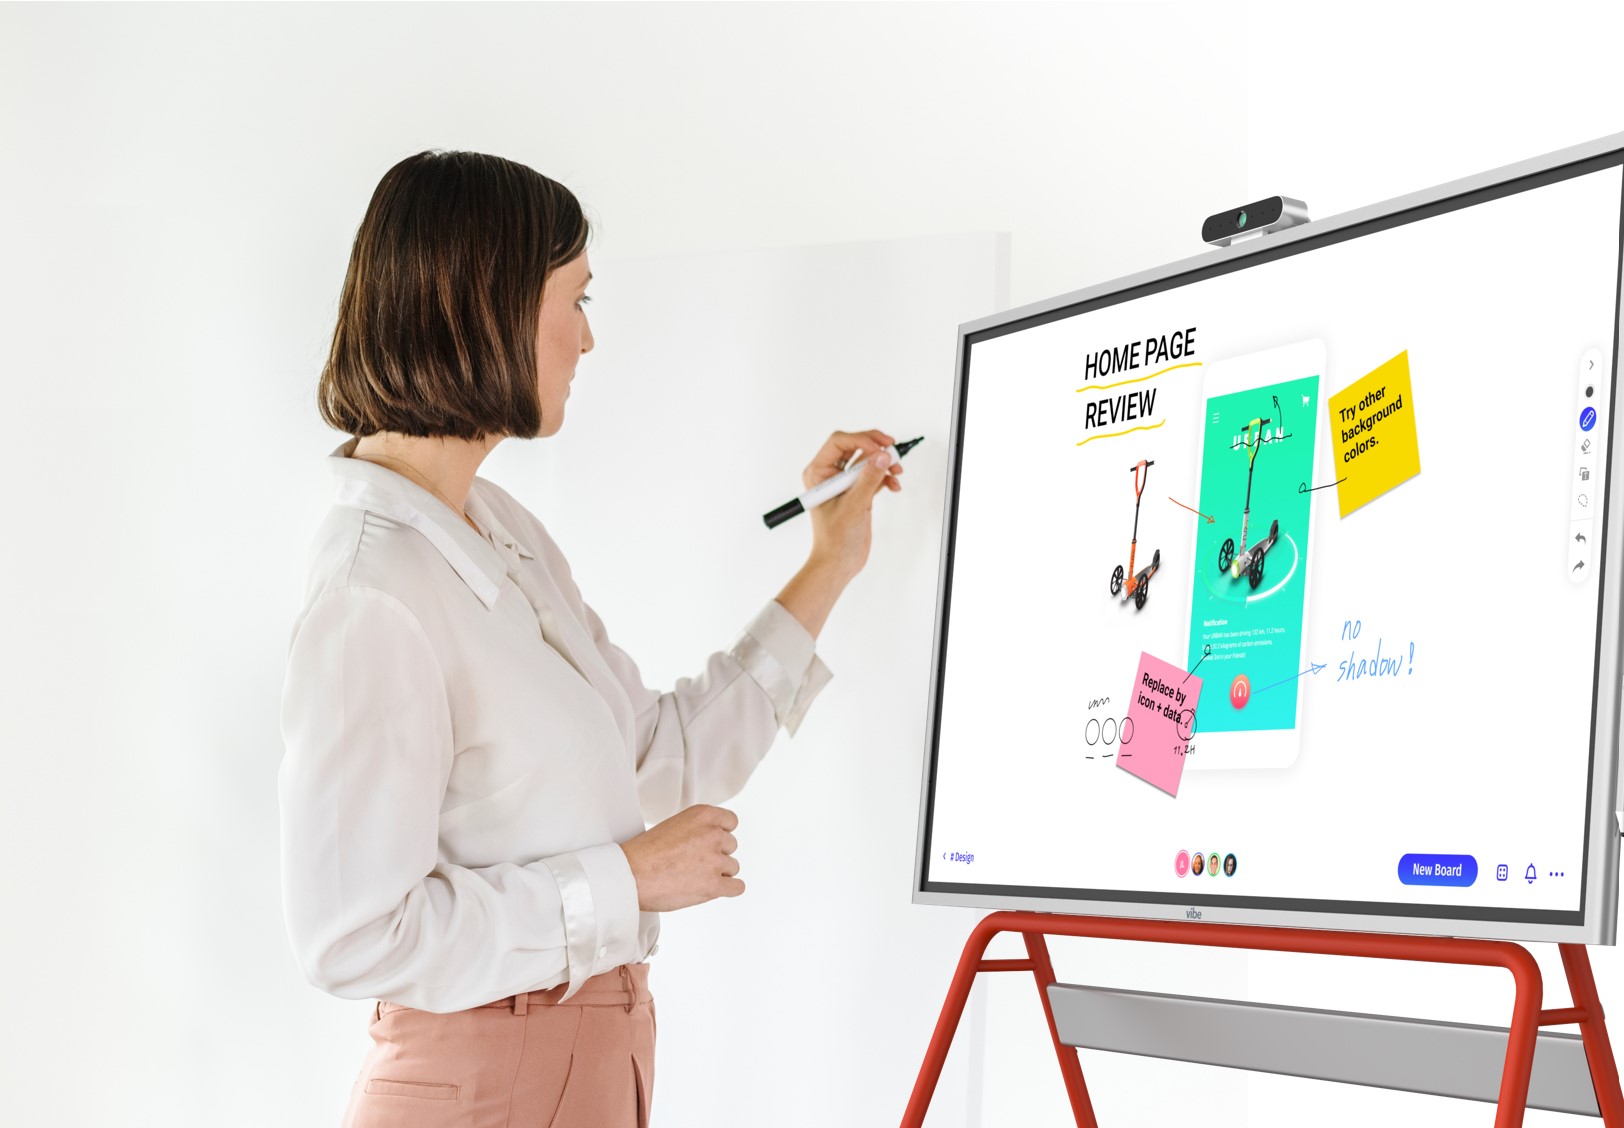
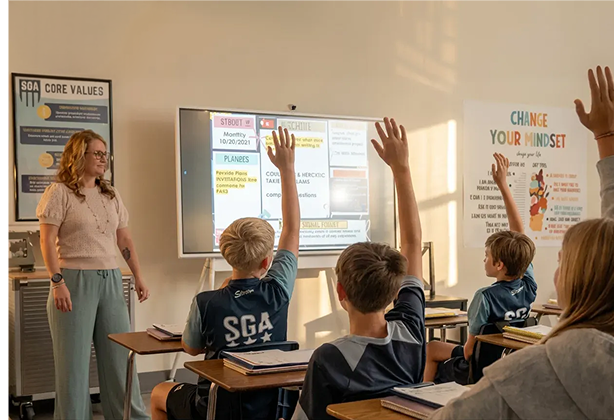
 Vibe Board interactive display used in classroom for collaborative student learning activities
FAQs
Q: What is a classroom collaboration tool?
A classroom collaboration tool is any software or hardware that helps teachers and students work together on shared content during a lesson. The category includes interactive displays, student response systems, digital whiteboards, screen mirroring tools, and collaborative platforms like Google Slides or Miro. The defining characteristic of an effective classroom collaboration tool is integration: it should connect to the other tools in the classroom rather than operating in isolation. A student polling app that shows results on the main display is a collaboration tool; one that shows results only on the teacher's phone is just another app to manage.
Q: What is the difference between collaborative learning tools and classroom management tools?
Collaborative learning tools are designed to create shared educational experiences — students and teachers working on content together in real time. Examples include interactive whiteboards, shared digital canvases, and student response systems. Classroom management tools are designed to guide student device activity — locking screens to one app, monitoring what students are viewing, or pushing content to every device in the room. The two categories serve different purposes and work best when used together: management tools set the conditions for focused work, and collaboration tools provide the shared workspace where that work happens.
Q: Do students need their own devices for classroom collaboration to work?
Not necessarily. Some collaboration tools — particularly interactive displays with multi-touch capability — allow multiple students to work directly at the front of the room without personal devices. Others, like student response systems and digital collaboration platforms, work better when each student has a device. Many schools use a hybrid model: students share classroom devices (tablets or Chromebooks) for activities that require them, and the interactive display serves as the hub for whole-class instruction. The classroom collaboration environment can be designed around whatever device availability exists, as long as the display at the front of the room is capable enough to anchor it.
Q: What is the best interactive whiteboard for classroom collaboration in 2026?
The best interactive whiteboard for a classroom depends on three teacher-specific criteria: whether it supports wireless casting from student devices, whether it has built-in whiteboard software that saves automatically, and whether it runs apps natively (so teachers do not need a connected laptop for every lesson). Leading options in 2026 include the Vibe Board (full Android environment, cloud-save whiteboard, wireless casting), SMART Board series (strong software ecosystem, good LMS integration), and Promethean ActivPanel (known for multi-touch responsiveness and teacher-friendly interface). For a full comparison, see Best Interactive Whiteboards for Teachers in 2026.
Q: How much do classroom collaboration tools cost?
Costs vary widely by category. Student response software (Kahoot, Nearpod, Pear Deck) ranges from free to $1,500/year for school licenses. Digital collaboration platforms (Google Workspace for Education, Microsoft 365 Education) are free for most K-12 schools. Screen mirroring tools are typically included with the display hardware. The largest investment is the interactive display itself, which ranges from approximately $1,500 for entry-level 65″ panels to $6,000+ for premium 86″ displays with full software ecosystems. For detailed pricing by brand and size, see Smart Board Pricing Guide for Schools (2026).
Q: Can classroom collaboration tools work for hybrid or remote teaching?
Yes, and this has become a standard requirement after 2020. Interactive displays with built-in cameras and microphones — or connected to external webcams and a video conferencing app — allow teachers to share their screen in real time with students joining remotely. Students participating in person can interact at the display; remote students can see the same content and participate through the collaboration software on their devices. The key requirement is that the display's built-in apps include video conferencing (Zoom, Google Meet, or Microsoft Teams) without requiring a separate laptop to run the call.
Q: How do classroom collaboration tools improve student engagement?
Student engagement improves when students participate actively rather than passively observing. Collaboration tools create participation opportunities that passive instruction cannot: every student can respond to a question simultaneously via a response system (not just the one student called on), students can annotate shared content directly, and student work can be shared with the class without embarrassment or delay. According to RAND Corporation research on active learning, participation-based instruction correlates with measurable gains in knowledge retention compared to lecture-only formats. The tools do not cause engagement — but they create the conditions where engagement is possible at scale in a thirty-student classroom.
Q: What is the difference between an interactive whiteboard and a digital whiteboard?
An interactive whiteboard is the hardware device — a large touch-sensitive screen at the front of the classroom. A digital whiteboard is a software application that replicates the function of a physical whiteboard on a screen: teachers and students can draw, write, and annotate. Many interactive whiteboards include digital whiteboard software built in. The distinction matters because some digital whiteboard apps (like Google Jamboard, Miro, or the Vibe Whiteboard) can run on any device — a laptop, a tablet, or the interactive display itself — allowing students to contribute from their seats rather than only from the front of the room.
Q: How do I get my school to invest in classroom collaboration tools?
The most effective approach is to start with a specific, measurable problem rather than a tool request. Document the instruction time lost to technology transitions in your current setup. Calculate how many minutes per week those transitions cost, and multiply by the number of classes you teach and the number of teachers in your building. Present the data to your principal as an instruction time problem with a known solution. Attach a vendor quote and a pilot request — most display vendors offer 30-day classroom pilots. If you can show a reduction in transition time and an increase in student participation during the pilot, the budget conversation shifts from "can we afford it" to "can we afford not to."